USER GUIDE
 Overview
Step 1:
Connect WordPress to Facebook App
Choose where you want to go live (page / group / personal timeline)
Step 2:
Create video content, get this video link and paste in OBS
Get Stream Key from Facebook and paste in OBS
Step 3:
Start streaming with OBS
Go live on Facebook
Walk-through
Step 1: Configure initial settings
- Open Dev Facebook App
- Paste App ID & App Secret from Facebook App dashboard

- Click Connect to Facebook. A Facebook pop-up will show. (If it doesn’t show, you need to turn off pop-up block.)
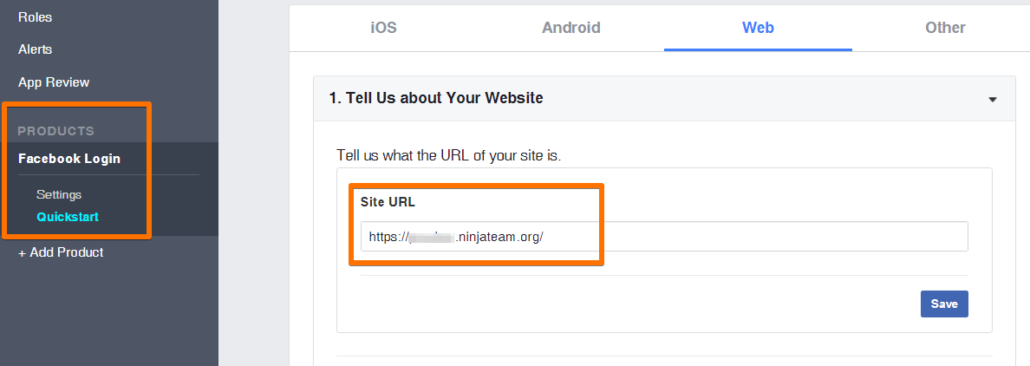
- Make sure to apply your website domain to Facebook App.
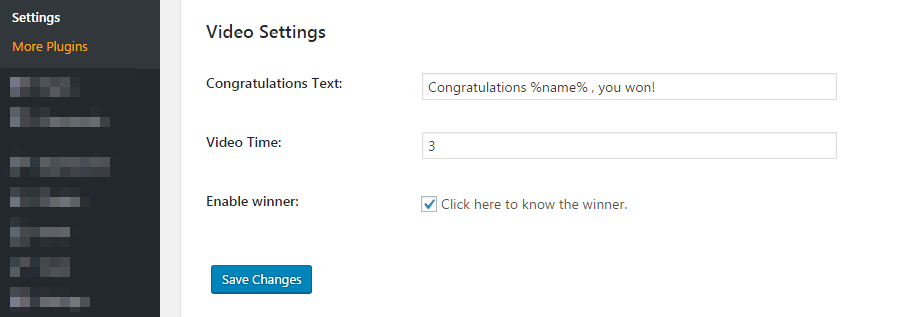
- Set Congrats text & video duration (minutes)
Step 2: Create video content
- Continue to connect to Facebook and choose where you want to go live.
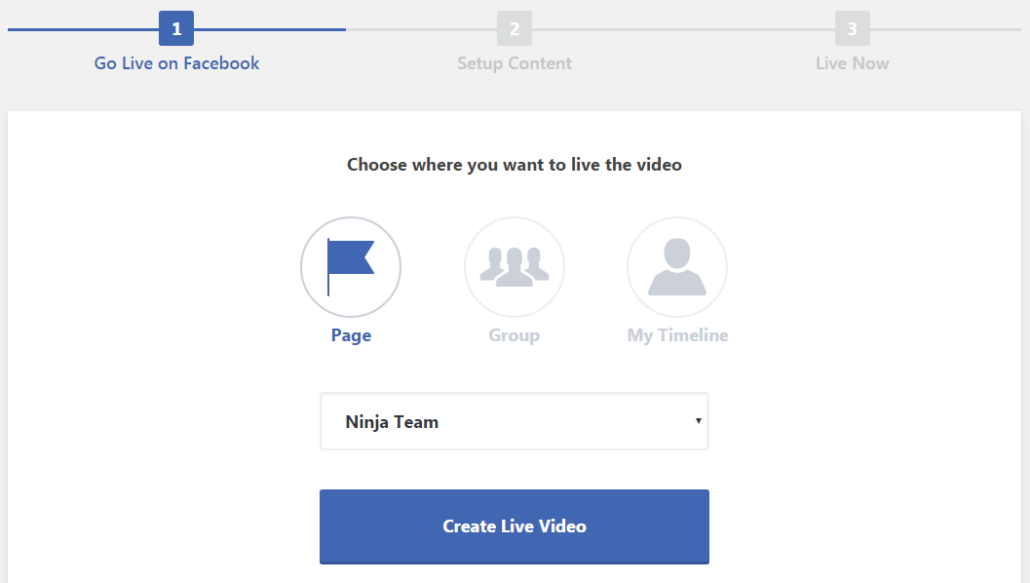
- In Game Settings, set video background, question & images. Save Changes.
- Copy Video content link and paste at OBS > BrowseSource > URL
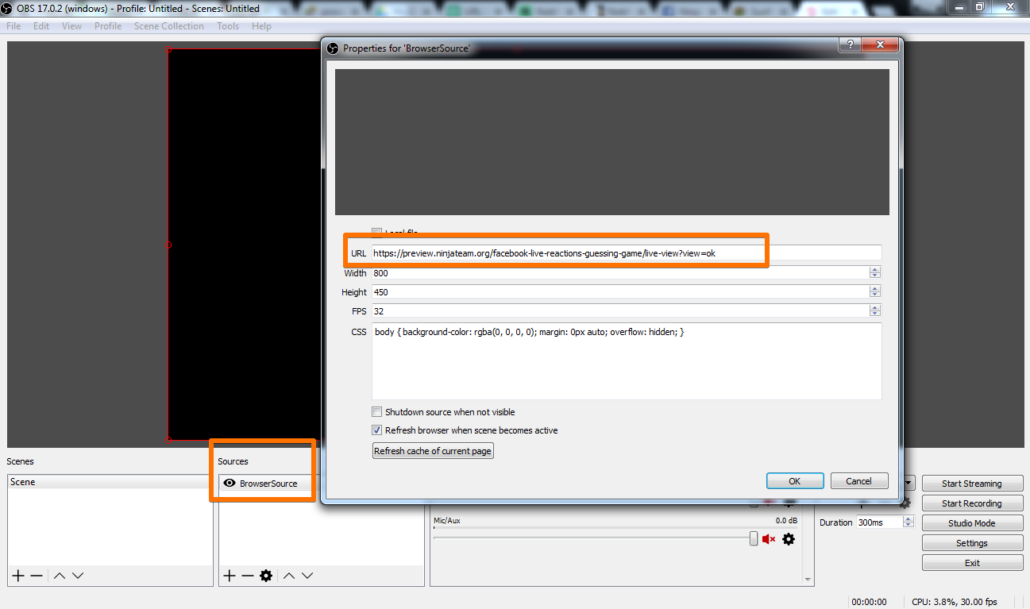
- What you see on OBS preview screen is how your live video looks on Facebook.
- Copy the Stream Key from Facebook pop-up.
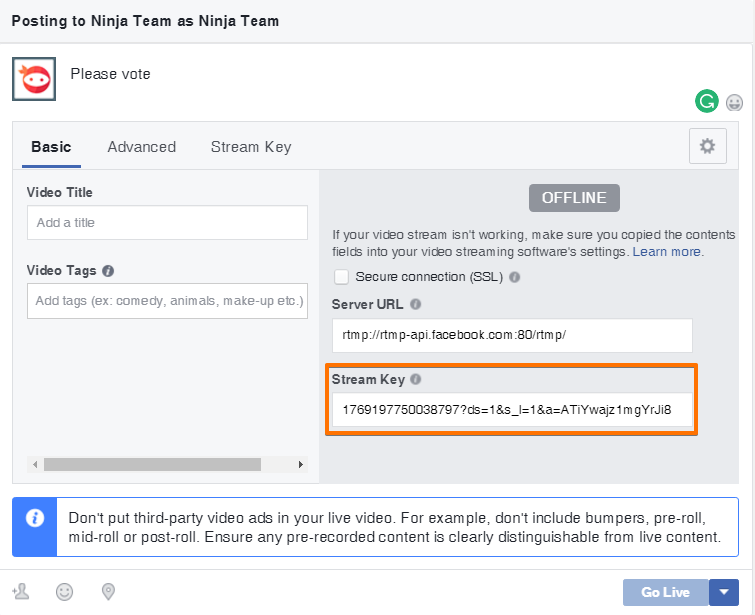
- Paste Stream key in OBS.
- Make sure your Stream Service is Facebook Live.
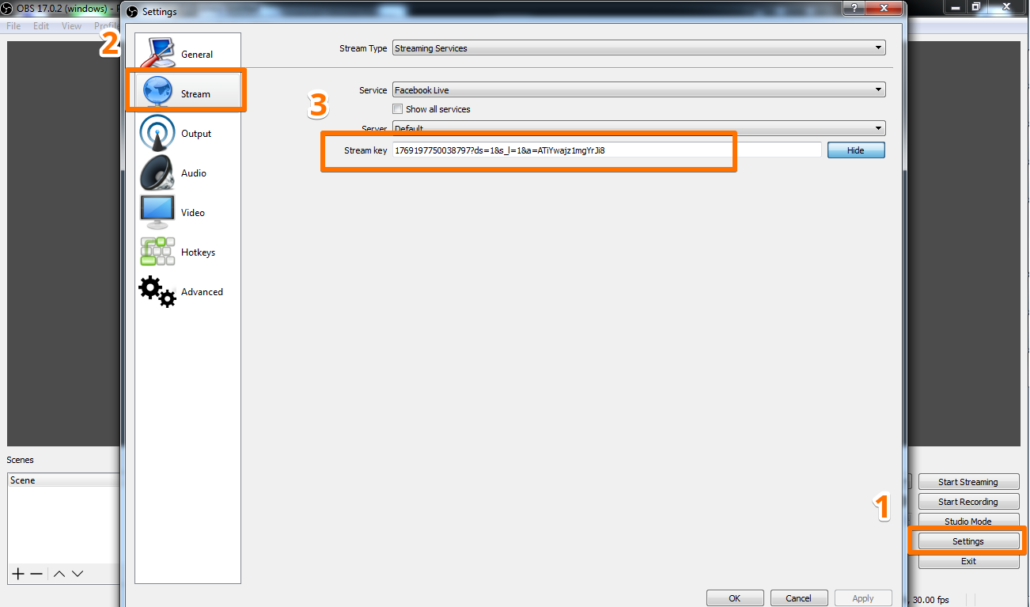
Step 3: Go live
- This is what the Facebook window looks like after you set URL & Stream Key successfully in OBS:
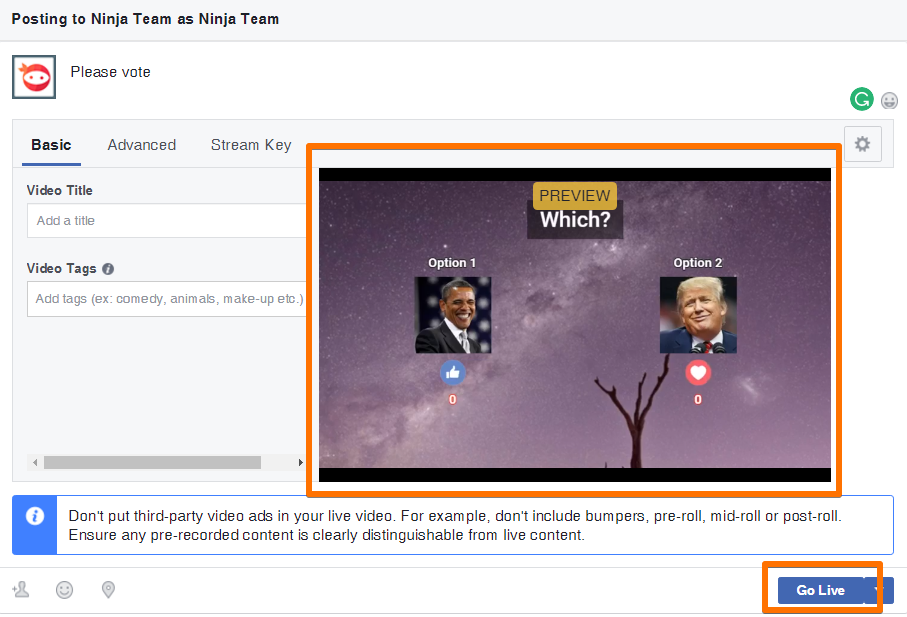
- Write your post, video title & tags.
- Click Start Streaming in OBS Studio and Go Live.
You’re now live, refresh your Facebook page to enjoy the game!
Note:
- After the video duration is over (i.e, after 3 minutes), the live stream video ends. In OBS and Facebook live video screen, you will see the result “Congratulations, *name*. You won!”
- You only need to setup Step 1 once. All information will be saved for next campaigns.
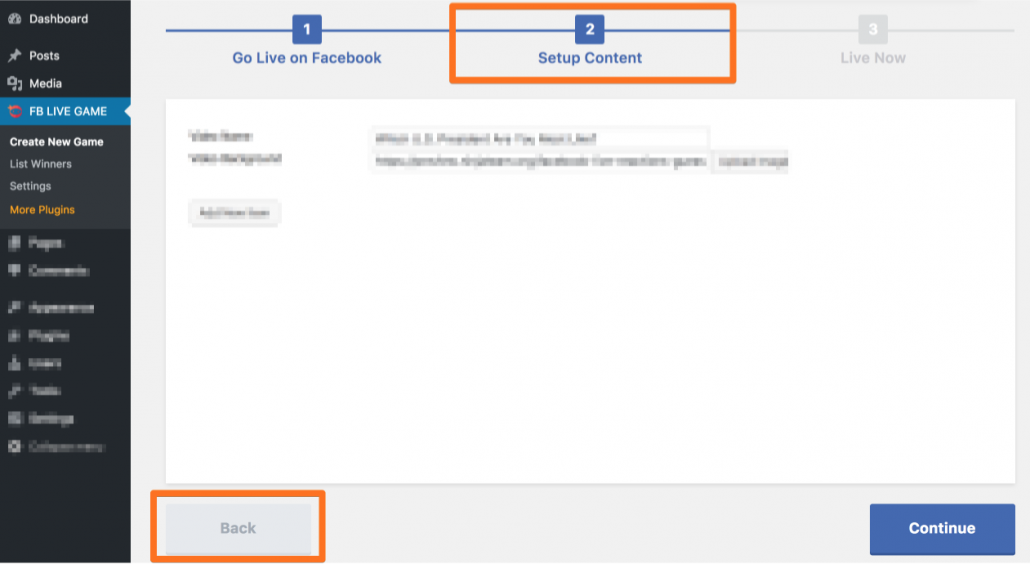
- ‘Where you want to go live’ will also be saved. If you want to change the ‘Live’ location, please click Back in Step 2:

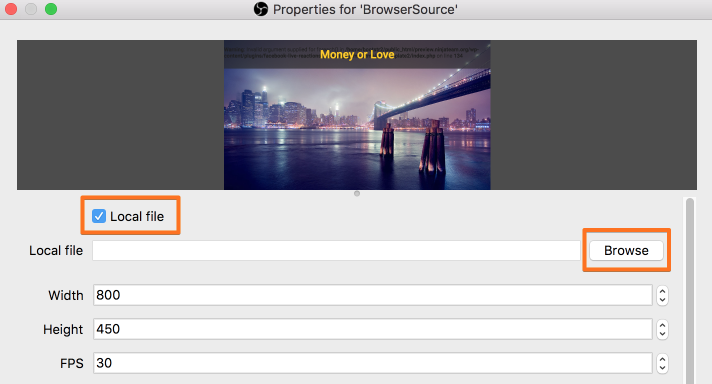
- The above walk-through applies from version 1.5. For earlier versions, instead of pasting the video link, you will have to save the content file (.html) to your computer and then browse the file from OBS:
