How to Set Up SMTP for WordPress Multisite the Easy Way (Using YaySMTP)
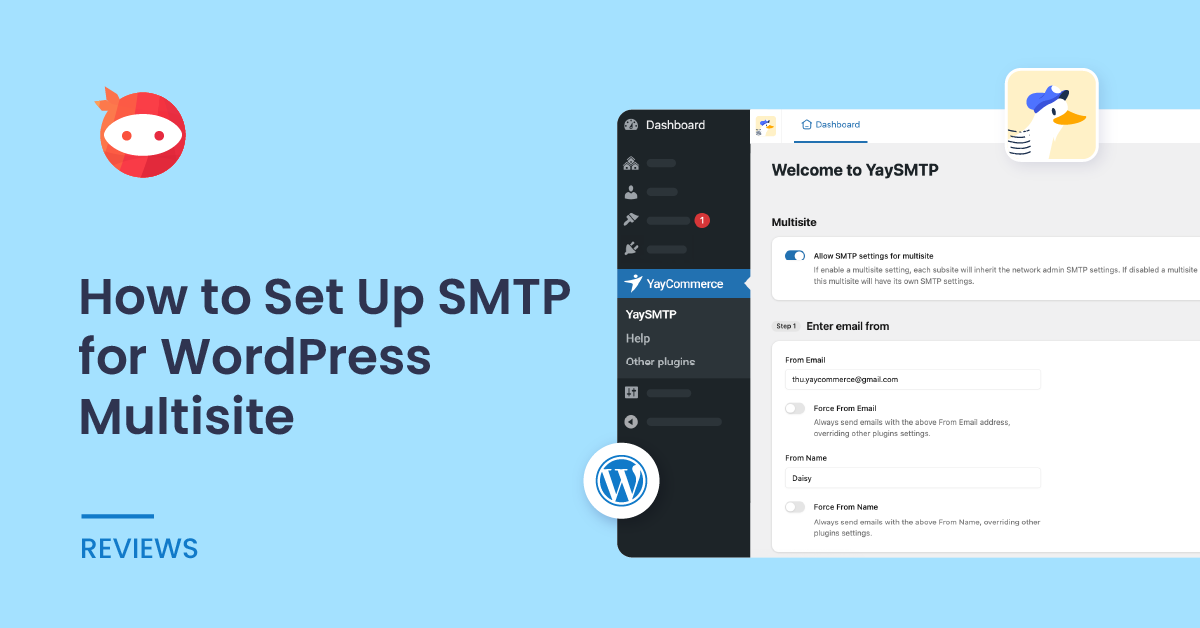
Running a WordPress multisite network can be powerful – but when it comes to email delivery, things can quickly get complicated. If you’ve ever experienced emails not being sent, landing in spam, or simply disappearing without any trace… you’re not...