Step 1: Go to the Facebook Developers page at https://developers.facebook.com/
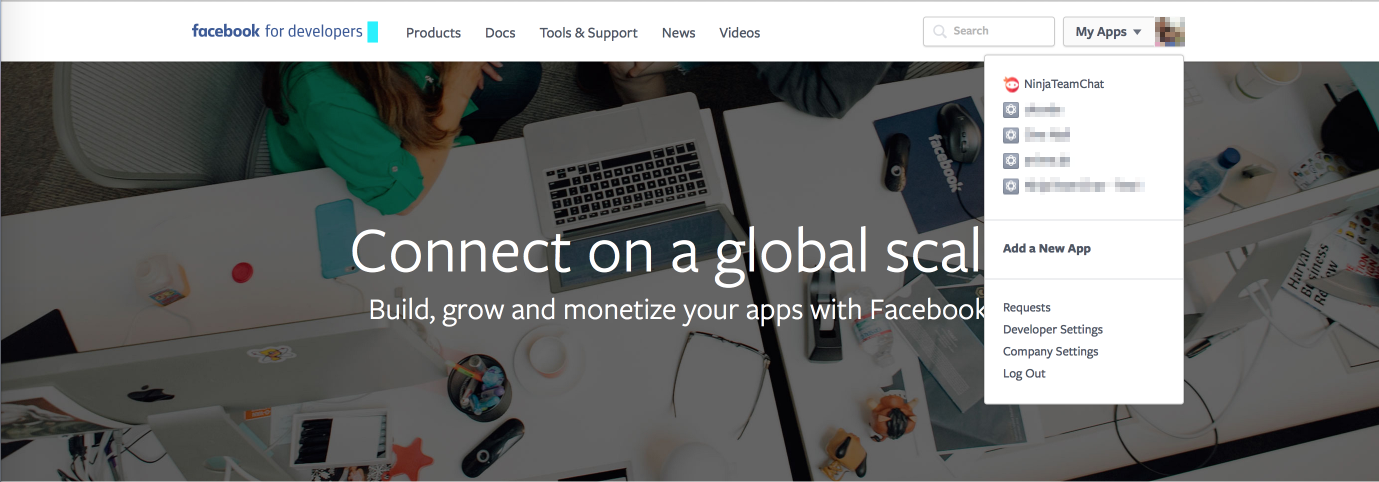
Step 2: On the page’s top-right corner, choose an existing app, or create a new one:
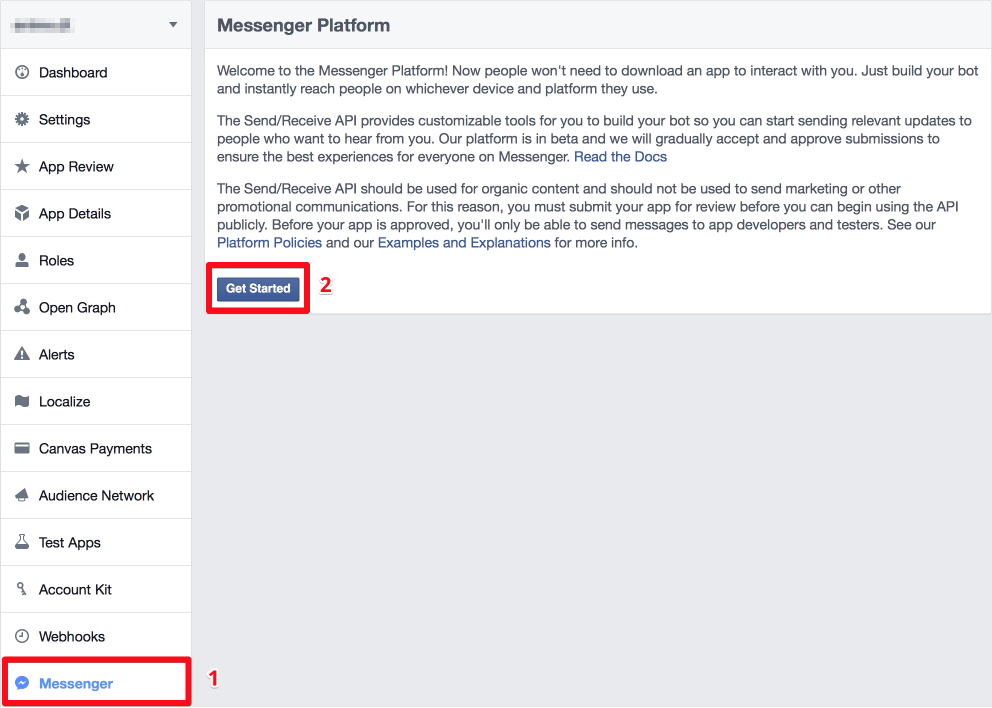
Step 3: After choosing (or creating) an app: on the left navigation, click “Messenger”, then on the right, hit the “Get Started” button.
Step 4: Setting up Token
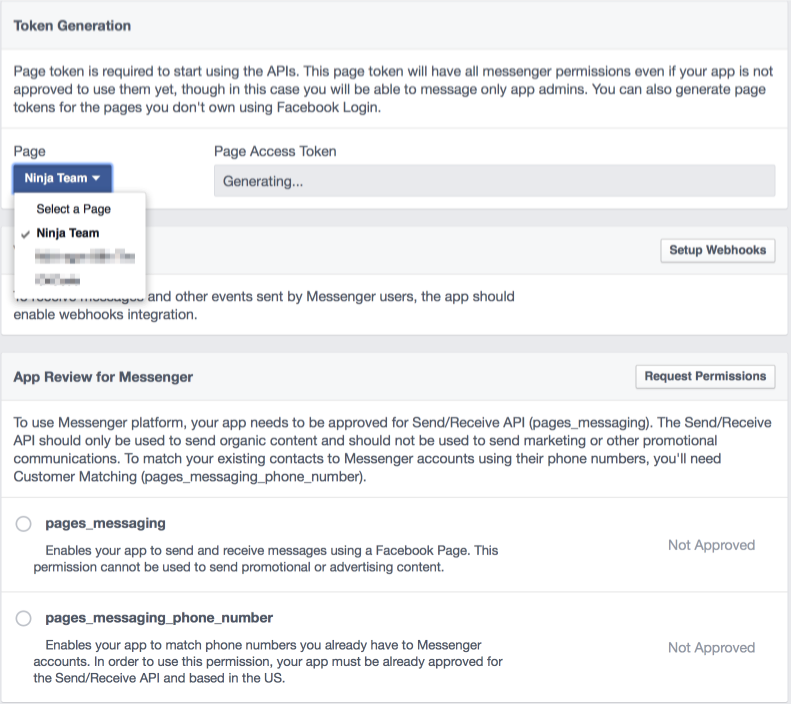
4.1: Select the page that you want to use in BOT
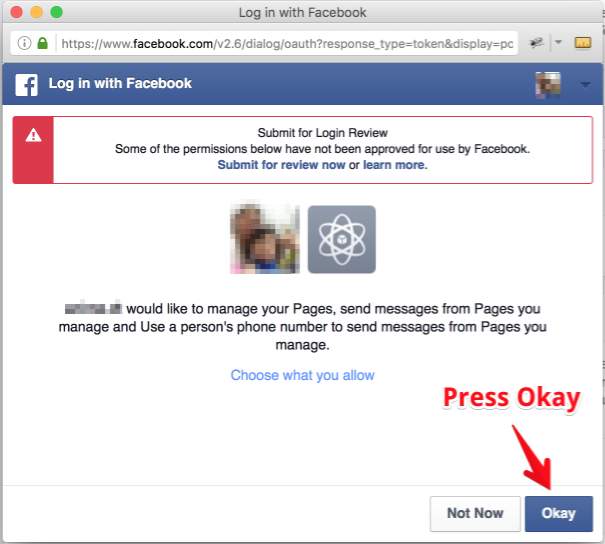
4.2: Maybe you’ll be asked for permissions, just Okay
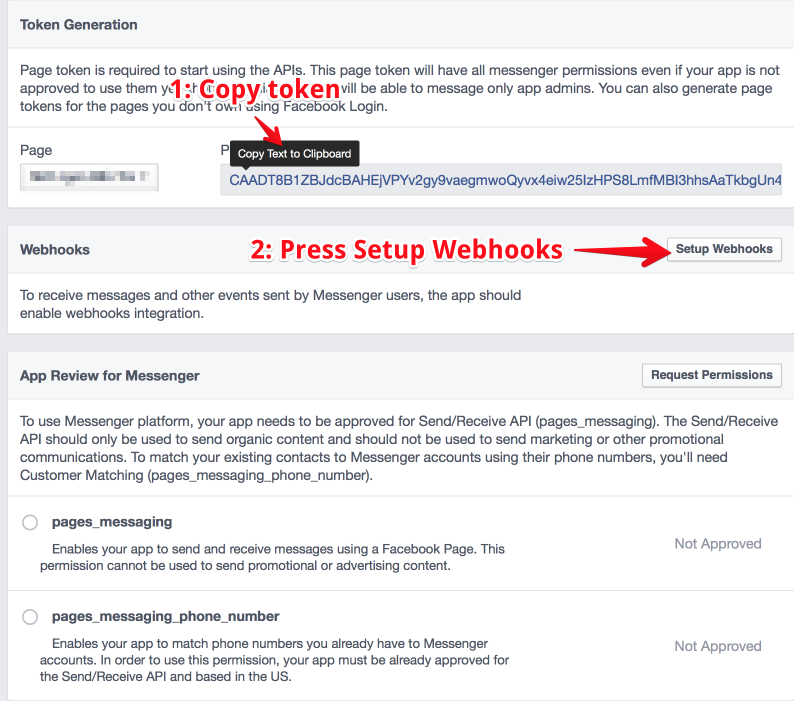
4.3: Then, you must copy the token generated on the page, and click “Setup Webhooks” button.
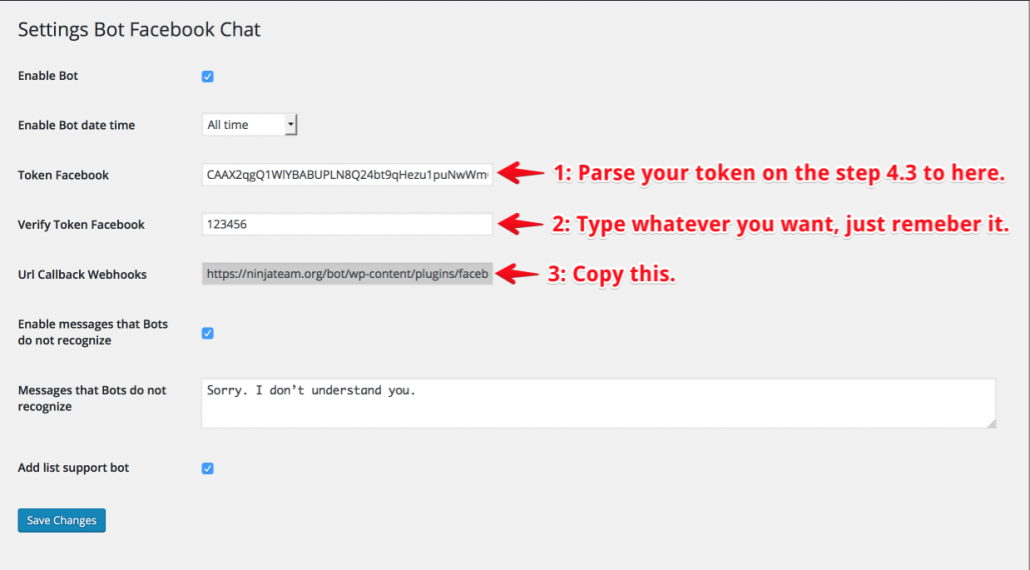
4.4: On your web browser, open a new tab or new window, go to your WordPress site’s backend, and go to the Settings > Facebook Bot Settings page.
- Parse to the “Token Facebook” field the token you’ve copied in step 4.3.
- On the “Verify Token Facebook” field, type whatever you want, for example: I type 123456.
- Copy the URL on the “Url callback webhooks” field.
- Finally, press “Save Changes” button.
4.5: Go back to the Facebook website
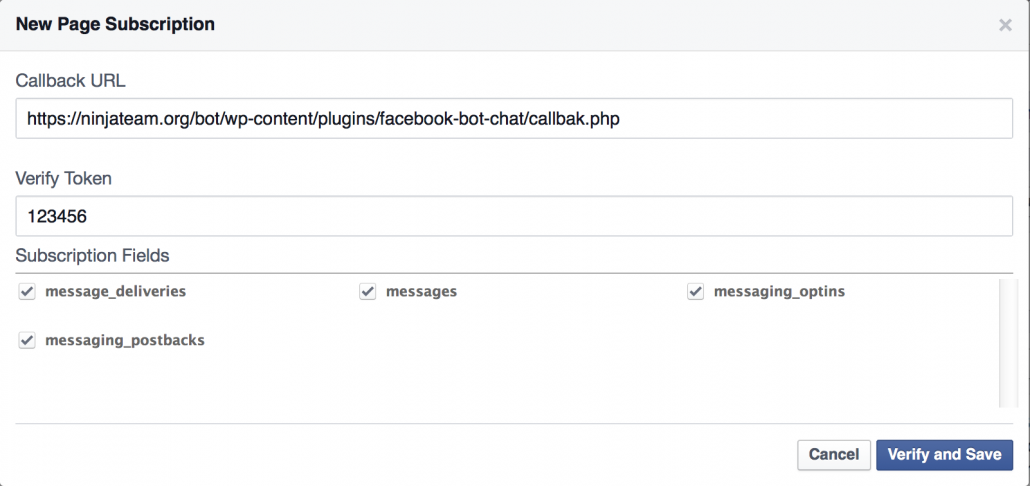
- Parse the URL that you’ve just copied from step 4.4 to “Callback URL” field.
- Do you remember the token I said you have to remember on step 4.4? Parse it to “Verify Token” field.
- On the “Subscription Fields” block, check all checkbox fields.
- Finally, click “Verify and Save” button.
The result:
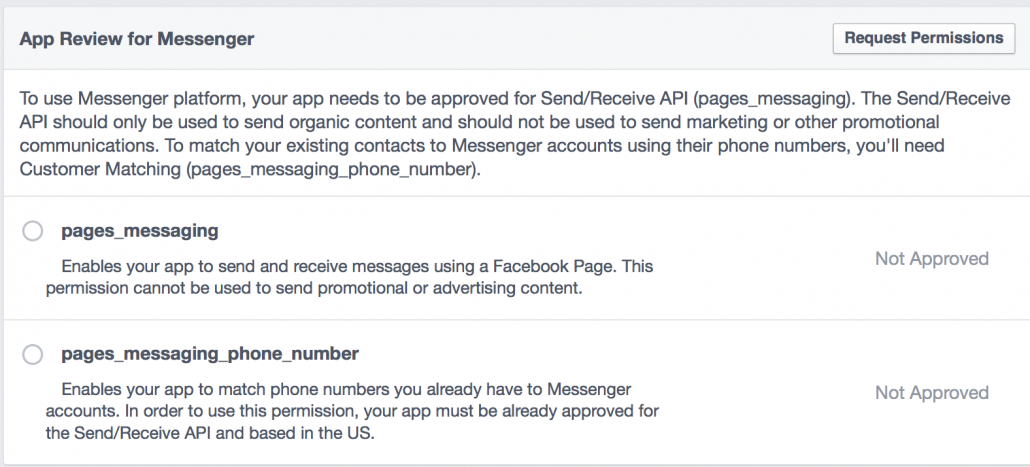
Step 5: Request Permissions
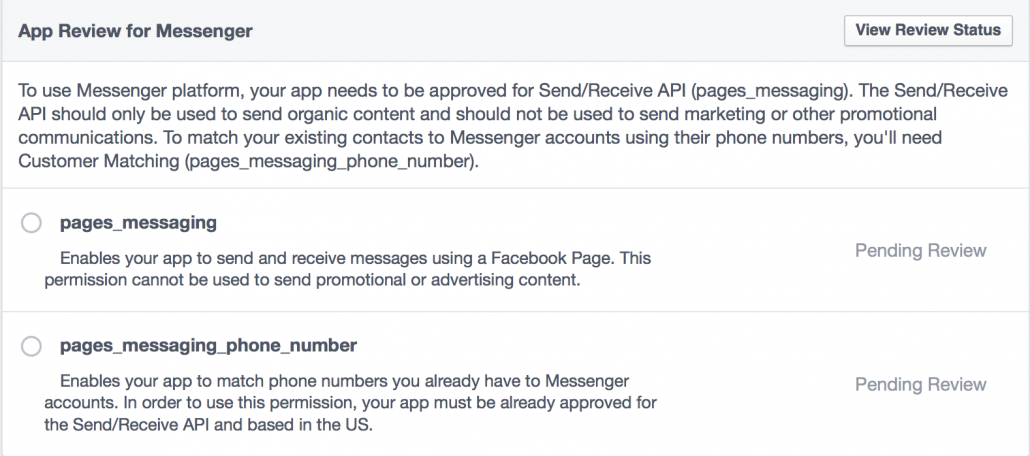
You have to send a request to facebook, and wait for approving (it will take some days or more). If not, your BOT will work only with admin accounts.
Click “Request Permissions” button
When you complete all fields required to submit your review, the result will be like this:
If your app approved, your facebook bots will be able to send messages to everyone.
