
Do you want to apply a discount to the cheapest cart item in WooCommerce? If you are looking for a step-by-step tutorial, keep reading this article.
Studies show that offering free shipping or discounts on the purchase will help you sell more stuff. While handling an online store, you need to develop strategies like this to boost the conversion rate.
Some proven methods to increase conversion rates are upselling, offering category discounts, etc. But recently, people discovered that offering discounts to the cheapest cart item is another great thing you can do.
By default, WooCommerce doesn’t come with this feature. But with some modifications, we can achieve it. If you are looking for a step-by-step guide, keep reading this article. Here, we will show you how to complete the task without hassle.
Let’s see how to apply a discount to the cheapest cart item in WooCommerce without any further ado.
How to Apply Discount to Cheapest Cart Item in WooCommerce
If you need a simple solution, use this method. You can complete the task with some code without any extra plugins.
We recommend pasting the code to a child theme’s functions.php file or on a site-specific plugin like Code Snippets.
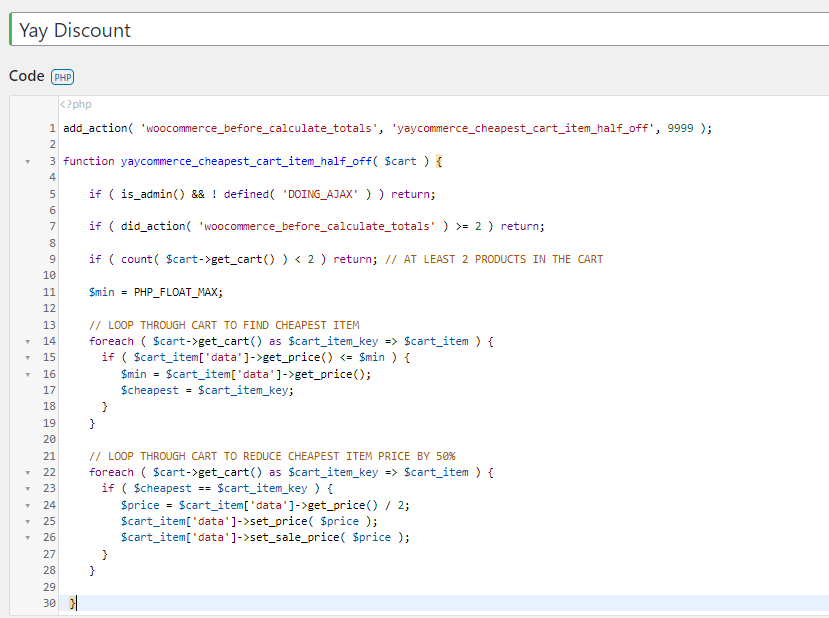
Scenario 1. 50% Discount on the Cheapest Product
If you need to give the customer a flat 50% discount on the cheapest product in the cart, we have you covered.
The code you are going to use is:
add_action( 'woocommerce_before_calculate_totals', 'yaycommerce_cheapest_cart_item_half_off', 9999 );


function yaycommerce_cheapest_cart_item_half_off( $cart ) {


    if ( is_admin() && ! defined( 'DOING_AJAX' ) ) return;


    if ( did_action( 'woocommerce_before_calculate_totals' ) >= 2 ) return;


    if ( count( $cart->get_cart() ) < 2 ) return; // AT LEAST 2 PRODUCTS IN THE CART


    $min = PHP_FLOAT_MAX;


    // LOOP THROUGH THE CART TO FIND THE CHEAPEST ITEM

    foreach ( $cart->get_cart() as $cart_item_key => $cart_item ) {

      if ( $cart_item['data']->get_price() <= $min ) {

         $min = $cart_item['data']->get_price();

         $cheapest = $cart_item_key;

      }

    }


    // LOOP THROUGH CART TO REDUCE CHEAPEST ITEM PRICE BY 50%

    foreach ( $cart->get_cart() as $cart_item_key => $cart_item ) {

      if ( $cheapest == $cart_item_key ) {

         $price = $cart_item['data']->get_price() / 2;

         $cart_item['data']->set_price( $price );

         $cart_item['data']->set_sale_price( $price );

      }

    }


 }
In this case, we will paste the code in the Code Snippets plugin.
Once you have added the code, save the snippet. Now, add a product to your cart.
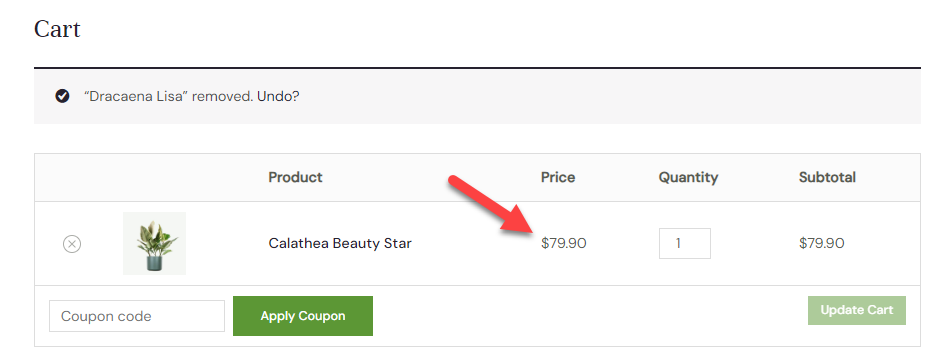
According to our customization, we need to add two or more products to the cart to get the discount. So, add one or more products to the cart.
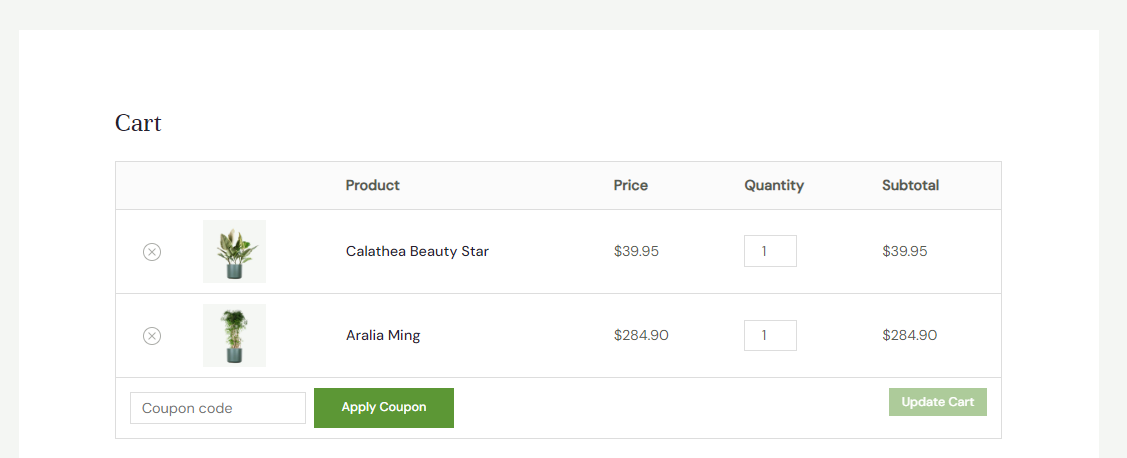
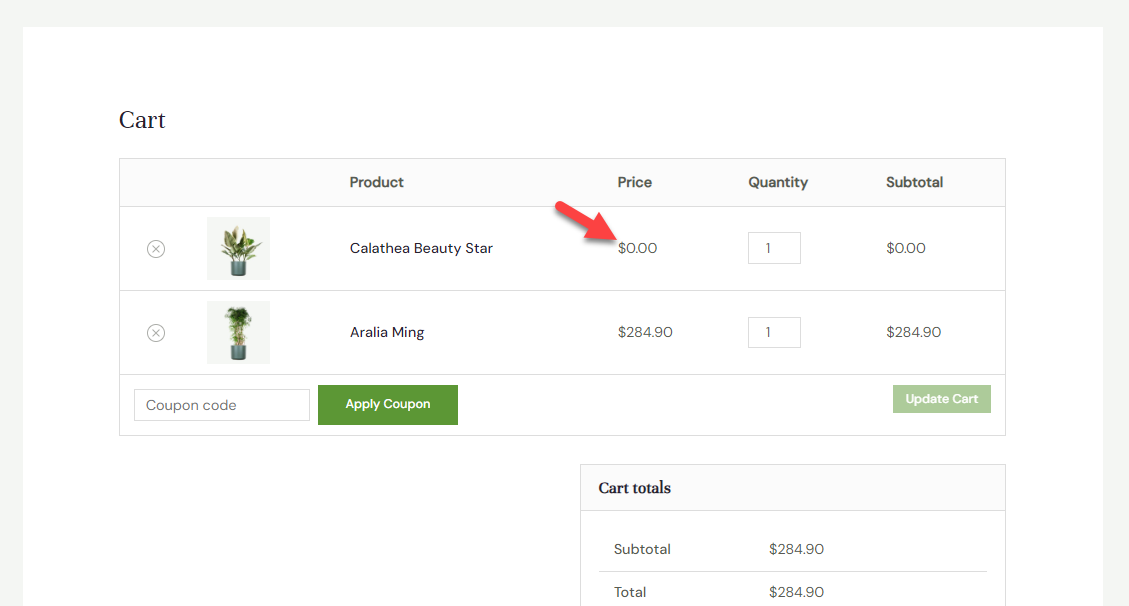
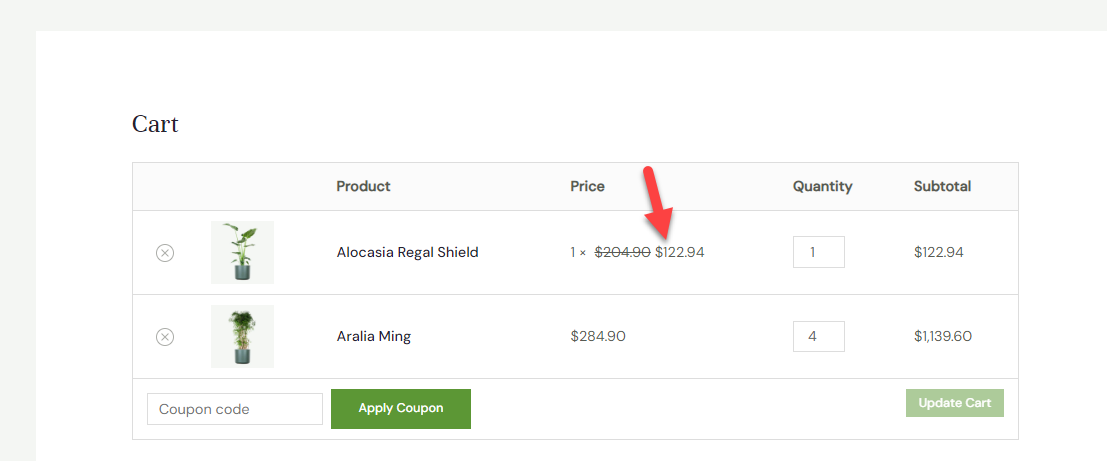
You can see that a 50% discount was applied to the cheapest item.
Scenario 2. Get the Cheapest Product for Free
Sometimes, you need to give the cheapest item for free. Here’s the snippet for that:
add_action( 'woocommerce_before_calculate_totals', 'yaycommerce_cheapest_cart_item_half_off', 9999 );


function yaycommerce_cheapest_cart_item_half_off( $cart ) {


    if ( is_admin() && ! defined( 'DOING_AJAX' ) ) return;


    if ( did_action( 'woocommerce_before_calculate_totals' ) >= 2 ) return;


    if ( count( $cart->get_cart() ) < 2 ) return; // AT LEAST 2 PRODUCTS IN THE CART

    $min = PHP_FLOAT_MAX;


    // LOOP THROUGH THE CART TO FIND THE CHEAPEST ITEM

    foreach ( $cart->get_cart() as $cart_item_key => $cart_item ) {

      if ( $cart_item['data']->get_price() <= $min ) {

         $min = $cart_item['data']->get_price();

         $cheapest = $cart_item_key;

      }

    }

    // GIVE CHEAPEST ITEM FOR FREE

    foreach ( $cart->get_cart() as $cart_item_key => $cart_item ) {

      if ( $cheapest == $cart_item_key ) {

         $price = $cart_item['data']->get_price() / 20000;

         $cart_item['data']->set_price( $price );

         $cart_item['data']->set_sale_price( $price );

      }

    }


 }
You can paste the code in the Code Snippets plugin. Once you have done that, check your cart.
As you can see in the screenshot, the price of the cheapest item we have in the cart is $0.
That’s it!
NOTE: We recommend generating a complete website backup if you paste this code on the functions.php file. You can restore the site to its previous state if there are any issues.
Bonus: How to Use Discounts for Specific Products
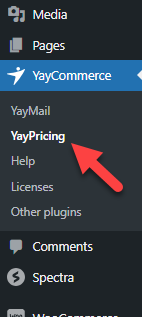
We will use the YayPricing plugin for this task. The first thing you need to do is go to the YayPricing settings.
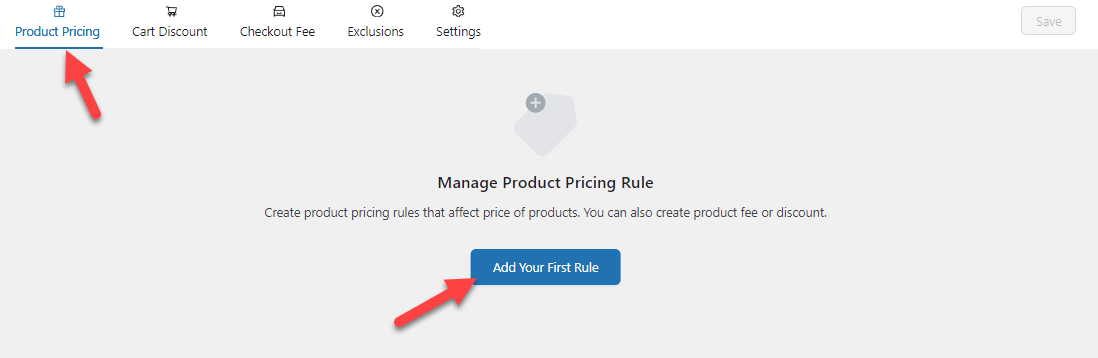
If you use the plugin for the first time, you won’t see any campaigns running. Now, create your first rule under product pricing.
1. Creating a Campaign
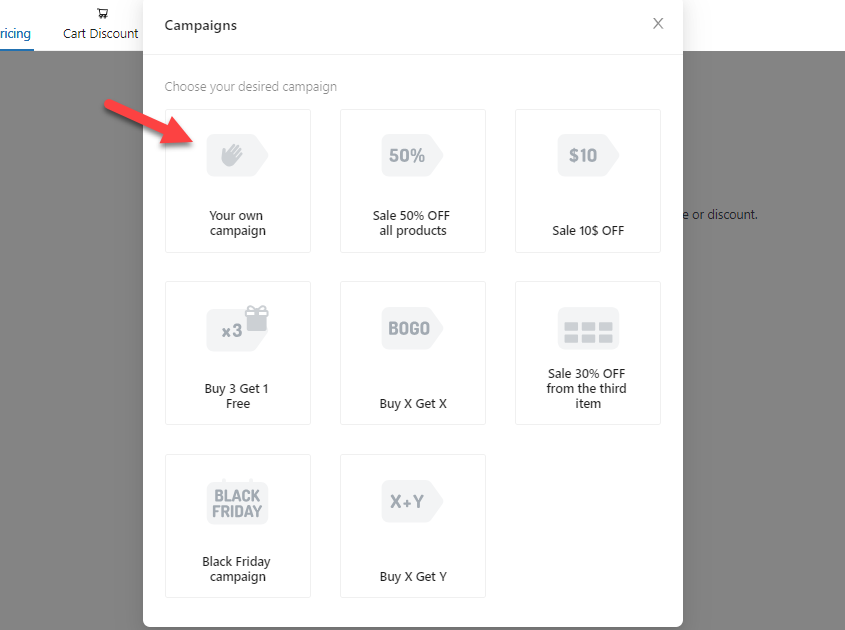
You will see several pre-made campaigns now. Choose the option where it says create your campaign.
The customization options available are easy. The first thing you need to do is choose a name and type for your rule.
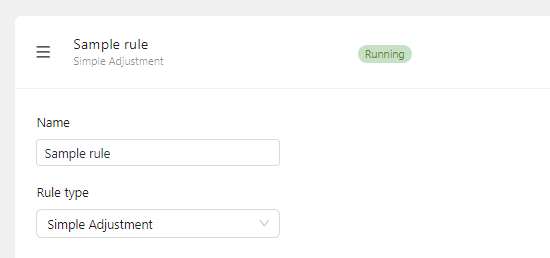
The name won’t be visible on the front end of the website. It is just for identifying the different rules. As the type, you can choose Simple Adjustment.
2. Customizing the Campaign
Now, let’s move to the central part of the configuration – adding a discount to the cheapest product in the cart. To do this, move to the pricing settings.
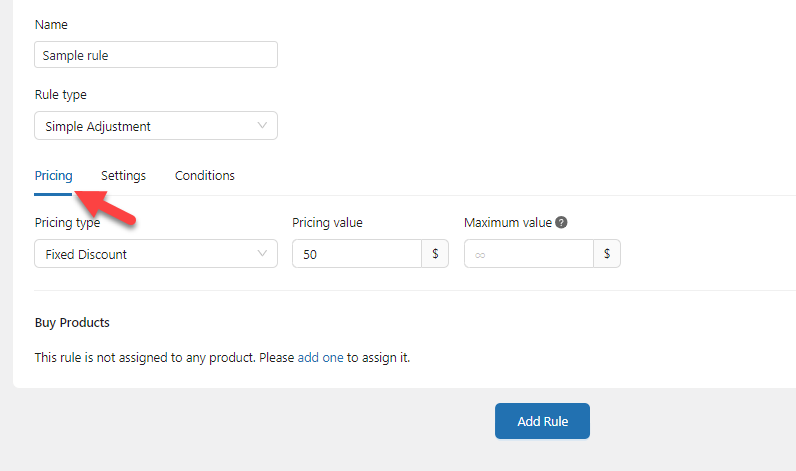
You can see multiple pricing types, such as:
- Fixed Discount
- Percentage Discount
- Flat Price
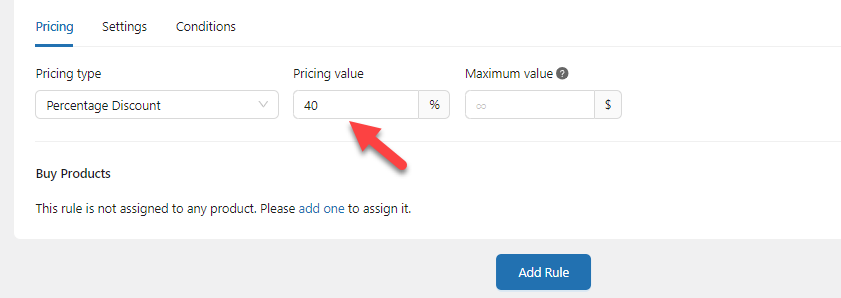
In this case, we will choose a percentage discount and enter 40% as the total discount.
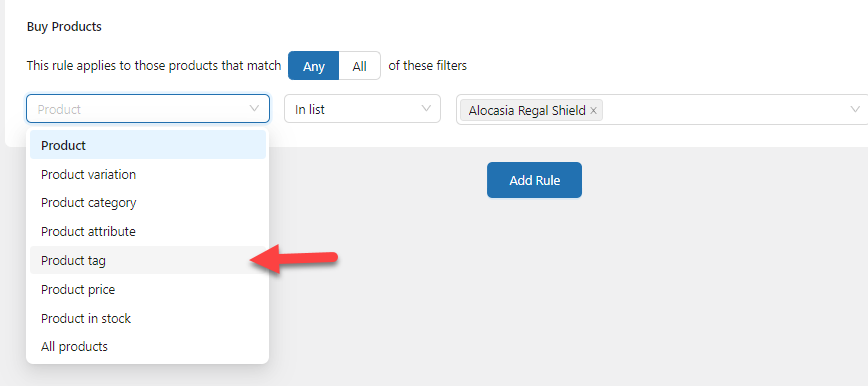
Next, mention the products you should add to this rule.
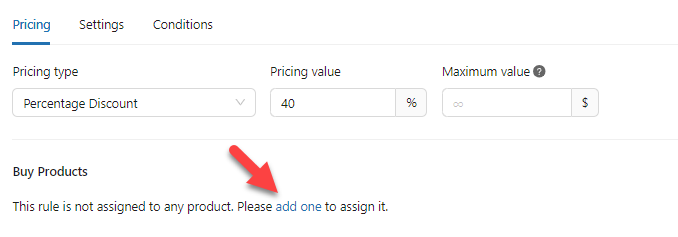
You can search for products and add them to the box. You can add one or more products through the option. In this case, we will only add one product.

Another excellent thing you can do is assign a WordPress tag to all the cheap products. Later, you can use the product tag condition to apply the rule to specific items.
After configuring this, you can add conditions to the rule. To do this, go to the conditions section and click Add a condition.
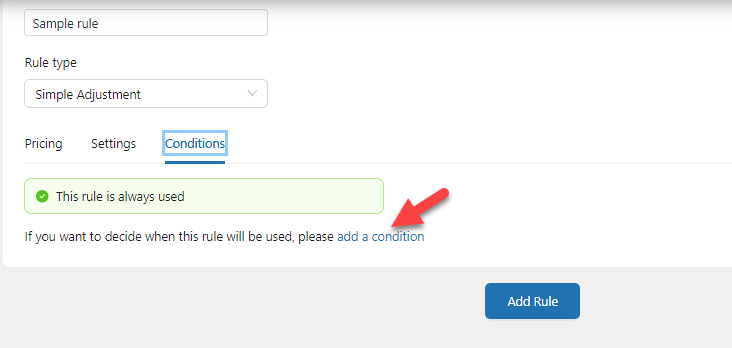
Adding extra conditions will always help. For example, you can add a minimum quantity of cart items to get the discount. This way, the customer will spend money on the store, and you can quickly boost the overall revenue.
We used this condition:
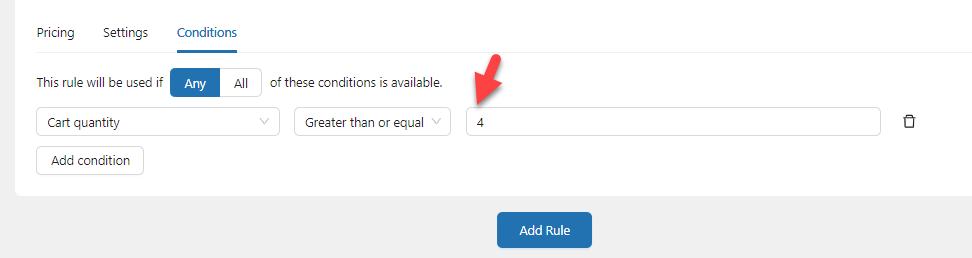
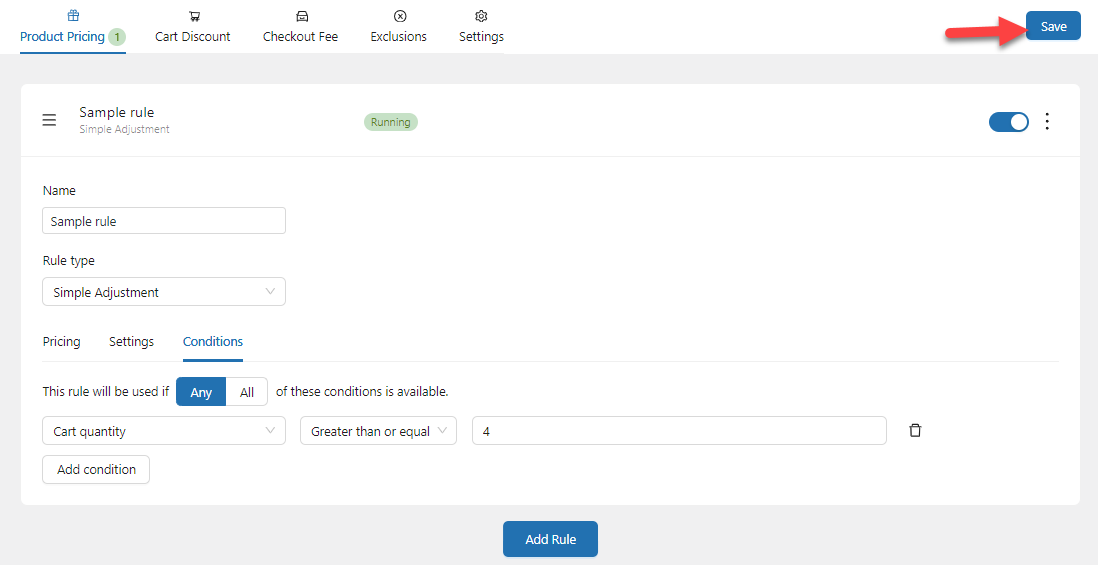
According to our conditions, people must buy four or more products for a 40% discount. Once you have modified the conditions, save the settings.
3. Testing the Campaign
Next, go to the front end of the website and add the discounted product to the cart. At the front end of the website, you can see a notice.
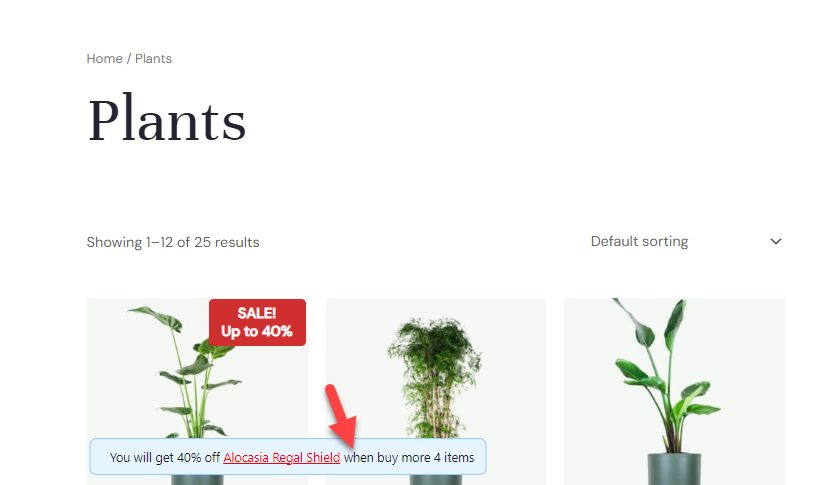
Add some more products and check the cart.
As you can see, the 40% discount for the product is applied automatically after meeting the mentioned conditions. Now, the users can complete the purchase.
You can always add more rules, modify the products, and add more conditions to make the campaigns more powerful.
That’s it!
This is how you can use YayPricing to apply a discount to the cheapest cart item in WooCommerce.
Why You Should Use the Plugin Method
You could use some coding skills to achieve the same task. But compared to the coding method, the plugin method is far better. Here are a few advantages of using YayPricing for the task:
- Easy to use: The plugin comes with an easy-to-use configuration wizard. You can customize the pricing of the products without any hassle.
- Unlimited rules: You can add endless rules through the plugin’s settings. The rules can alter the product’s price, checkout fee, or cart value.
- No compatibility issues: YayPricing is compatible with most WordPress themes and third-party plugins. So you won’t face any issues using the plugin.
- Stays the same: When you use the coding method, you will edit the theme’s functions.php file. But after the theme update, all the modifications will be lost. But if you have modified the rules via the plugin, they won’t be deleted after the theme or plugin update.
- Easy management: Managing rules is easy. Since you can name the rules/campaigns you have, it would be easy to manage or edit specific ones.
- Conditional logic: If you need to make your rules/campaigns more powerful, use the conditional logic feature. The plugin comes with so many options you can use to tweak the conditions.
- Excellent support team: if you need help with the plugin, contact the YayCommerce support team. They will help you personally to solve every issue.
- Additional features: So many features are available in the plugin to customize the campaigns further.
Now you know which tool is best for applying a discount to the cheapest cart item in WooCommerce and why it is ideal.
Conclusion
When you need to optimize the conversion rate of a WooCommerce store, you must develop multiple tactics. Discounts are among the best ways to attract new customers and get returning ones.
Instead of offering a site-wide discount, you can provide a discount for the cheapest items in the cart. With a little bit of code, you can complete it. On the other hand, if you need to add discounts to specific products, use the plugin method.
Do you use other methods to boost the conversion rate of your online store?
Let us know in the comments.