We all know that WooCommerce is by far one of the best tools for operating a full-fledged ecommerce website. WooCommerce already allows you to set a specific currency type to be used in your store. Most businesses, however, sell their products and services to different regions across the world and so it is important and even more beautifying to have WooCommerce multi currency set up for a website, in order to improve shoppers experience which in turn improves website sales.
Steps to Adding WooCommerce Currency Switcher
- How to add YayCurrency to your store
- How to enable Checkout in different currencies
- How to set multi currency display at different location
How to add multi currency to your store
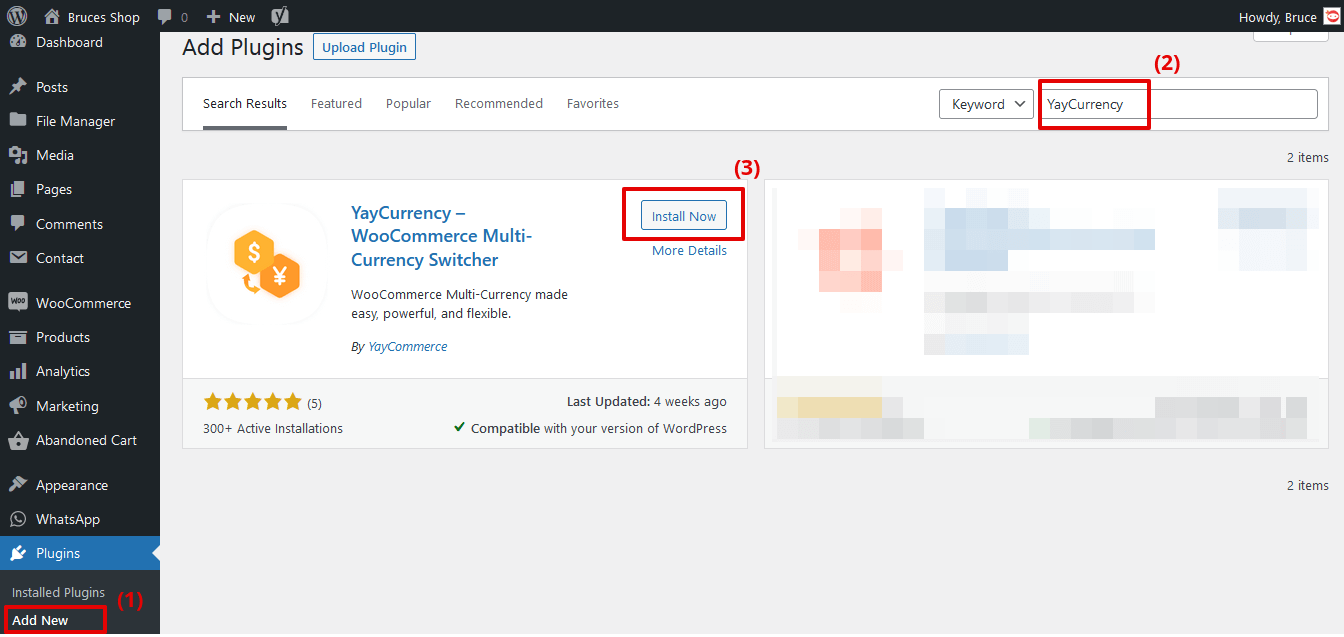
- Inside your WordPress dashboard, under Plugins, click on Add new.
- Search YayCurrency, click Install now and then click on Activate.
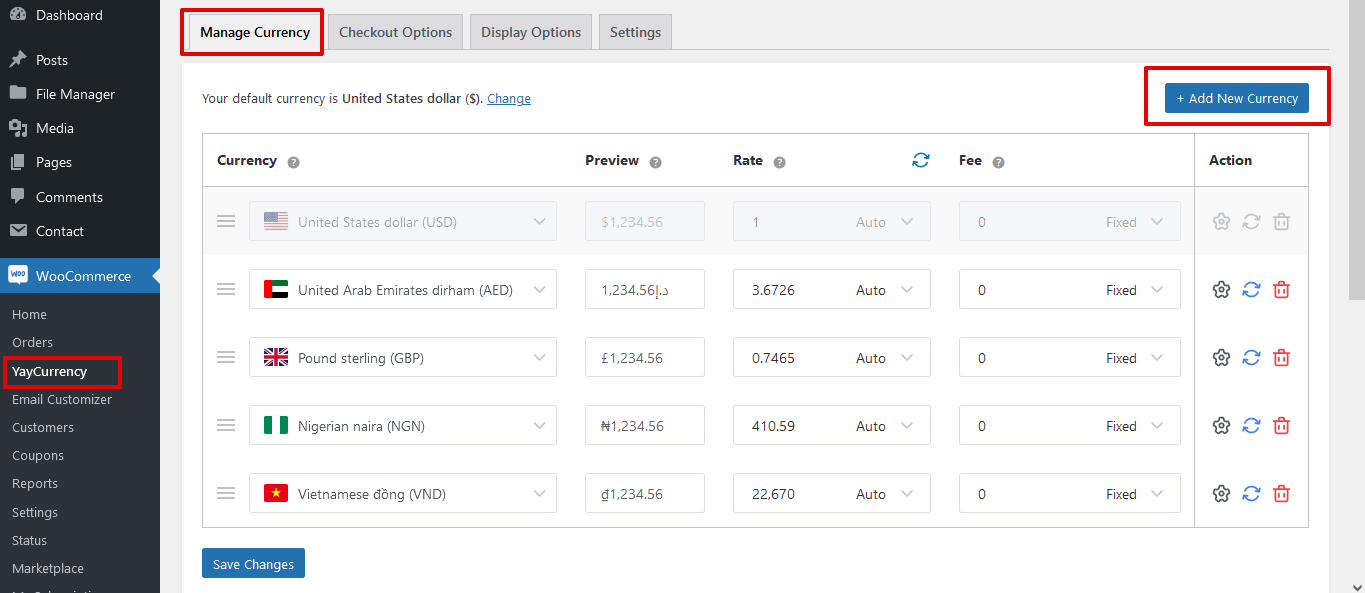
After the plugin has been activated successfully, You will be able to access the settings by clicking on YayCurrency under the WooCommerce tab. This will reveal the four main sub-tabs that would allow you to make different settings and multi currency changes as you want. These sub-tabs include;
- Manage Currency
- Checkout Options
- Display Options
- Settings
- Manage Currency: This allows you to Add New Currency, update currency rates, configure currencies and delete currencies.
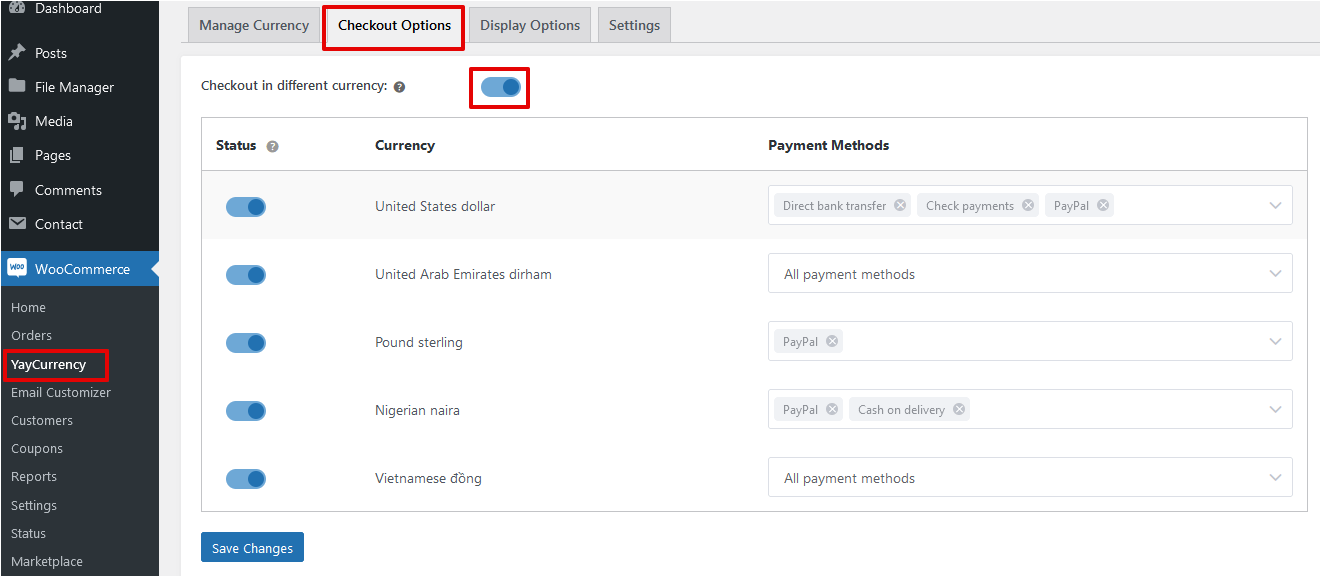
How to enable Checkout in different currencies
- Checkout Options: This tab allows you to allow or disallow frontend users to Checkout in different currencies as you have set in the ‘Manage Currency’ tab and also to associate specific payment methods to specific currency you have activated.
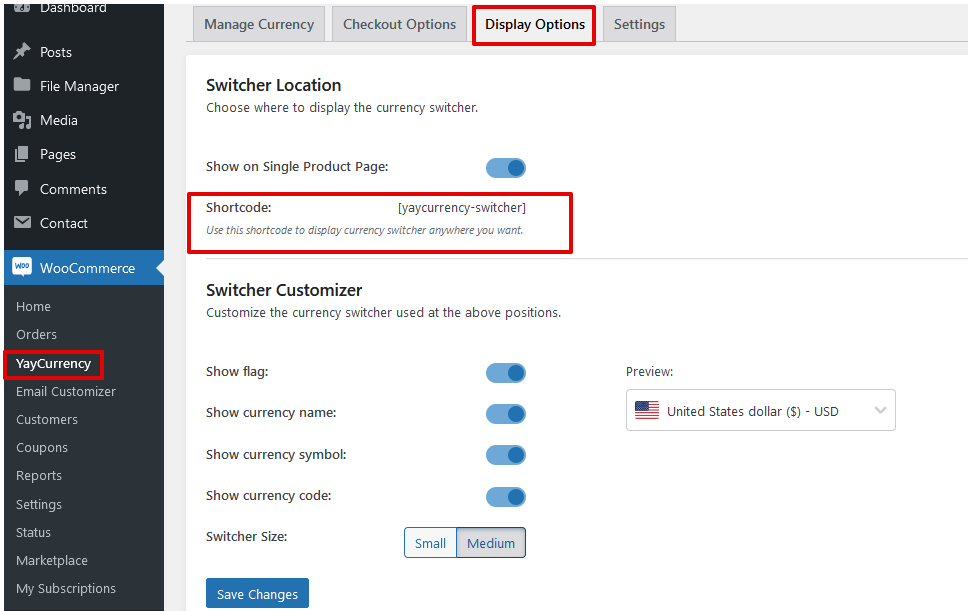
How to set multi-currency display at different locations
- Display Options: This tab allows you to select the size of the currency switcher, set where it should appear on your site and to copy the shortcode you could use it to display anywhere on your website.
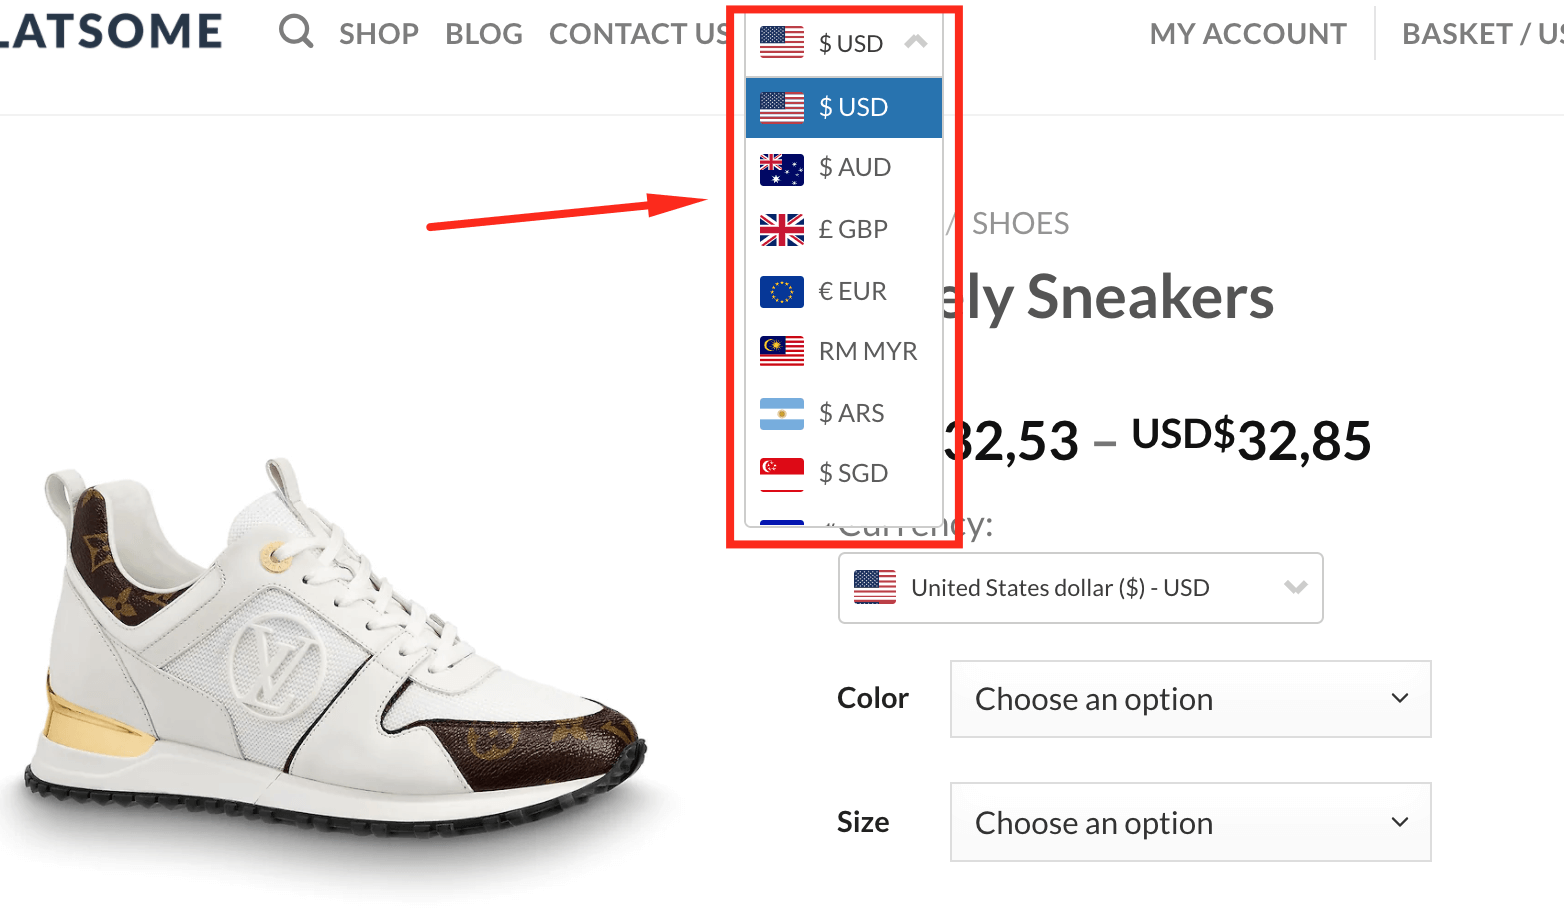
 Here is a screenshot showing how the multi currency switcher looks on the website’s single product page at the frontend:
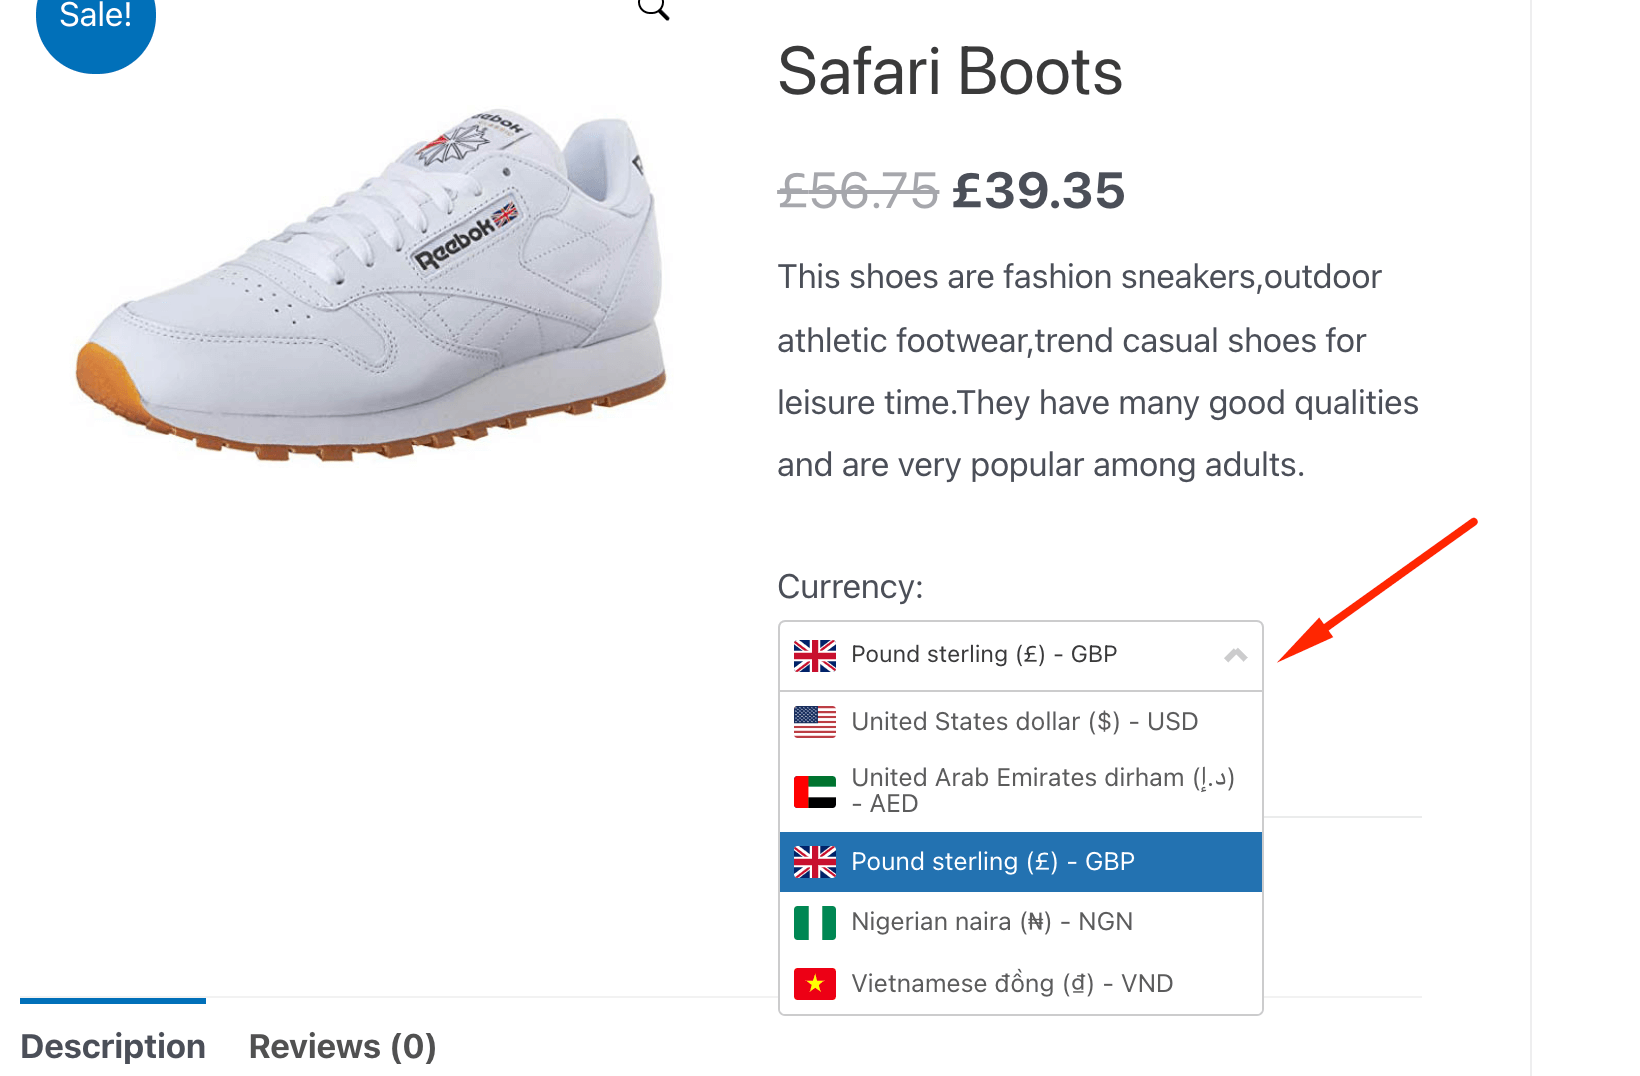
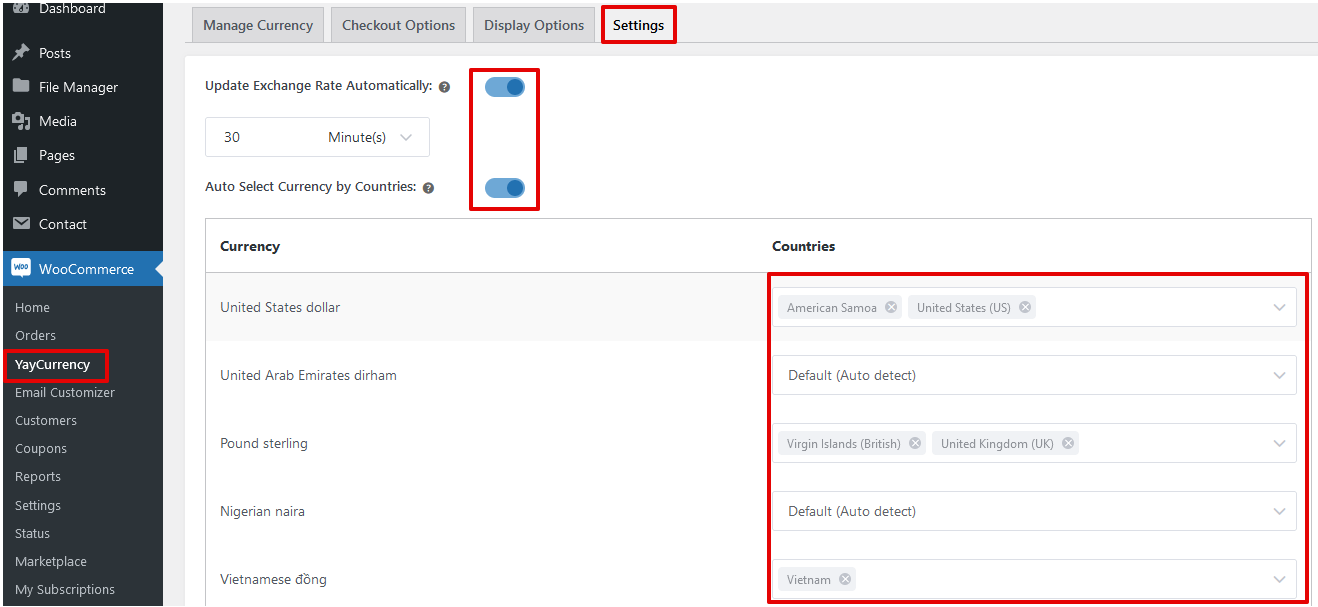
- Settings: This settings tab allows you to set Exchange Rate to be updated automatically, select specific countries that you want a specific currency to display for and to set currency to be automatically determined and displayed based on the visitor’s country.
- Widget Option: You can display multi currency at various widget locations supported by your website’s theme.
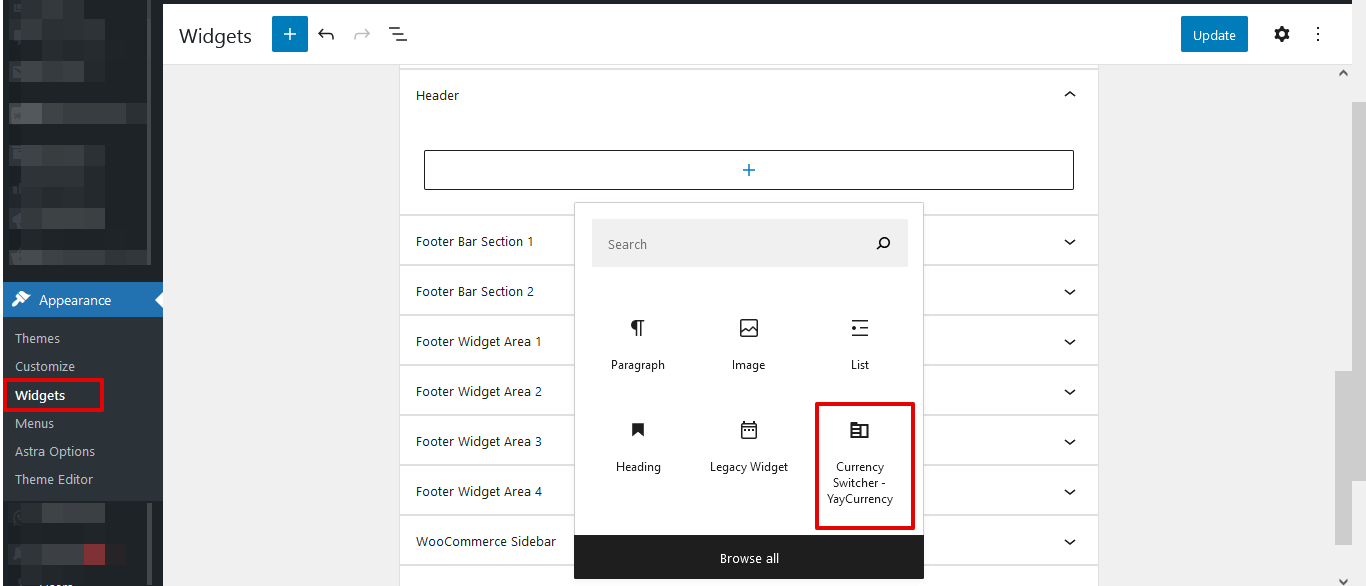
Here is a screenshot showing how the multi currency switcher looks on the website’s sidebar at the frontend:
 Menu Option: YayCurrency allows you to display the multi currency switcher on your website’s menu in just one click.
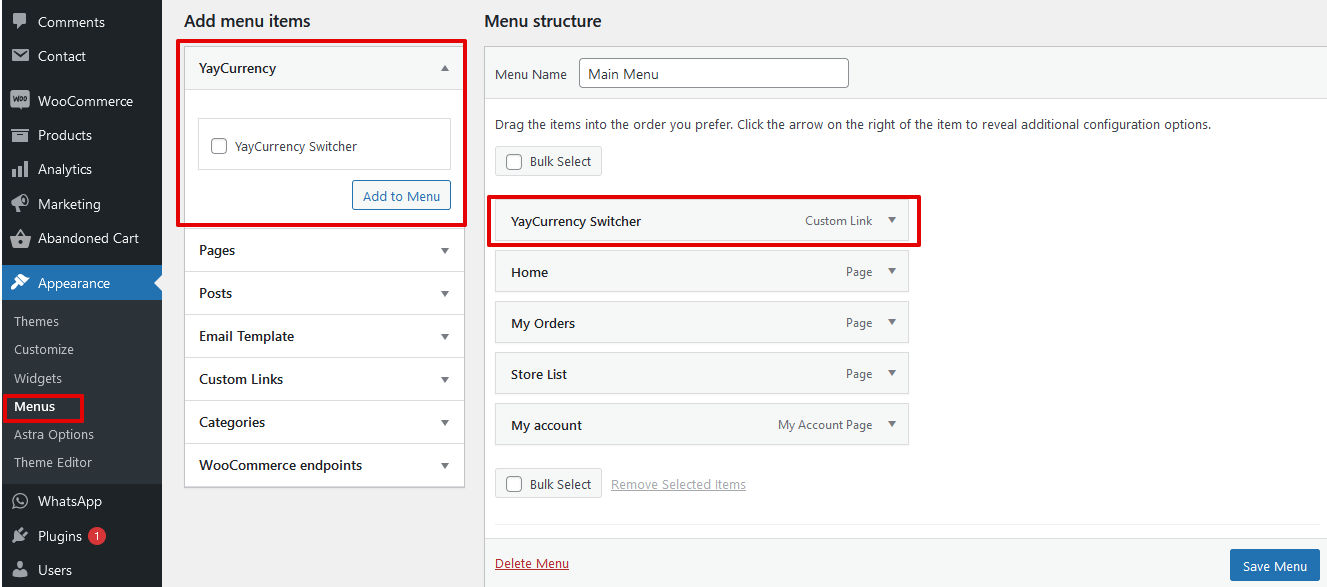
Here is a screenshot showing how the multi currency switcher looks on the website’s menu at the frontend:
How to set up fixed product price per currency
To avoid fluctuation due to market rates, or to display a fixed price for specific products, you might want to use fixed product price per currency. To enable this function, go to WooCommerce product > Edit > Product data > General, and enter your fixed price to the product price fields.
In the video below you can see the steps to enable the WooCommerce currency switcher, add conversion fees, and set up a fixed price for each product based on the local currencies.
Wrapping Up
In conclusion, we have talked about how to set up WooCommerce multi currency for your store, so that you can enhance better shopping experience for your customers. We learned about YayCurrency which is one of the best WooCommmerce multi currency plugin for this purpose. The YayCurrency plugin is available in both free and paid version, the free version is very much enough to get your store going. However, if you want to enjoy even more functionalities, you might later consider upgrading to the premium version.
YAYCURRENCY FREE YAYCURRENCY PRO