Hello WordPress Users,
Here is the documentation of Multi Step for Contact Form 7 Pro plugin.
- Make sure you have installed Contact Form 7 Plugin.
- Contact Form 7 Multi Step Addon (Free) or Contact Form 7 Multi Step PRO
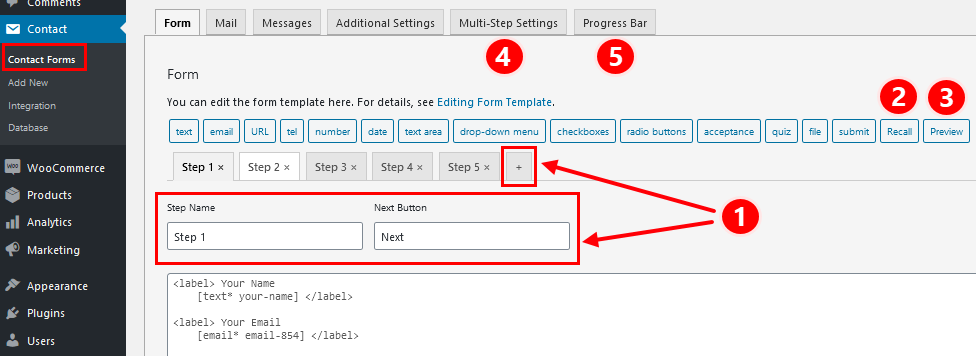
Once Contact Form 7 Multi-Step Plugin activated, the Contact Forms dashboard has a new look. You can see additional separate tabs represent Step 1, Step 2, Step 3…
-
Add a new step
-
Show an answer from a previous step
-
Preview the full form before submit it
-
Animation options and button colour settings
-
Enable and set progress bar feature
—
-
Add a new step
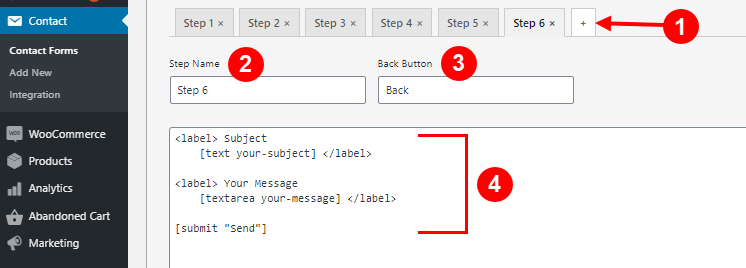
- Click the plus icon to add a step (1)
- Fill in Step name and Back, Next button titles (2) (3)
- Add form fields (4)
Note: By default, in the last step, the submit button is located on the left side. To make it float to the right, please add a submit button like this:
<p style=”float:right”>
[submit “Submit”]
</p>
-
Show an answer from a previous step
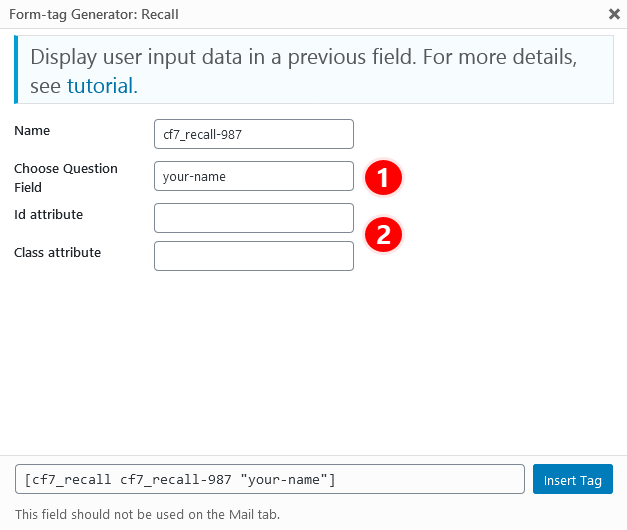
- You can enter only one field name here (1)
- Enter an ID or Class attribute for adding CSS rules later (optional) (2)
Note: If you use checkbox, please add”-cbmls” into checkbox name (e.g: checkbox-123-cbmls) so that Njt Answer can recognize and display it.
-
Preview the full form before submit it

- Enter a title for the preview button (1)
- Enter an ID or Class attribute for adding CSS rules later (optional) (2)
-
Animation options and button colour settings
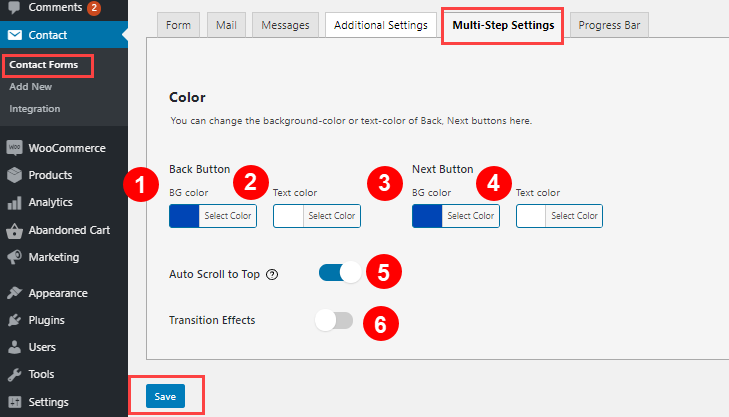
- Back button background colour and title colour (1) (2)
- Next button background colour and title colour (3) (4)
- Toggle this ON if you want the form to scroll to top of the page when Next button is clicked (5)
- Toggle this ON and select from the dropdown options if you want appearance animation for the Back and Next buttons (6)
-
Enable progress bar feature
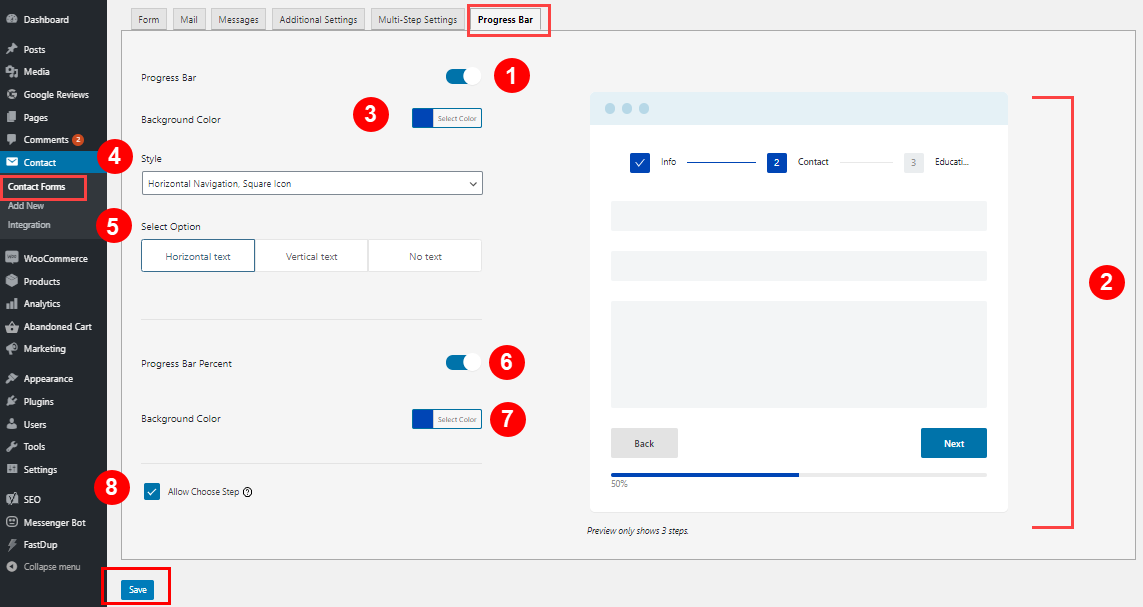
- Toggle ON progress bar if you choose to have it shown (1)
- Watch the form preview on the right side (2)
- Set colour for the progress bar (3)
- Choose your preferred style for the progress bar (4)
- Choose progress bar arrangement style (5)
- Activate or deactivate form progress percentage (6)
- Set colour for the form progress percentage (7)
- Tick this option if you want users to be able to click on each steps to see its contents without filling it first (8)
- Save the form!
Your form is now done!
I hope you can easily find how to customize Contact form 7 multi step plugin after reading this tutorial.
In case you have any question or need support, please submit a ticket at Our Support Portal or feel free to chat with our support team at Our Official Facebook Page
Many thanks for coming with us!
Ninja Team