Do you want to convert Notion to a WordPress website? If you are looking for a step-by-step guide, keep reading this article. Here, we will show you the A-Z process to achieve the task!
While working on a project (as an individual or team), boosting productivity to get better results would be excellent. By default, people will prefer offline tools to track progress, take necessary notes, etc.
But what if you need an all-in-one solution to handle the product more efficiently as a team?
That’s where Notion comes to the scene. It is one of the best tools you should try to boost the overall productivity. If you need to know more about the tool and learn how to convert Notion to a WordPress website, keep reading this post.
Here, we will explain the step-by-step method to complete the task.
Before going further, let’s see what Notion is and how it would be helpful.
Notion: An Introduction
If you need to take your productivity to the next level, check out Notion.
It is a freemium tool for product documentation, task tracking, wiki, and project management. The Notion software would be an ideal option for both individuals and teams.
Since the tool offers collaboration features, working with your team members on a project and letting others know the progress would be a cakewalk.
Some of the most unique features of Notion are:
- AI integration
- Block-based editing
- Template customization
- Task management
- Note-taking
And so on.
Now you know what Notion is. Next, let’s see when you need to convert Notion to a WordPress website.
When Do You Need to Convert Notion to WordPress
Let’s say you are a content writer. If you are dealing with multiple WordPress websites simultaneously and need to improve productivity, Notion would be an ideal tool. The process would be simple since all the tasks can be handled from a single Notion dashboard.
The content editor of Notion is so easy to use, and it uses blocks. Like the Gutenberg editor, writing or editing posts would be a cakewalk. When you think improving your content writing productivity is ideal, you must deal with Notion and WordPress integration.
Since Notion also has a free subscription, test the platform and check out the features yourself.
How to Convert Notion to a WordPress Website
The first thing you need to do is go to Notion.
From there, log in to your account. Once you have logged in to your Notion account, go to the My Integrations tab.
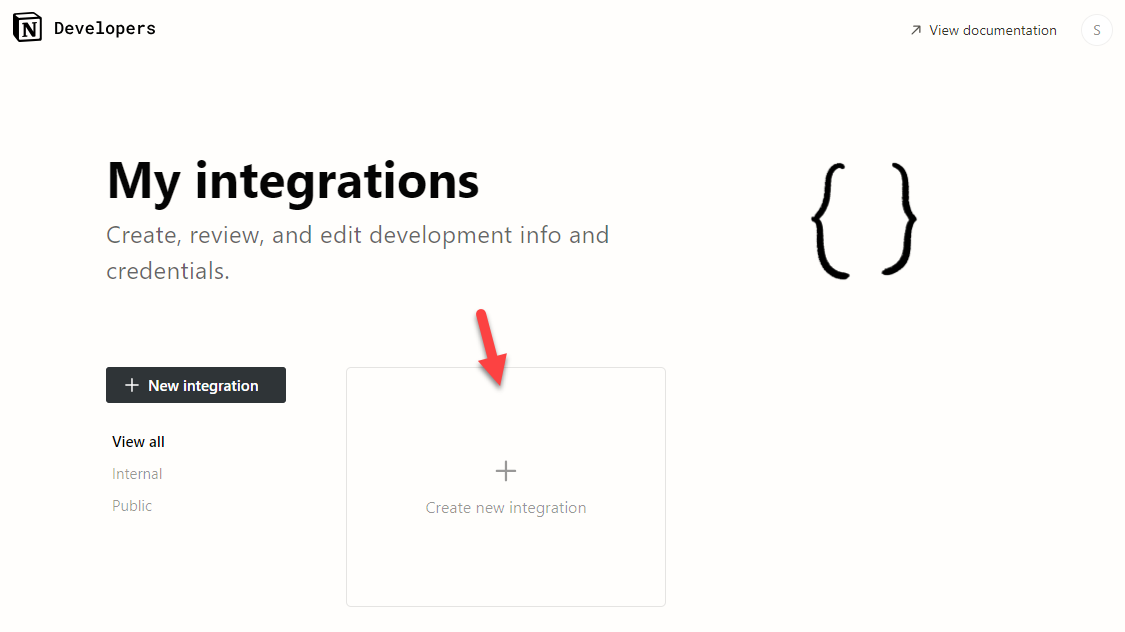
Step 1. Create a New Integration
Those will be visible if you have configured any integrations on your Notion account.
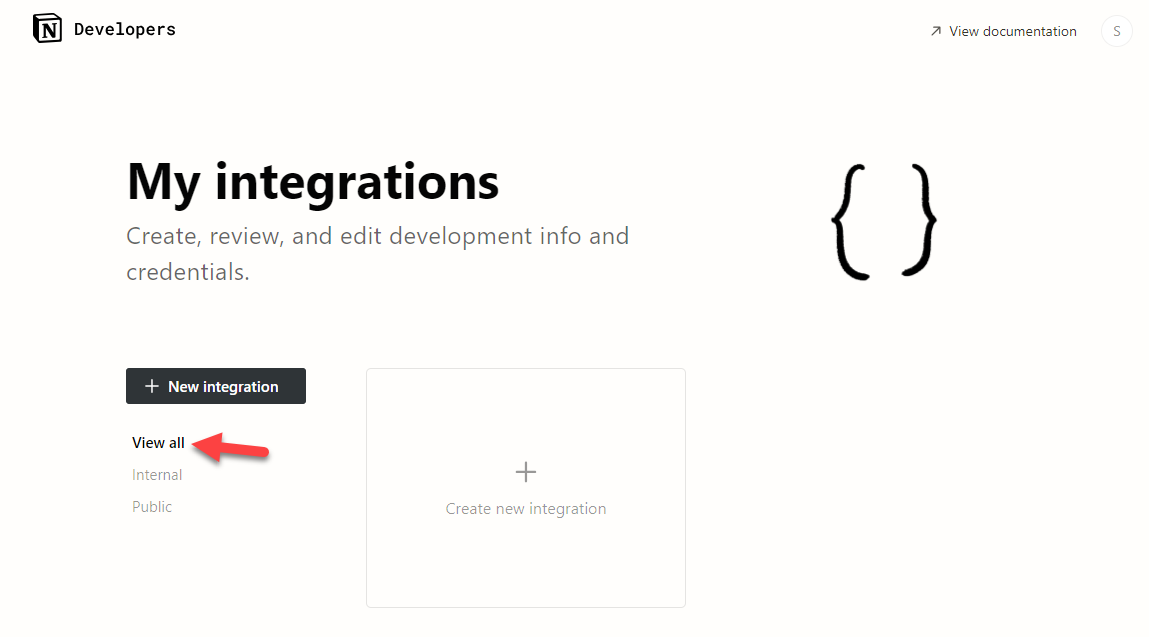
In this case, we do not have any existing integrations. Hence, we will click on the Create New Integration button.
On the next page, you need to enter some details. The information you need to fill in are:
- Integration type
- Associated workspace
- Name of the integration
- Logo
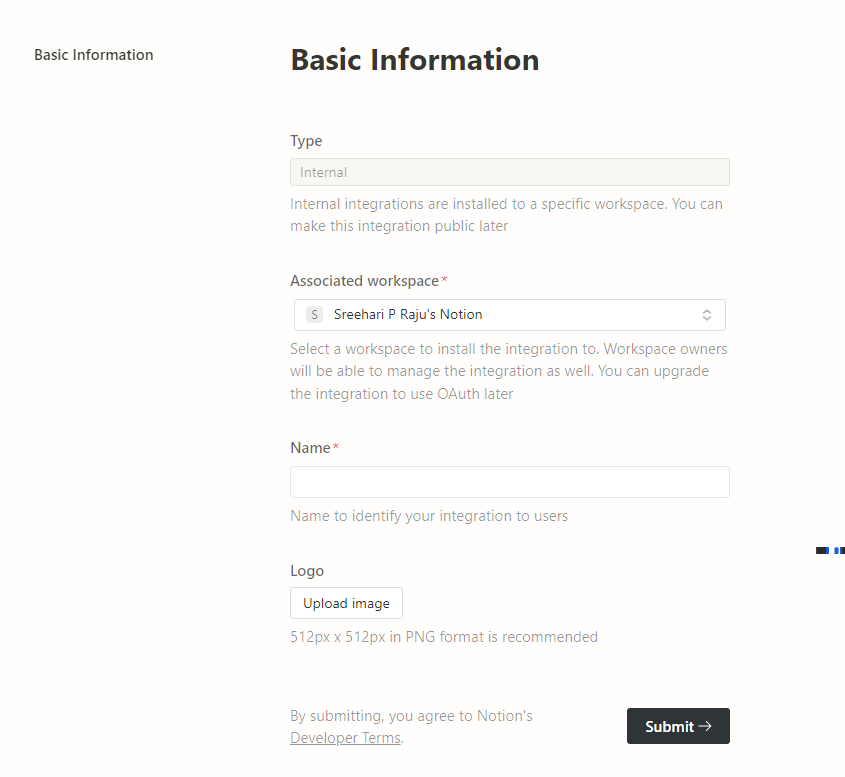
After entering the details, submit the form. Now, Notion will create a secret key for the integration.
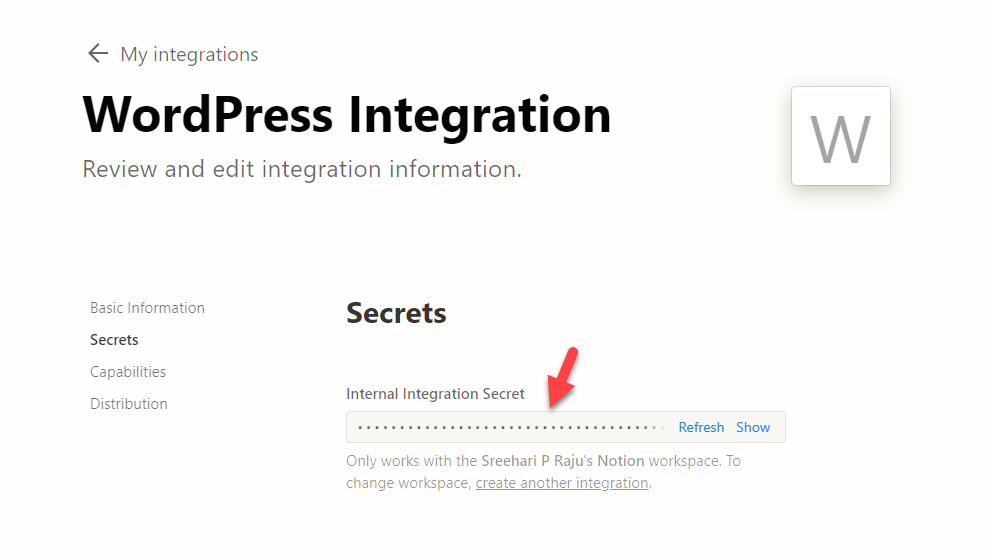
Keep this browser tab open.
Step 2. Install and Activate WP Sync for Notion
On a new tab, open your website and go to the backend. We need to install a plugin called WP Sync for Notion.
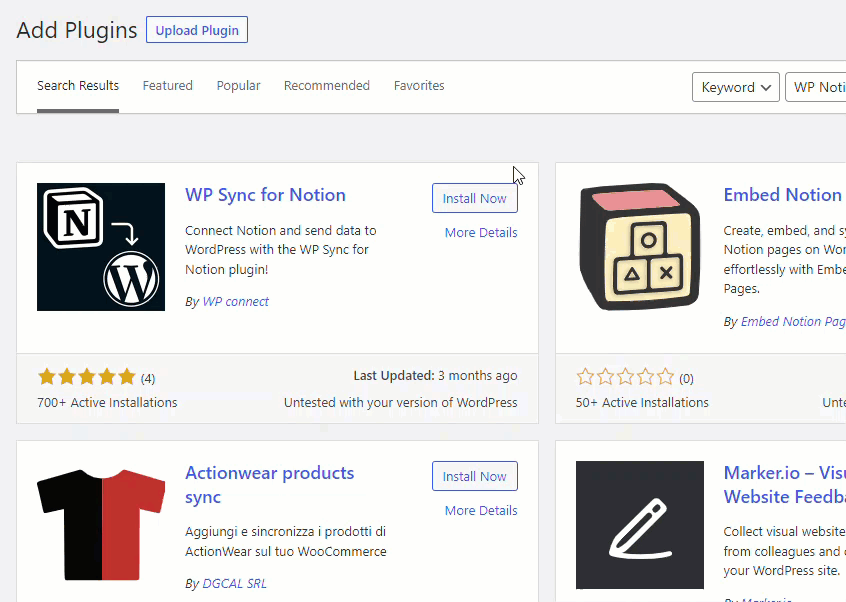
After installing and activating the plugin on the website, open the plugin’s settings.
Step 3. Create a Connection
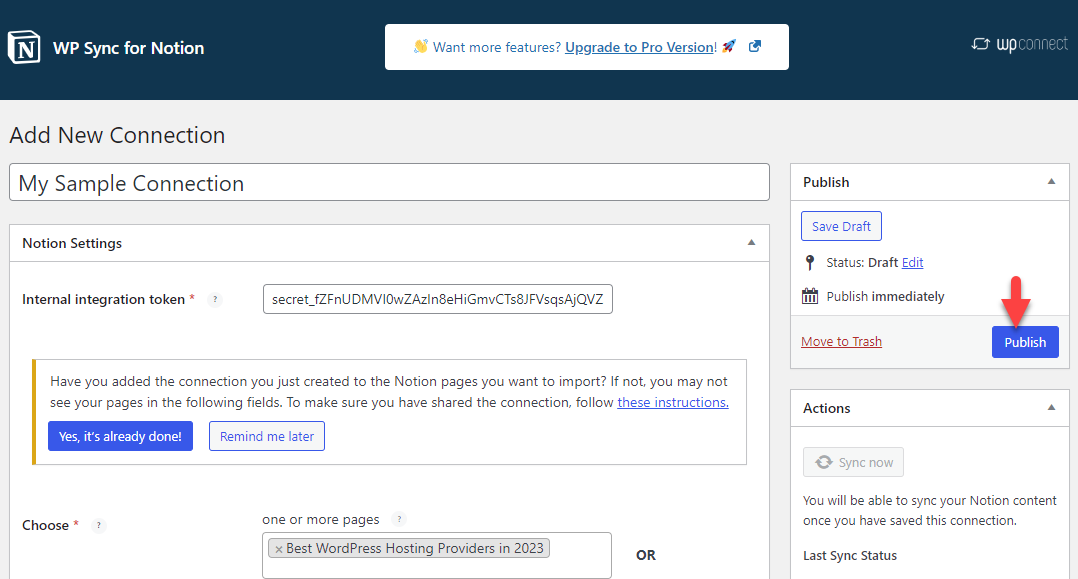
Next, create a new connection.
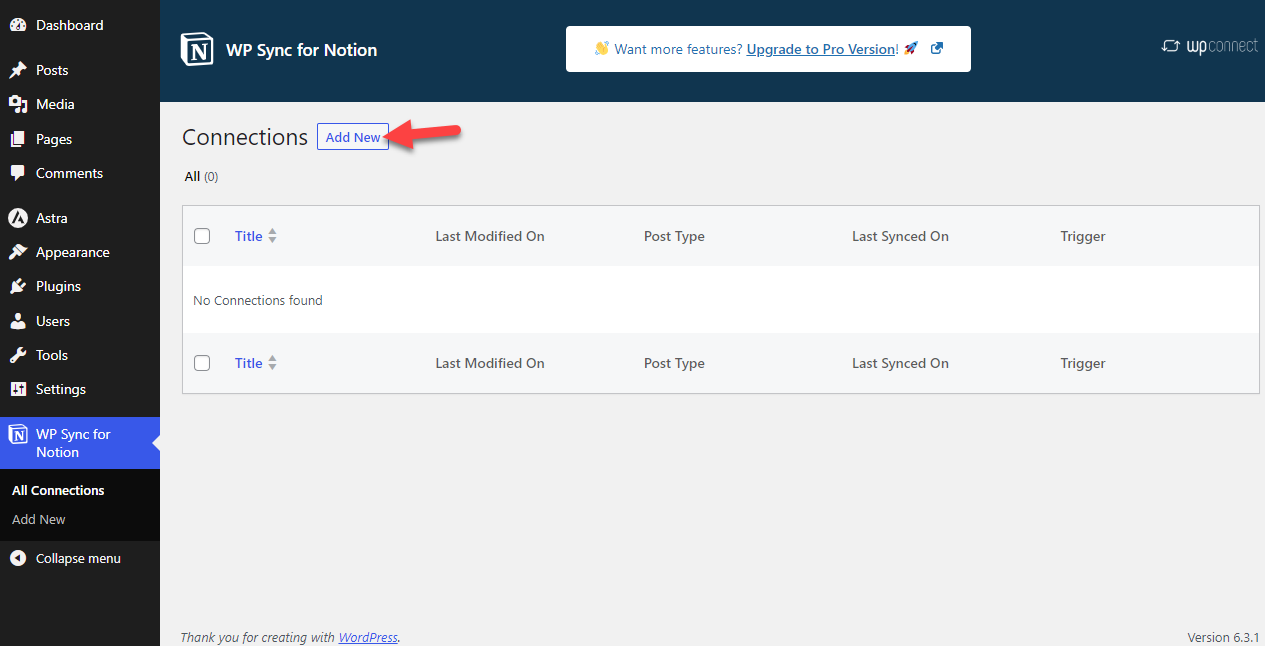
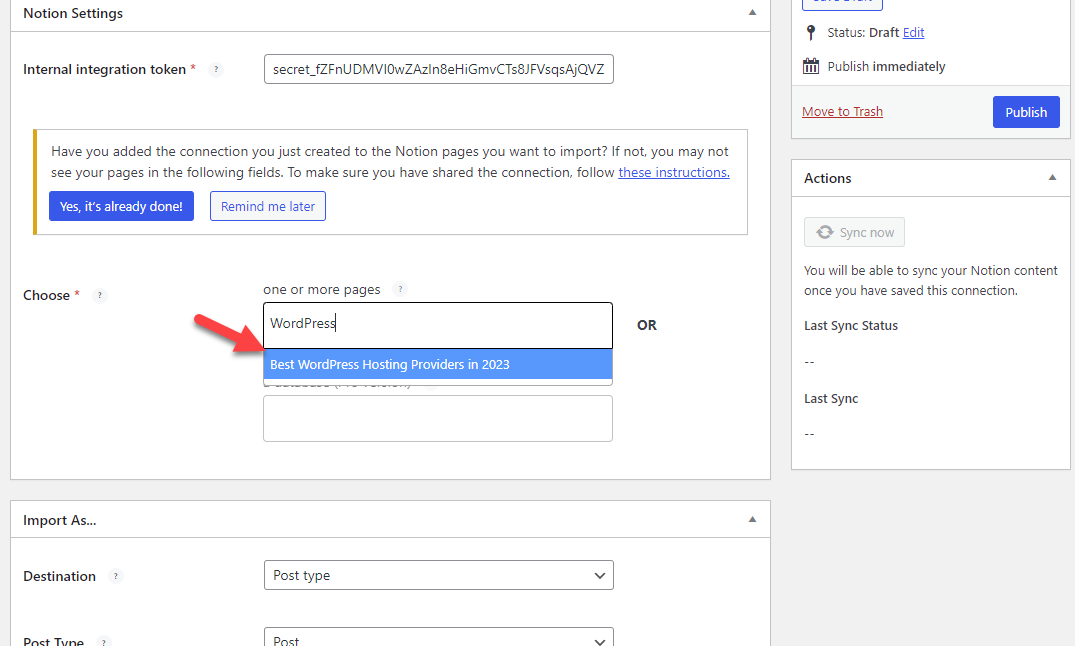
Now, give the connection a name and paste the secret key.
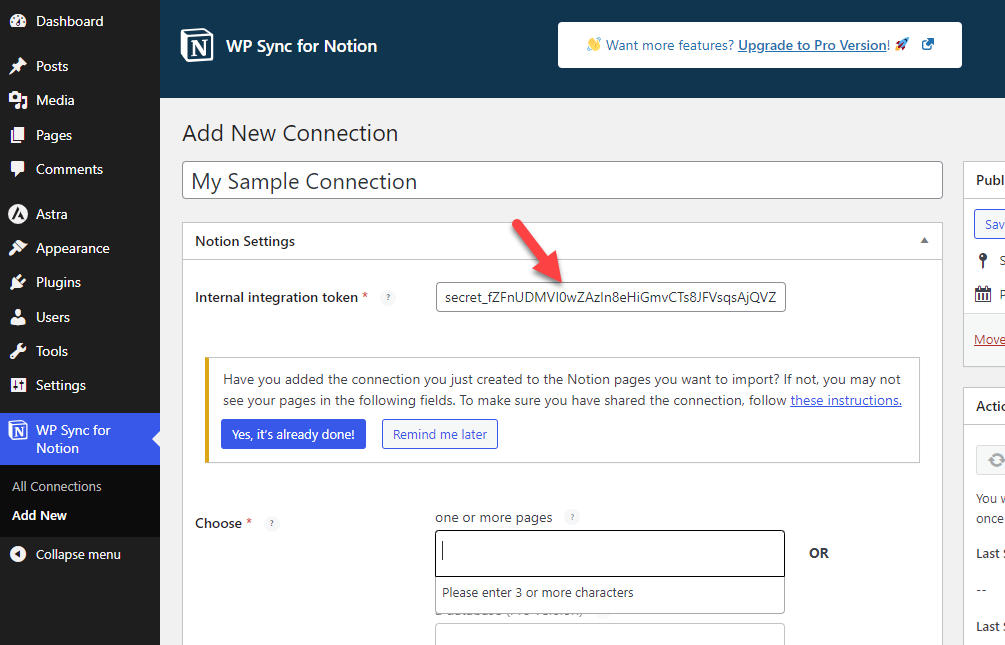
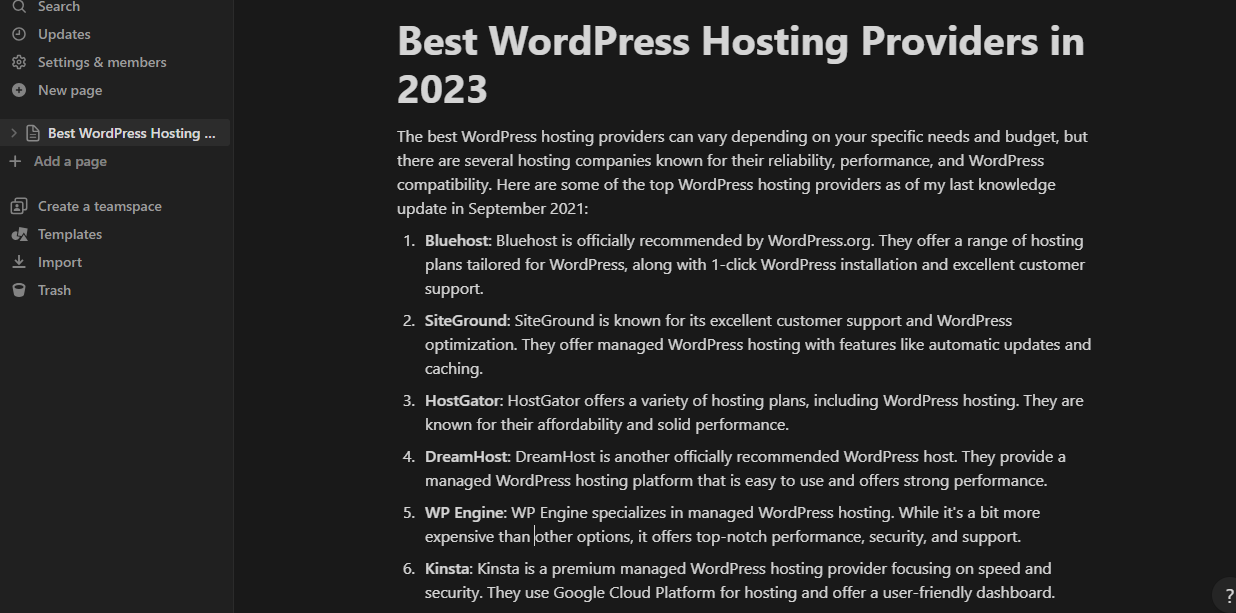
Now, go back to the Notion homepage and create a document there. You can name it as you like. For example, if you make an article on the best WordPress hosting providers, use it as the document title. You can see an option to add integrations to the document in the top right-hand corner.
Step 4. Complete the Integration
Select the correct integration from the dropdown.
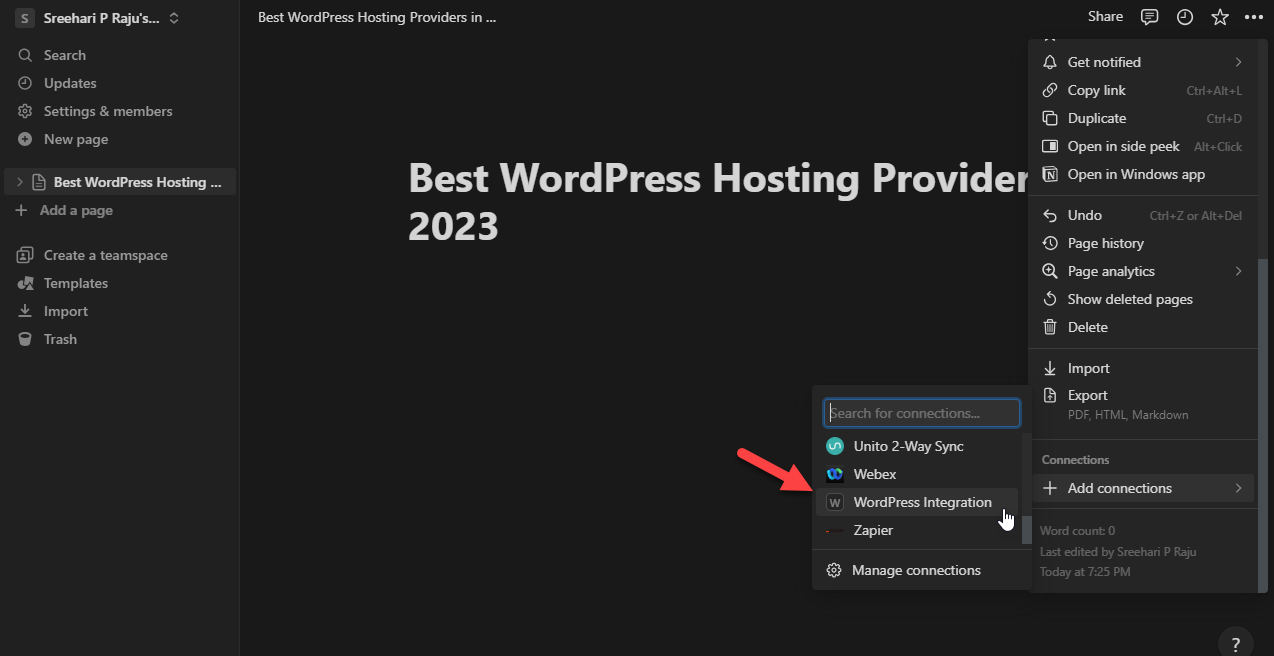
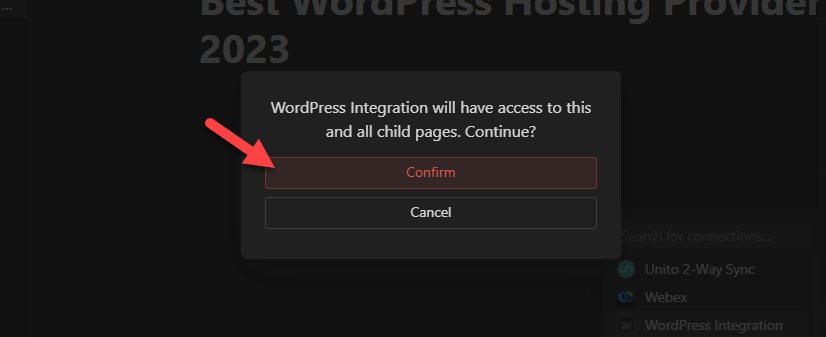
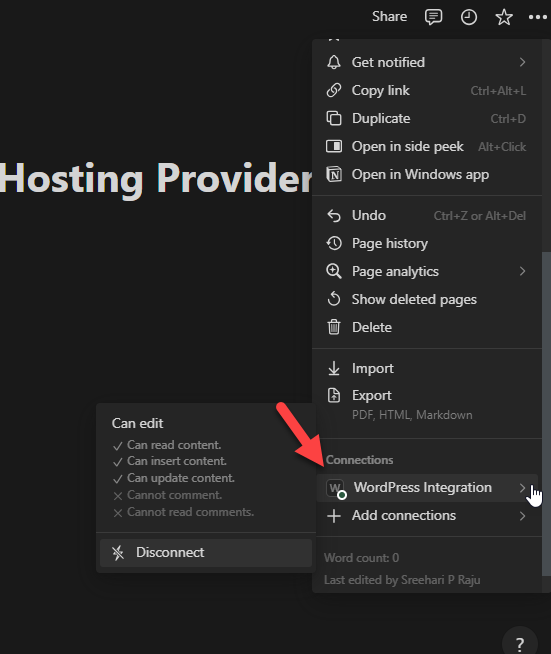
Next, give permissions to access the page and all child pages under it.
You can see your integration under the connections section if everything is correct.
Now, go back to the plugin’s settings and list the document you are working on.
Step 5. Configure the Plugin
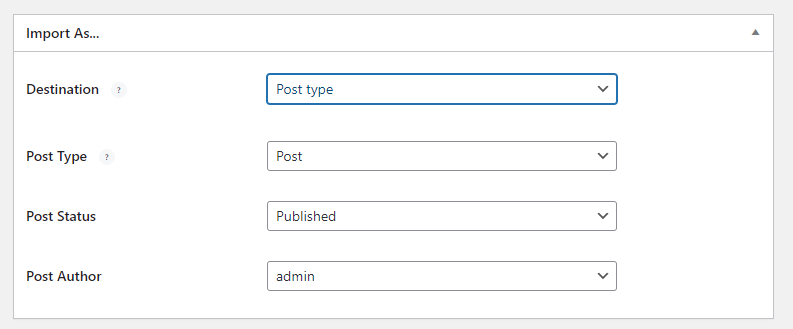
Next, choose how you need to deal with the document. In this case, we will use this document as a blog post. Plus, we will be using the draft as the post status. Finally, select the author account from the dropdown.
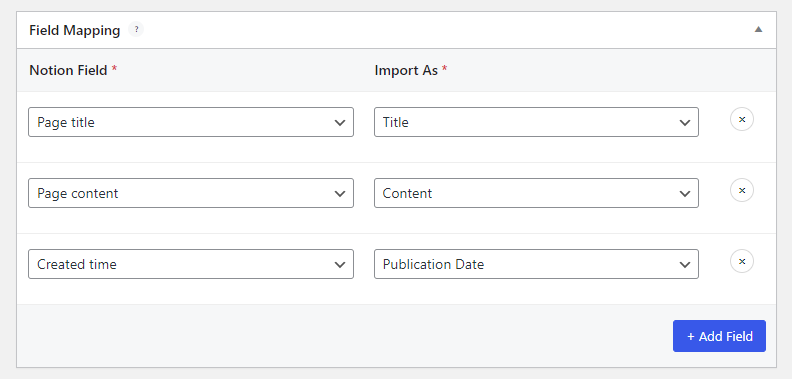
Next, configure field mapping.
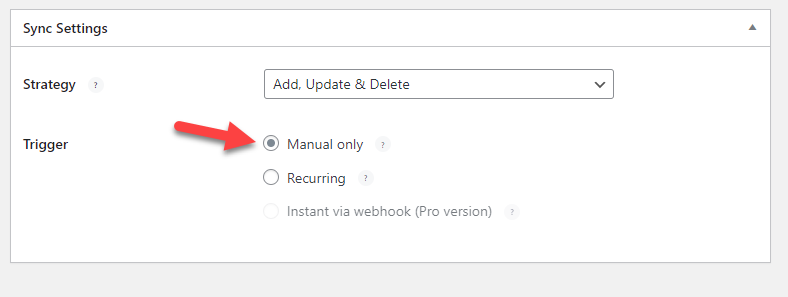
Finally, choose the sync settings. While you are using the free version subscription of the plugin, you will get some limitations. In this case, I have selected manual trigger as the sync option.
Once you have configured the plugin’s settings, publish the connection.
Now, make changes to the Notion document.
Step 6. Work on the Notion Document
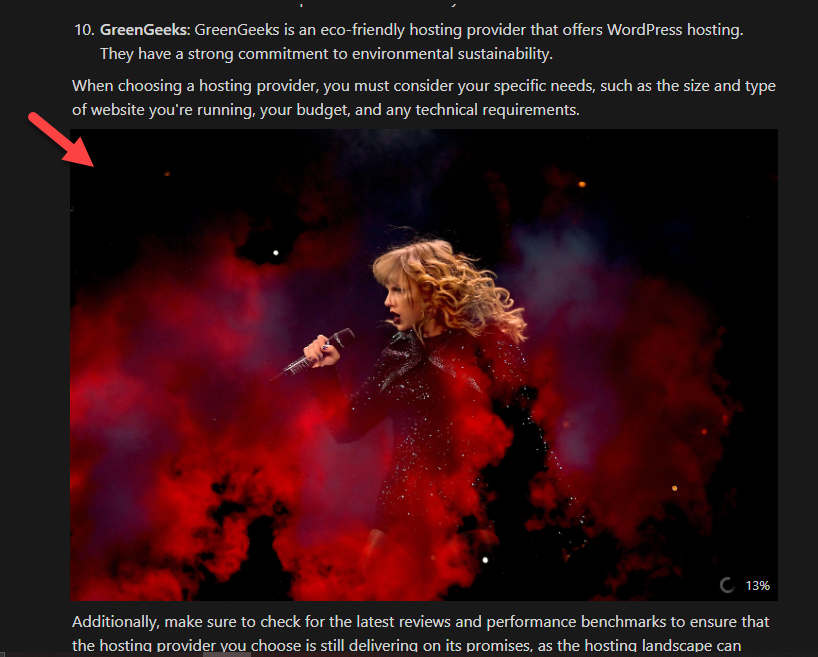
Add the content you are going to publish.
You can also add images to the Notion document. You can use the image block to insert photos into the document.
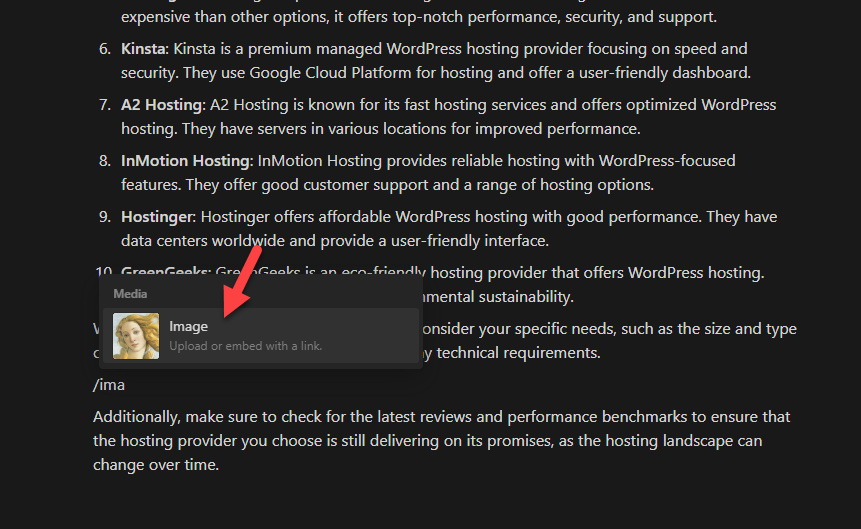
There, you have multiple options to add an image to the document:
- Upload
- Embed link
- Unsplash
- GIPHY
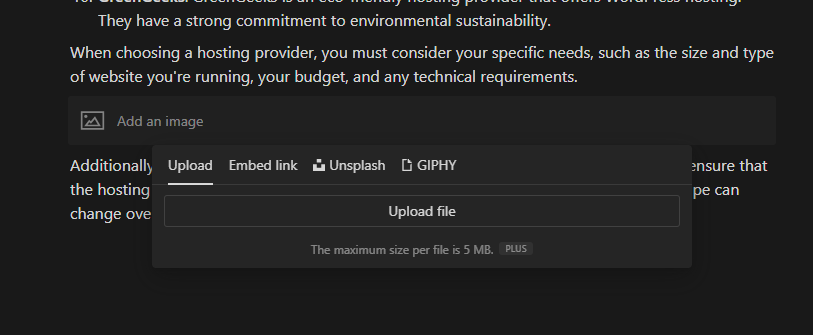
Upload images to the document from your local storage or embed an image file.
Step 7. Sync the Document
After modifications, click the Sync Now button in the connection settings.
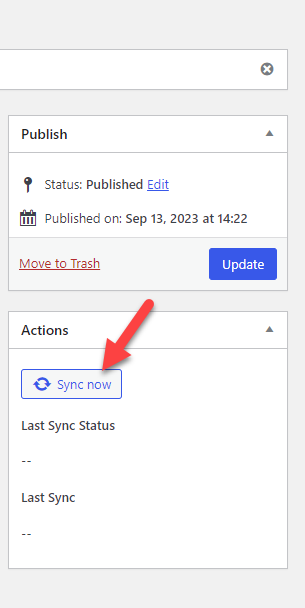
Once the sync is completed, go to the WordPress post editor.
Step 8. Finish Editing and Publish the Post
There, you will see the document.
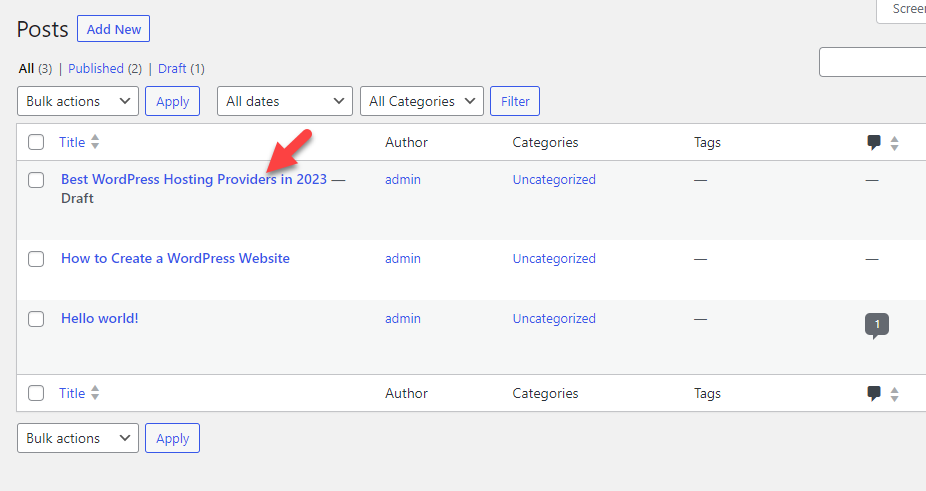
You can preview the document to see the content.
If you scroll down, you can also see all the images added to the document.
Based on our configuration, we have selected post status as a draft. So, when you are ready to publish the article, you can manually do the task.
Another thing to note is you need to manually sync the document again after making the necessary changes.
That’s it!
This is how you can complete the Notion and WordPress integration! As you can see above, the integration is simple and requires no technical knowledge.
Conclusion
While working as a content writer or blogger, improving productivity and time management needs to be your primary concern. So many platforms are available for content writers to handle their written tasks.
In our test, Notion would be a good tool for your blogging or business journey. Since the tool can also offer team collaboration, you can work on the team tasks, share progress, and so on.
Hence, we recommend testing Notion and converting Notion to WordPress websites to boost productivity.
What other platform do you use to improve productivity?
Let us know in the comments.