

Want to create a good-looking document gallery in WordPress?
A SEO-optimized WordPress website is not only written in words but also showcases plenty of media, documents, and graphics.
In this guide, we’ll walk you through the whole process using FileBird Document Library, a WordPress plugin that turns your media folders into a polished, browsable document gallery right on the front end of your site.
We’ll cover three things: first, how to enable the file types you need and get them uploaded to WordPress; then how to set up and display your document gallery using the Gutenberg block if that’s your editor of choice; and finally, how to use the shortcode generator if you’re working with a page builder like Elementor, DIVI, WPBakery and more. So you’re covered no matter how your site is built.
Just follow these guides:
- Uploading Document File Types to WordPress
- Create a Document Library with FileBird and Gutenberg
- Using the FileBird Document Library Shortcode Generator
- Final Thoughts
Uploading Document File Types to WordPress
What’s allowed to be uploaded and what’s not?
WordPress by default allows many document file types:
- .pdf (Portable Document Format)
- .doc, .docx (Microsoft Word Document)
- .ppt, .pptx, .pps, .ppsx (Microsoft PowerPoint Presentation)
- .odt (OpenDocument Text Document)
- .xls, .xlsx (Microsoft Excel Document)
- .psd (Adobe Photoshop Document)
Those are the most widely used file types. But if you need to upload a document file type that is not supported, you can easily get the know-how below.
WordPress 5.8 adds WebP support
Also, it’s worth mentioning that WordPress 5.8 adds new fields to Site Health to help determine if a site is capable of processing WebP format image files. And you can also manage these WebP files efficiently with the FileBird plugin.
In my personal experience, I often use these ebook formats including .prc, .epub, .mobi, .azw, .djvu, etc. Despite not being common, those file types have been existing for a very long time and actually got many advantages in terms of sharing among platforms and reading user experience on different devices.
Or when designers want to upload their graphic files such as .svg, .cad, .dwg, motion graphic files, etc. And Apple documents such as .numbers, .pages, and so on?
Upload unpermitted document file types
To allow those file types to be uploaded, you got to install some WordPress pre-built code to implement it, and here I choose File Upload Types. This is a fast and direct solution.

Right after activation, you’ll see a list of file formats that are well categorized in different functionality and media types.
A quick tip: You can use Ctrl + F (or Cmd + F) to search for the file type/format you want.
So when I want to get webp file types, I can easily locate them and tick the corresponding checkbox. Then all I have to do is to click Save changes and carry on uploading those files. Yayks!
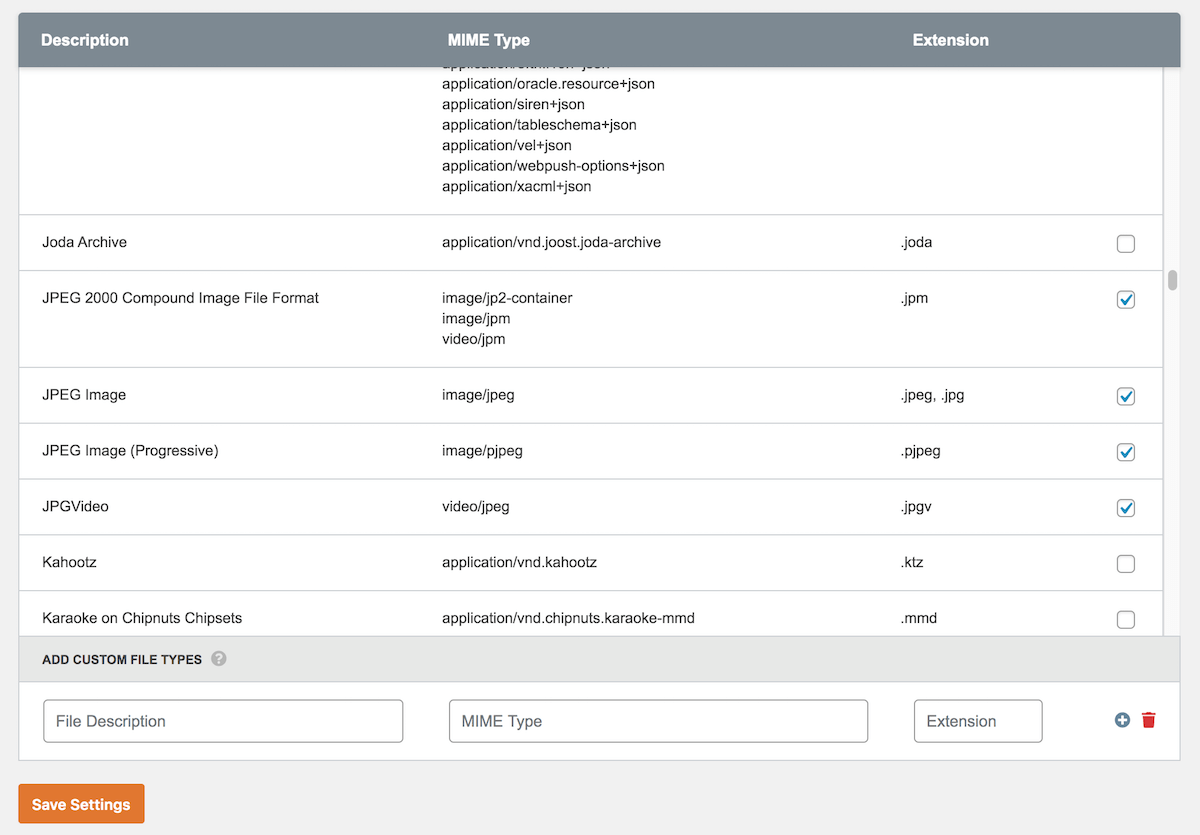
Another good thing about this plugin is it allows you to add custom file types. It’s just as easy as shown in the screenshot above. Just fill in those fields, including the file description, MIME type, and its extension, and then you’re good to go.
We won’t have to refresh or leave the page in order to complete those tasks. But of course, make sure you click Save Settings after making changes.
When you finish uploading all the necessary file types, we move on to the next step of adding those files to a document gallery.
How to Create a Document Library with FileBird and Gutenberg
Step 1. Organize Your Documents in Folders
This tutorial is about how to post a document gallery page in the WordPress Gutenberg block editor.
These are the prerequisites to make this guide work for you:
- FileBird version 5.0 or higher (Lite version or FileBird Pro)
- FileBird Document Library (Free download)
- Gutenberg editor
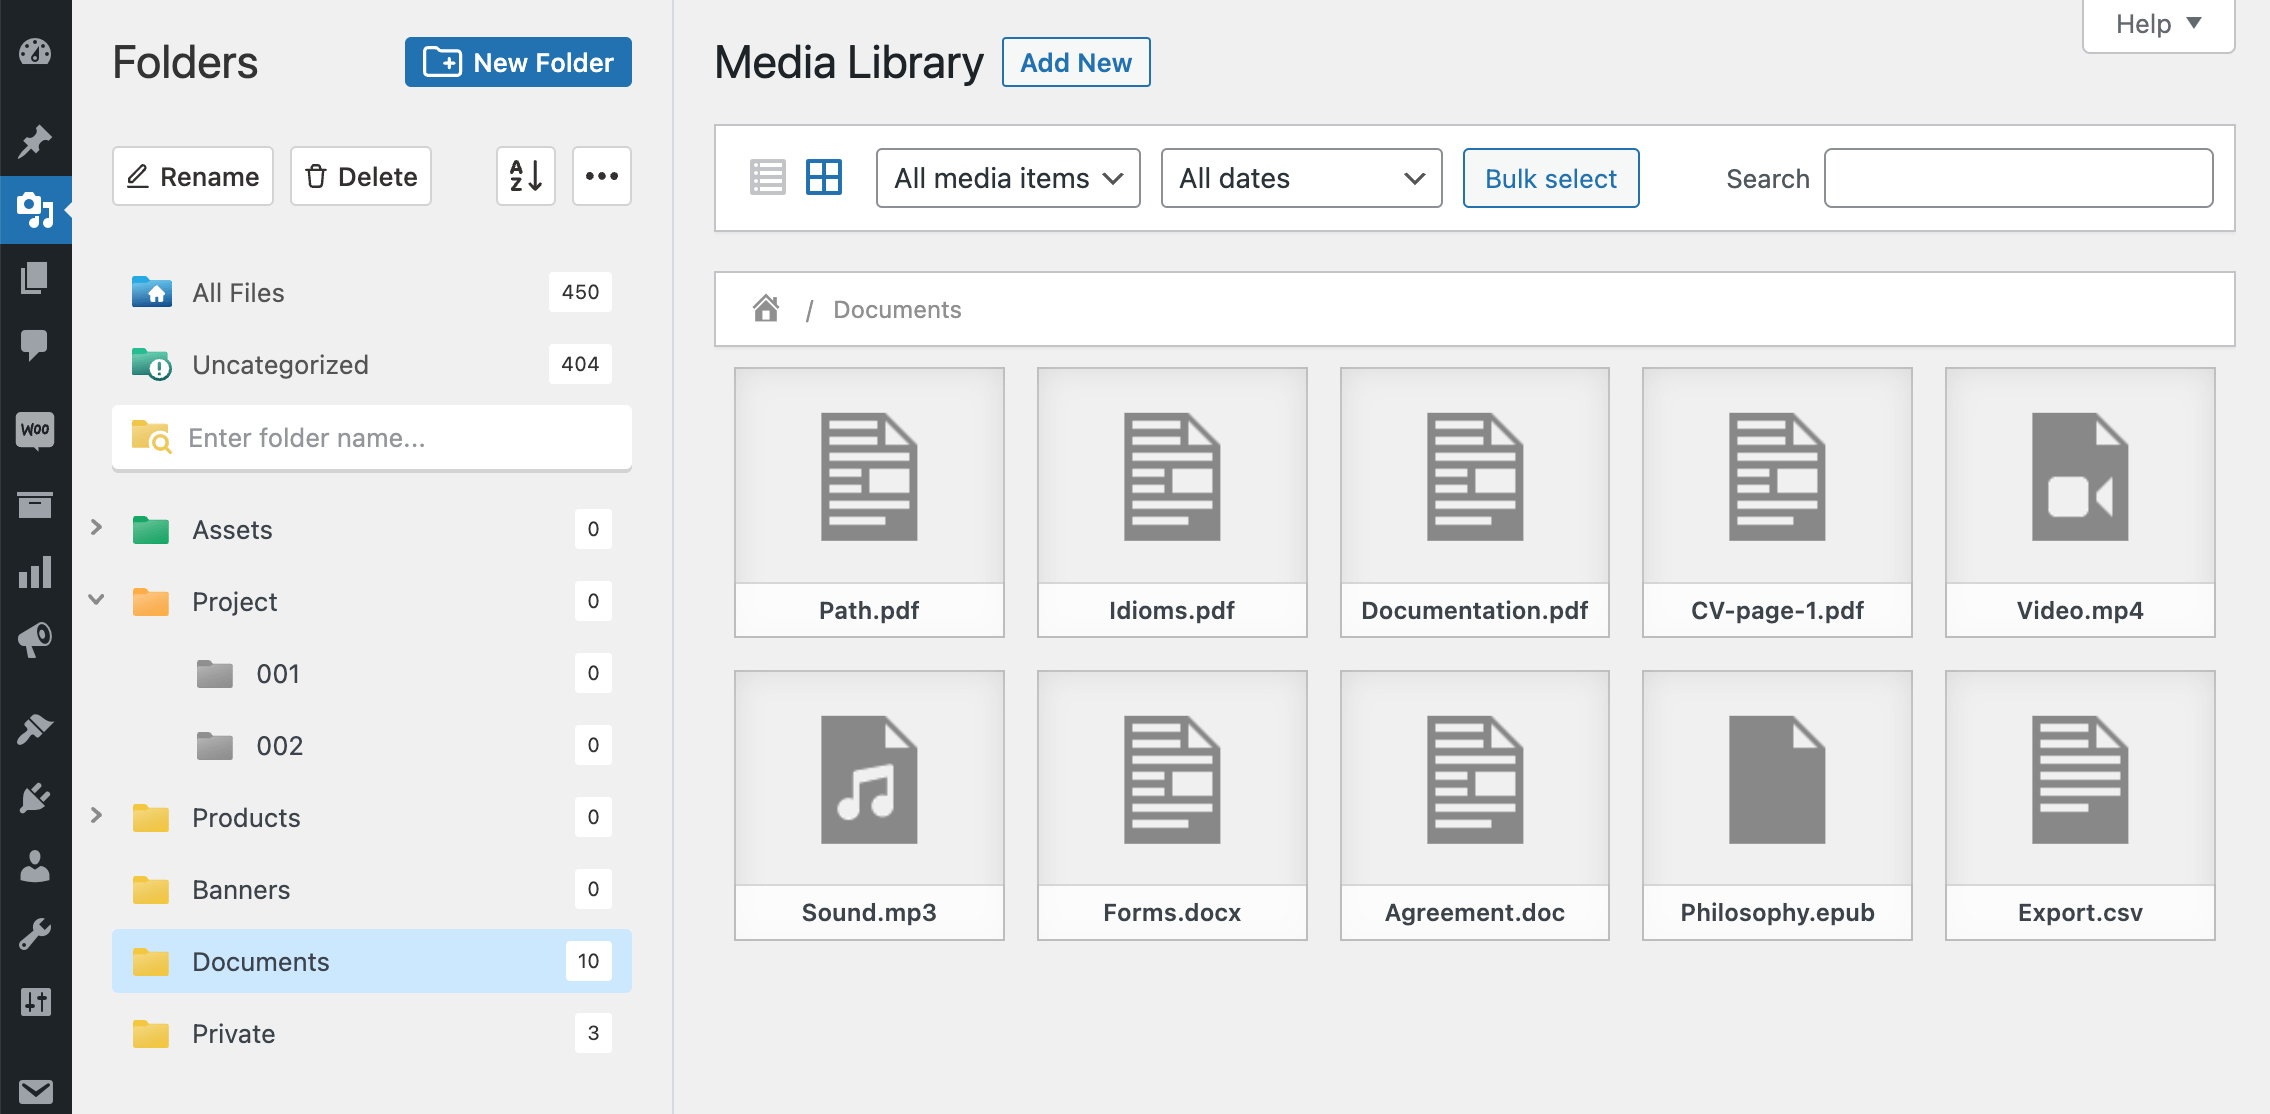
Let’s start by categorizing your uploaded document attachments. It can be done very easily thanks to FileBird’s drag-and-drop user interface and smart context menu.
Step 2. Install FileBird Document Library plugin
FileBird Document Library is a free plugin to help you showcase your document category on your WordPress page/post. So please install and activate this plugin on your WordPress site.
Step 3. Add the Gutenberg Document Library Block – and Done!
Search for “FileBird Document Library” and add it to your current page.
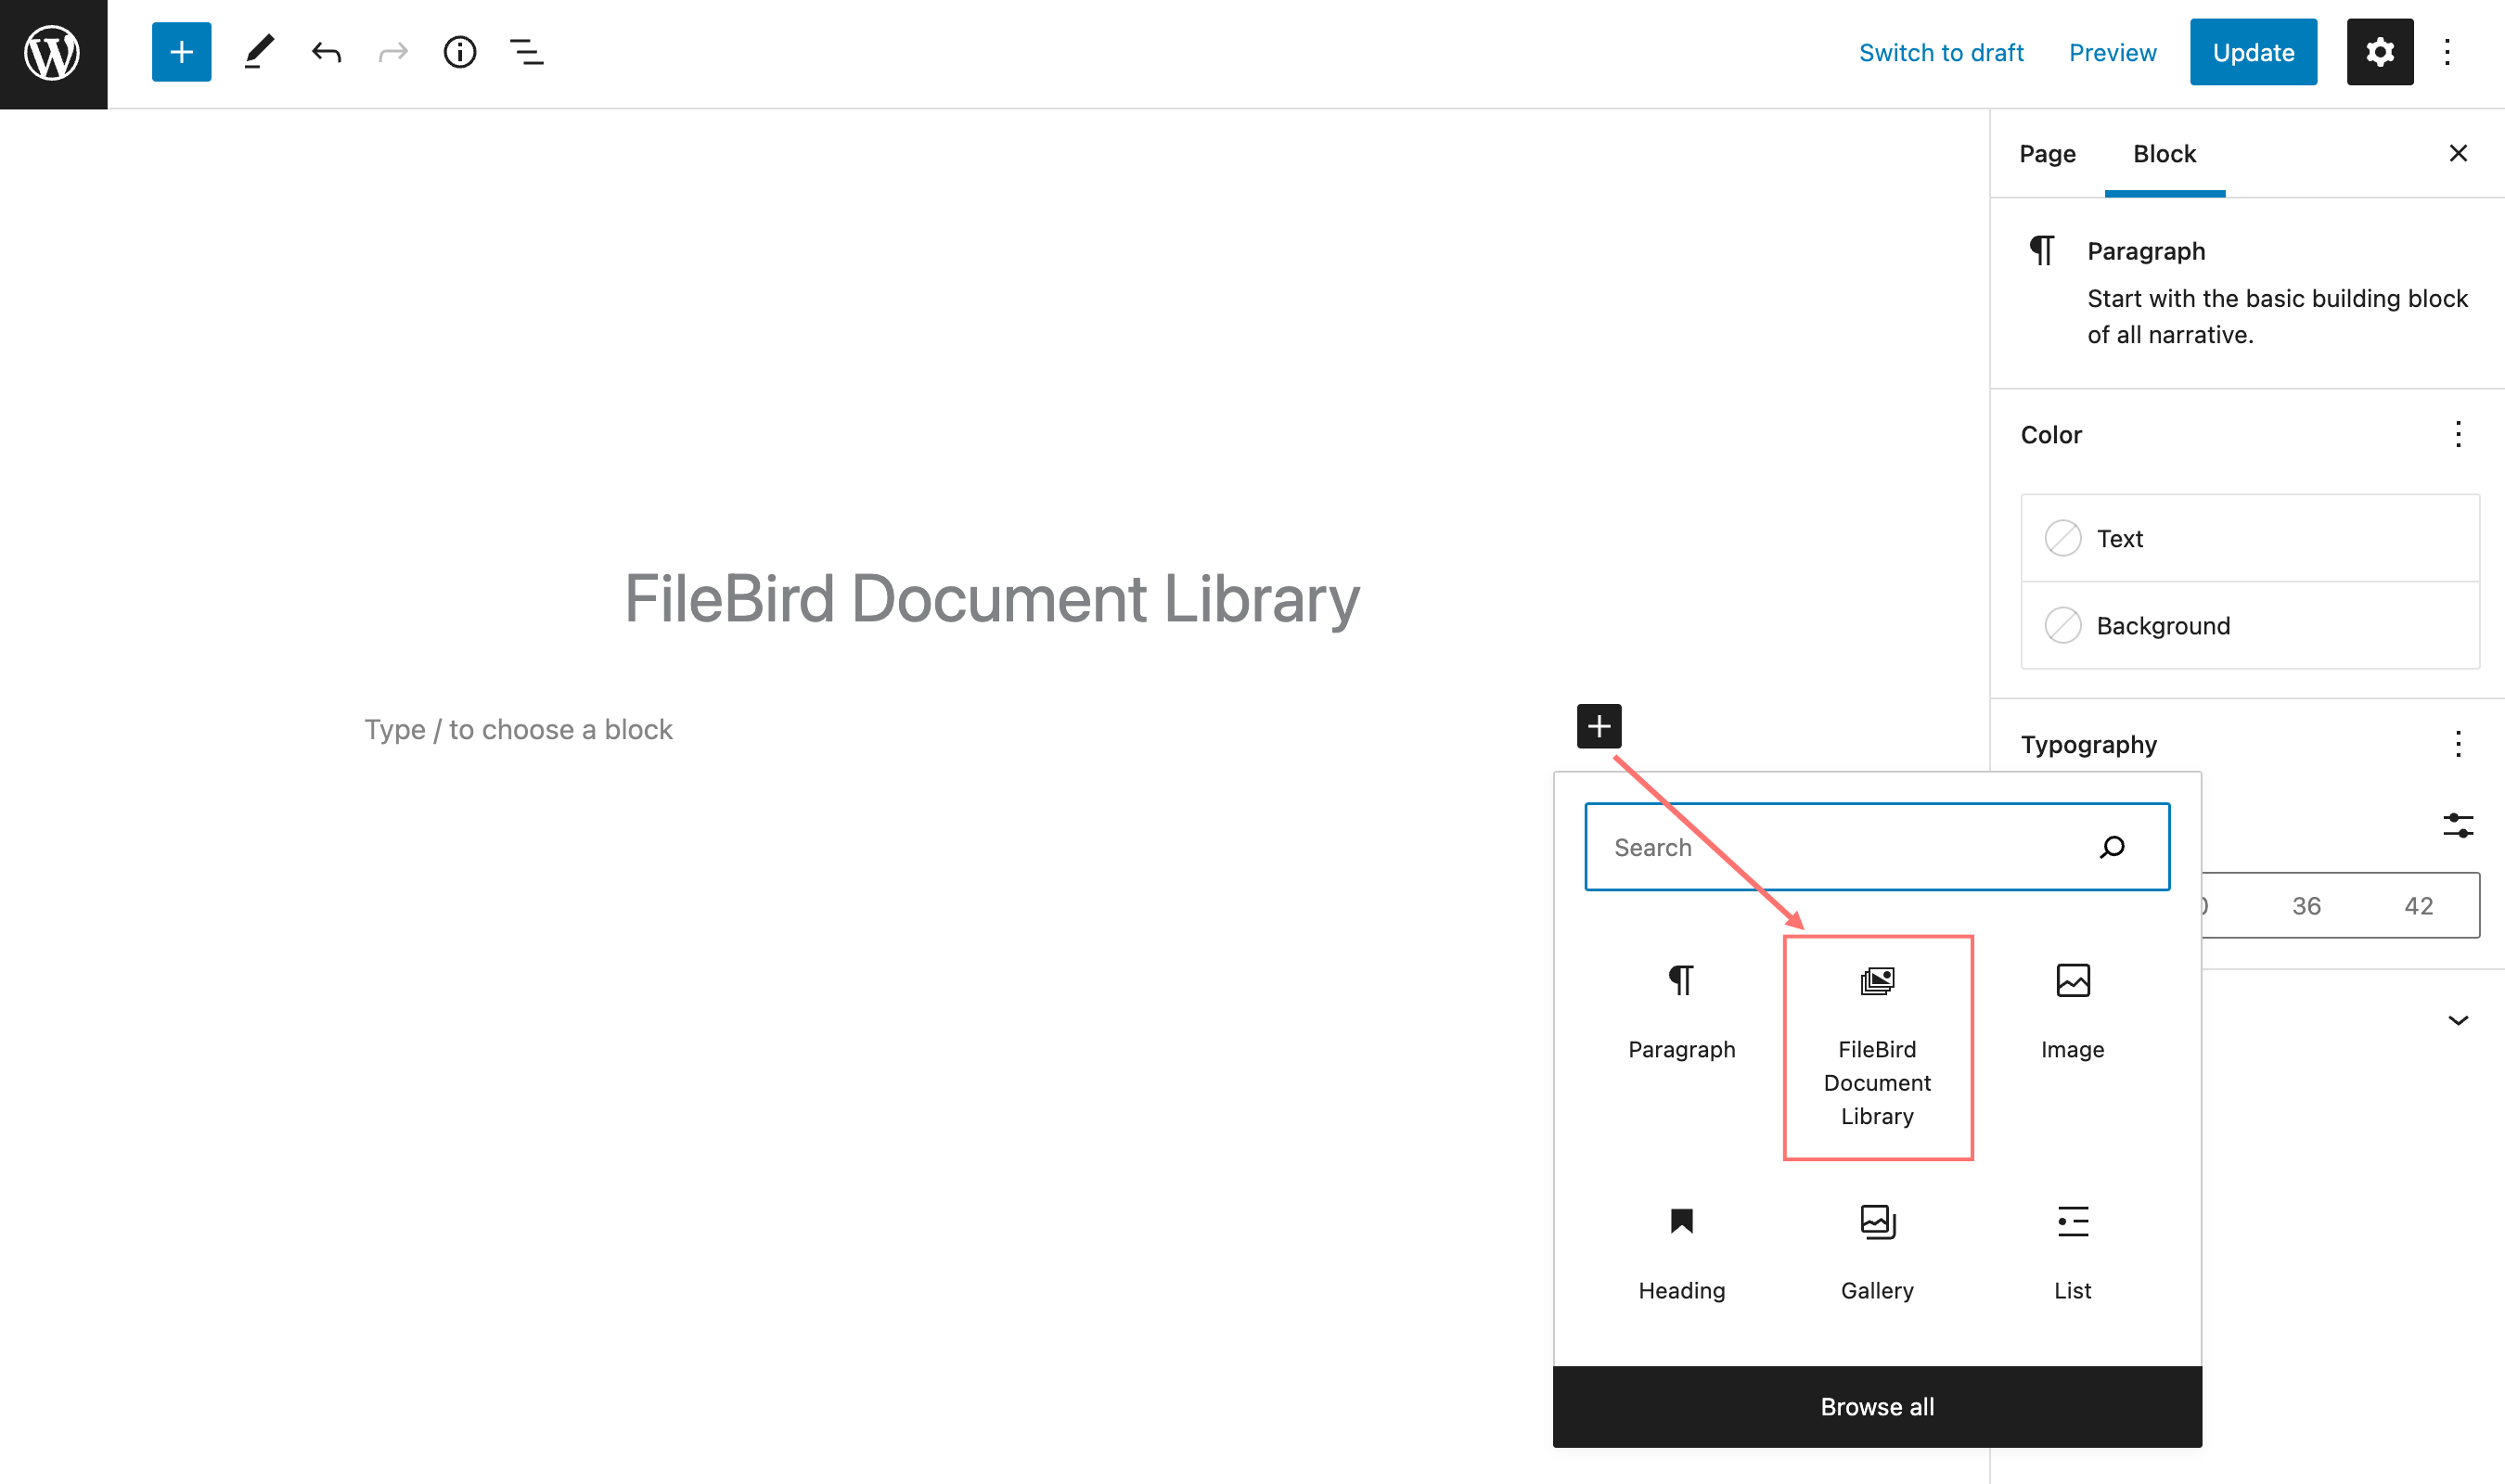
On the left settings panel, you can choose a single folder, alternatively, hold Ctrl or Shift to select multiple folders. There are various built-in options to help you display the library layout in the perfect design for your web styling. So feel free to play around with pagination, number of document items per page, sort type, sort by, and so on.
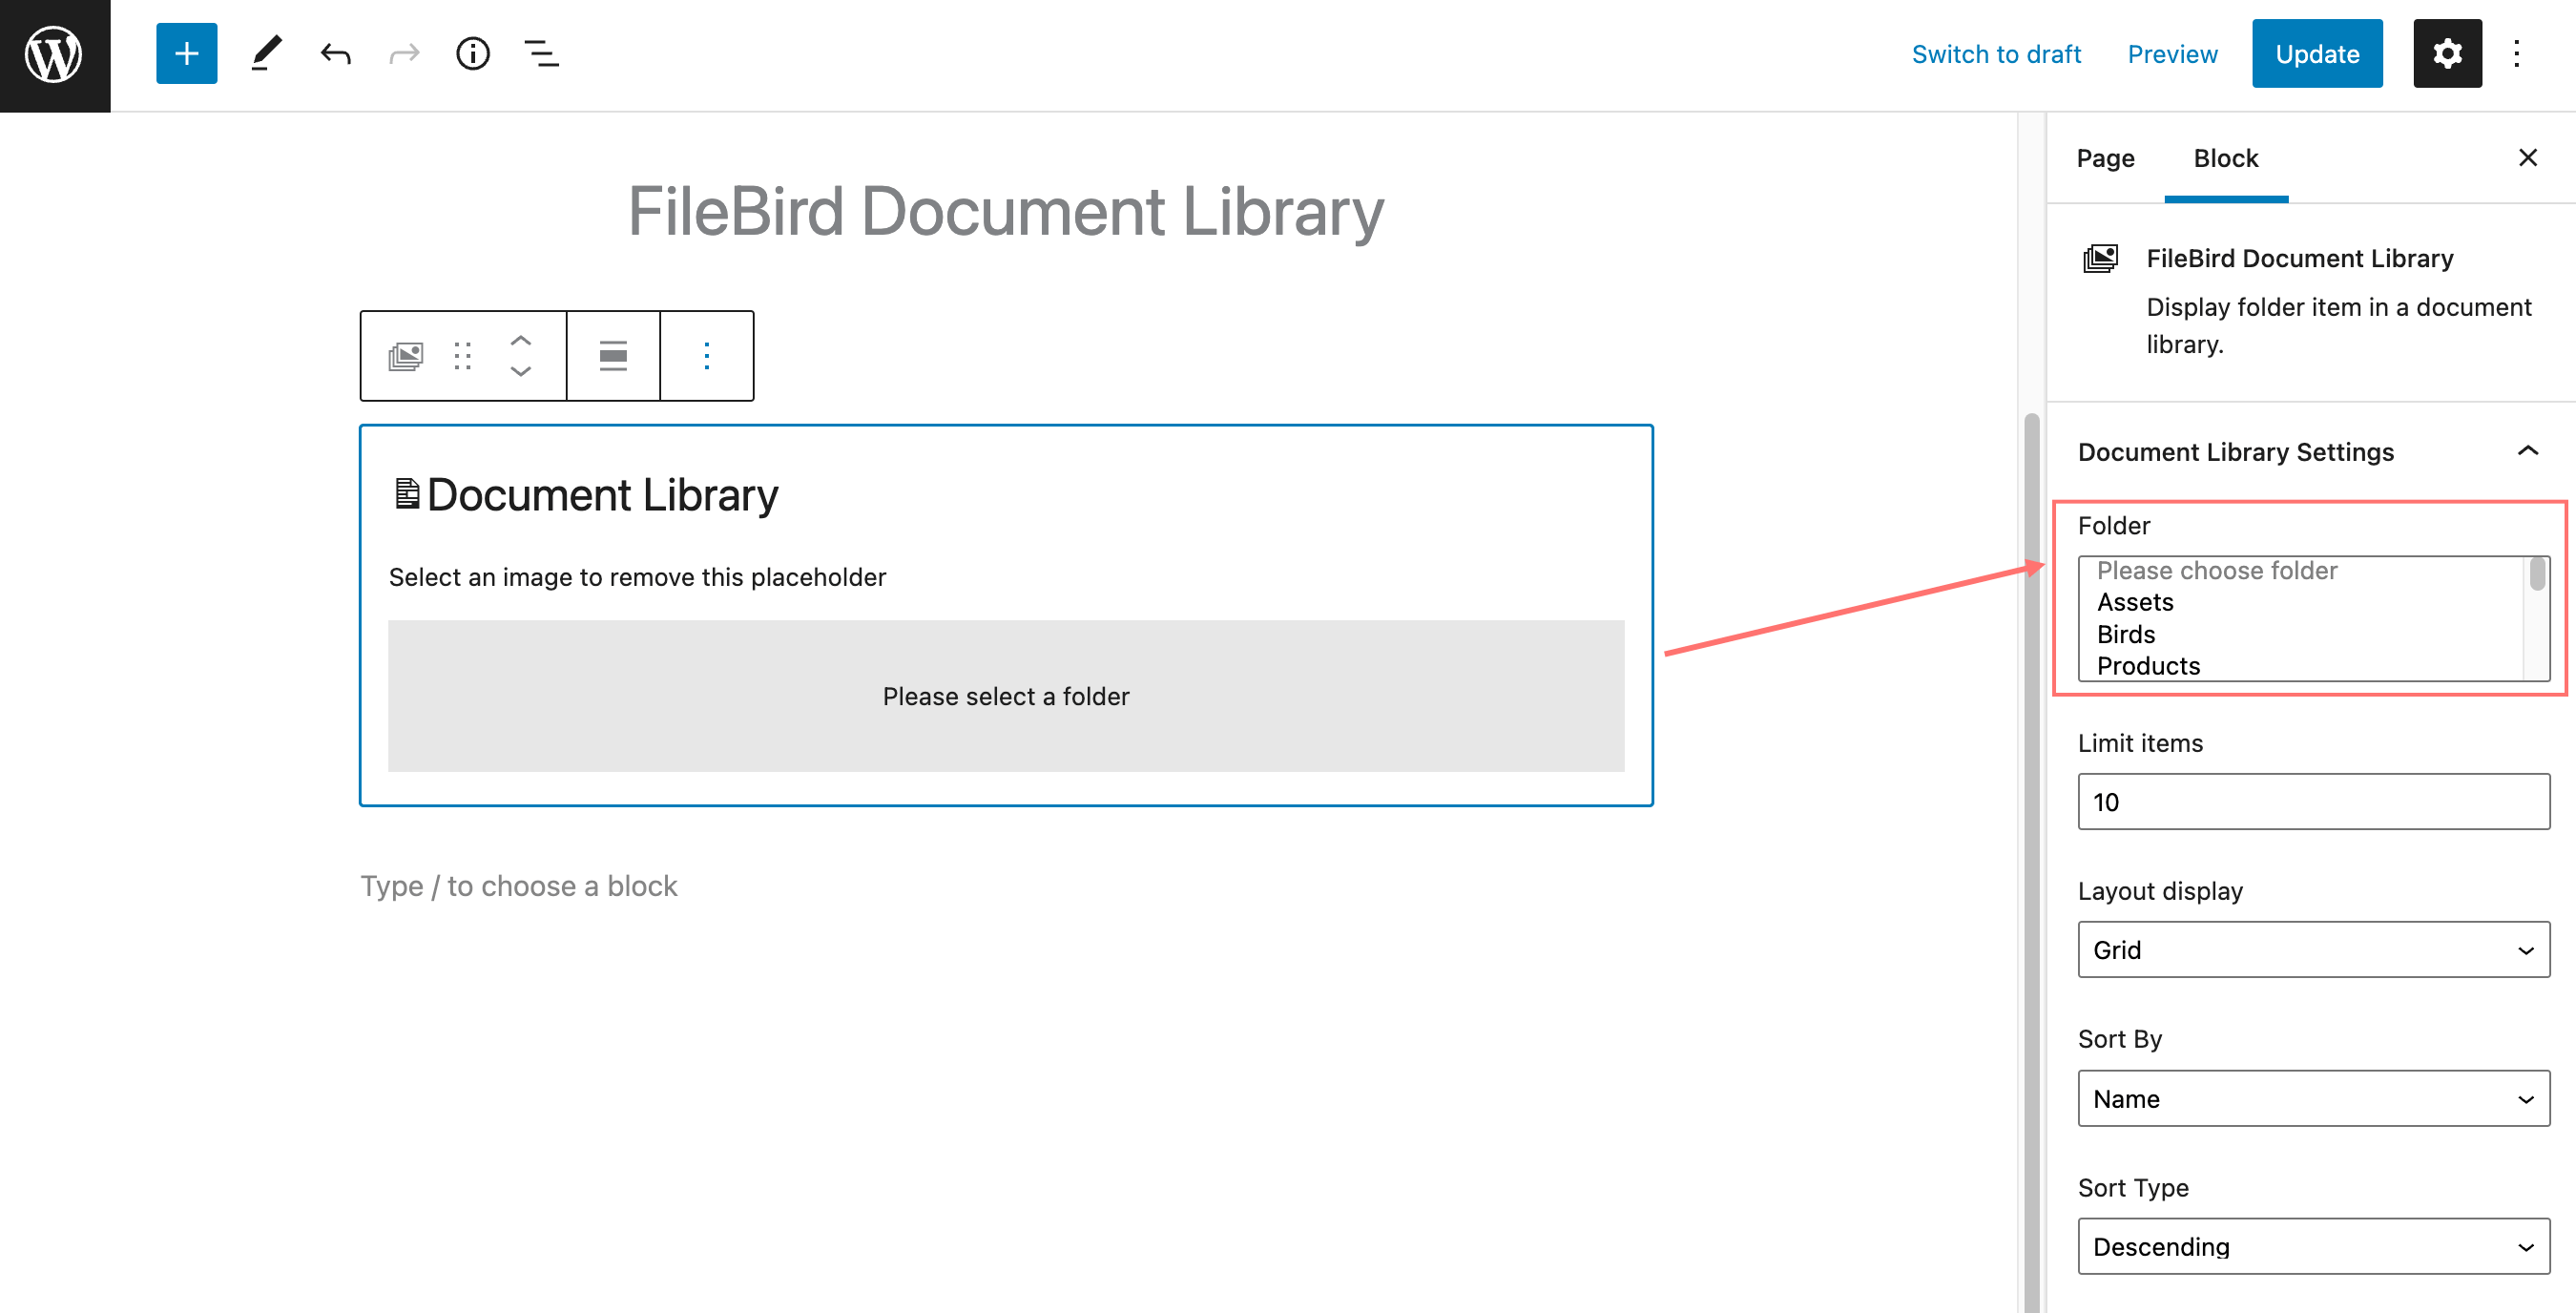
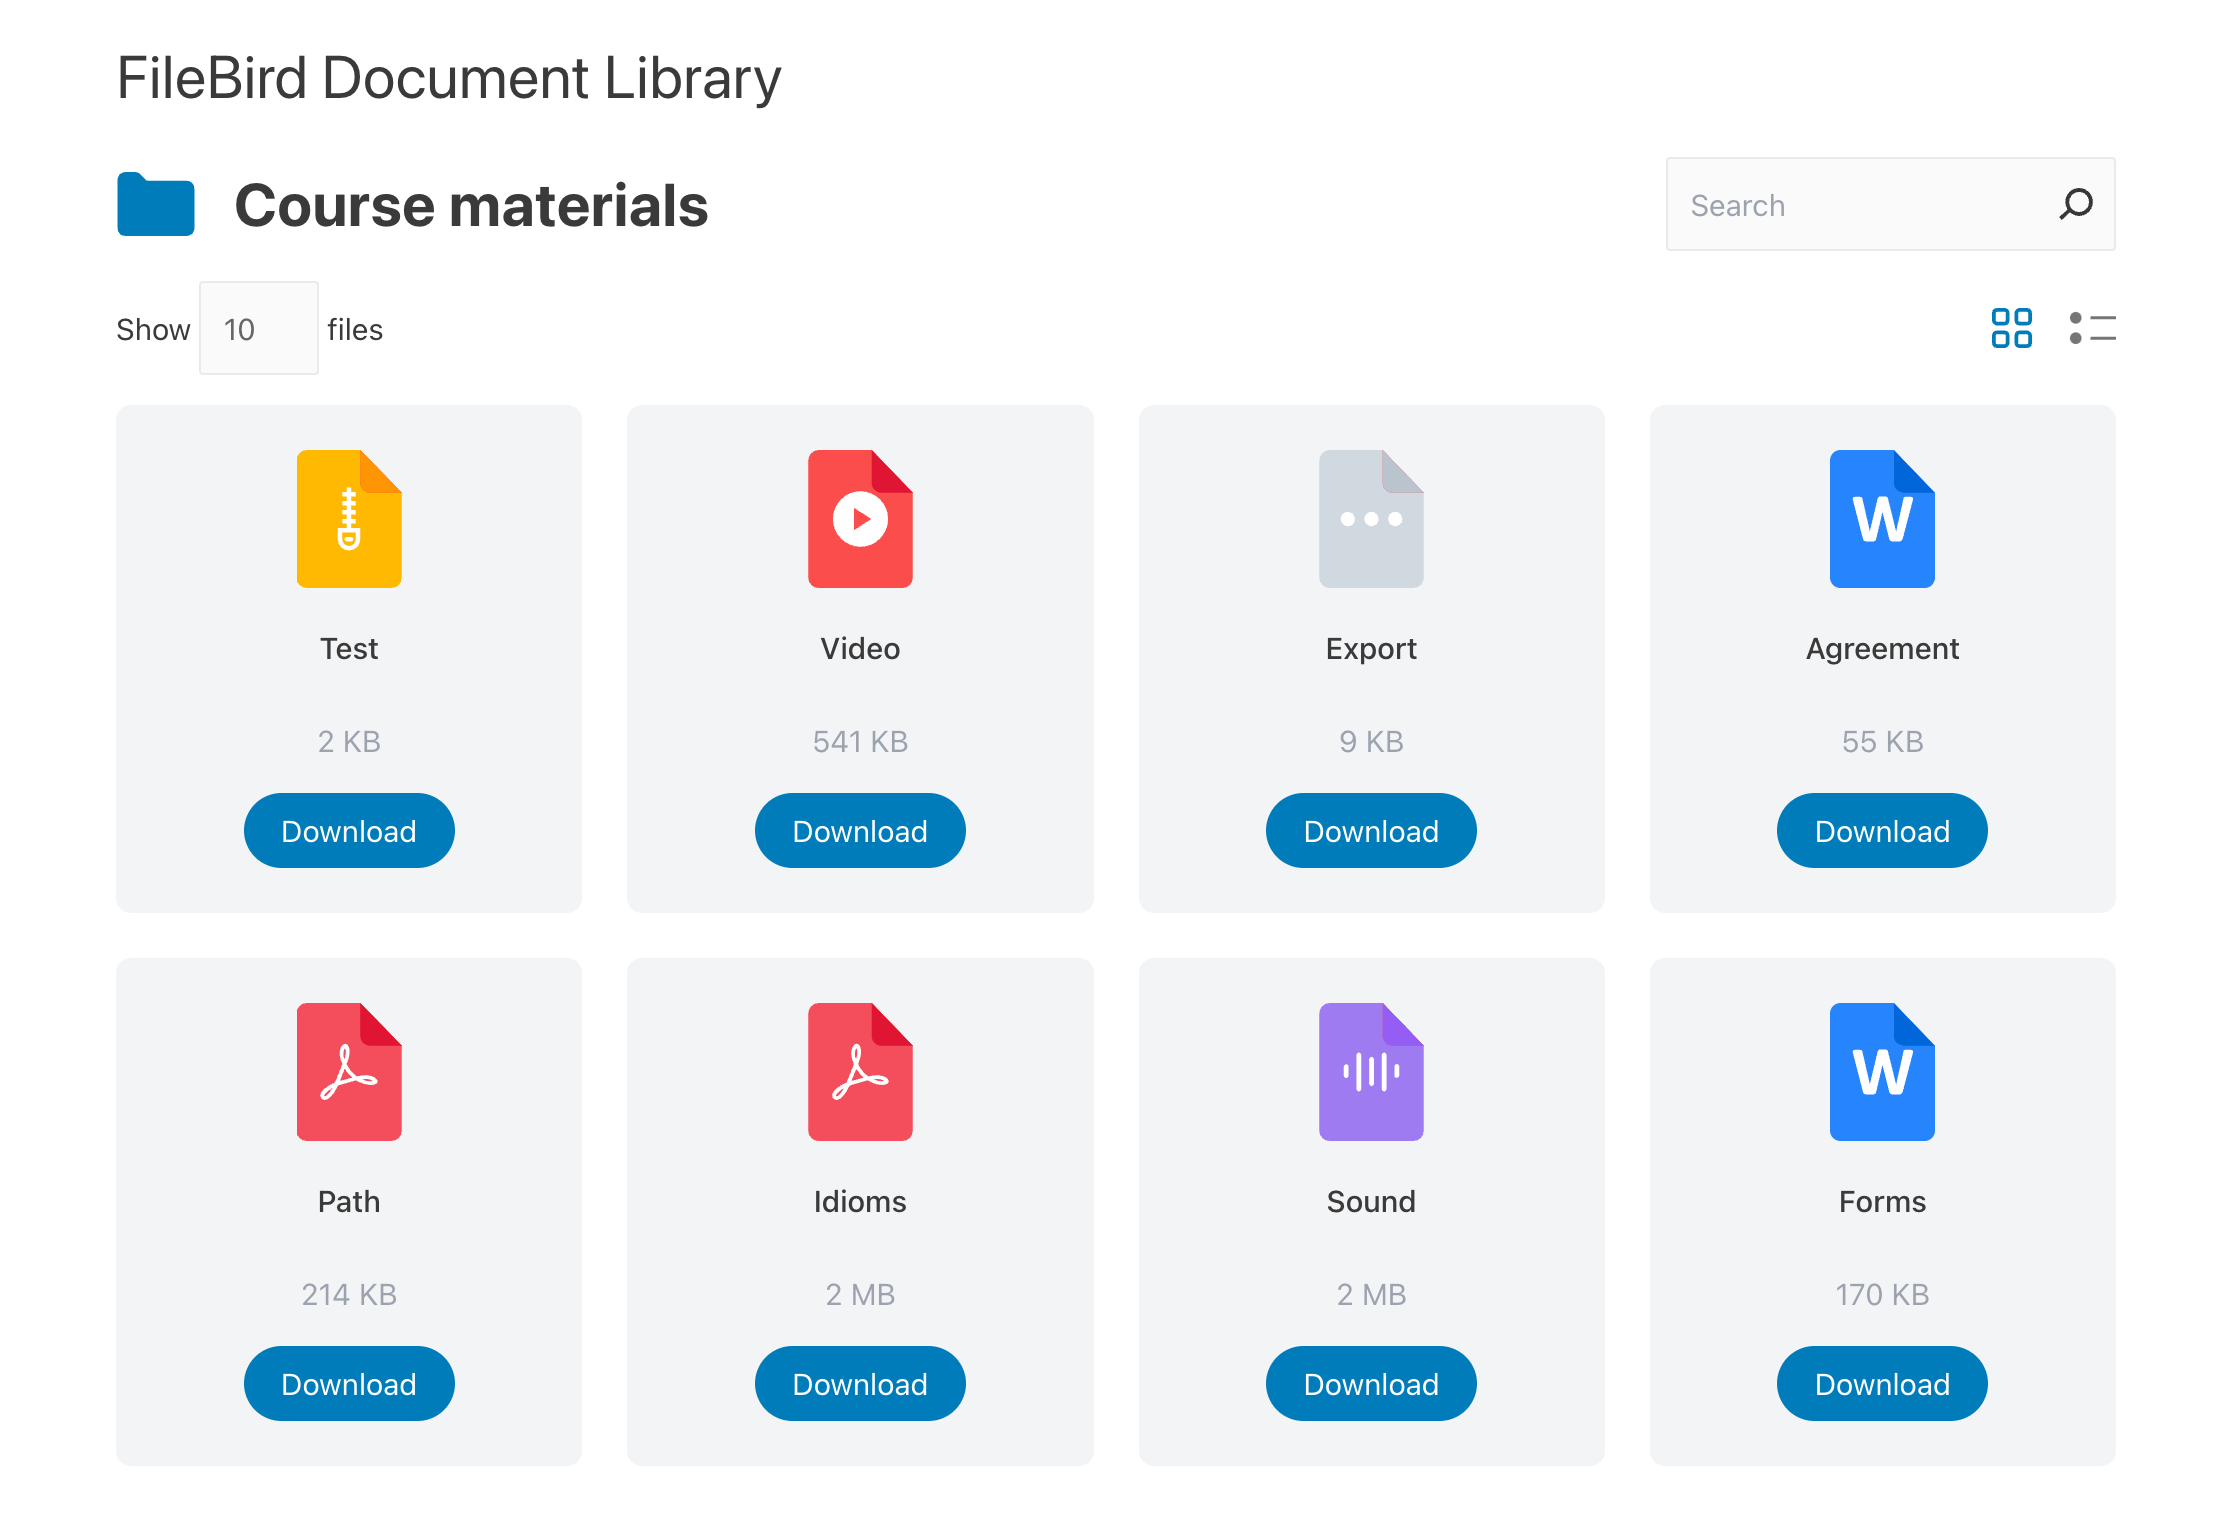
Those folders will then output the list of document files. If you choose to publish the library as a grid gallery, then the page looks like this on the front end.
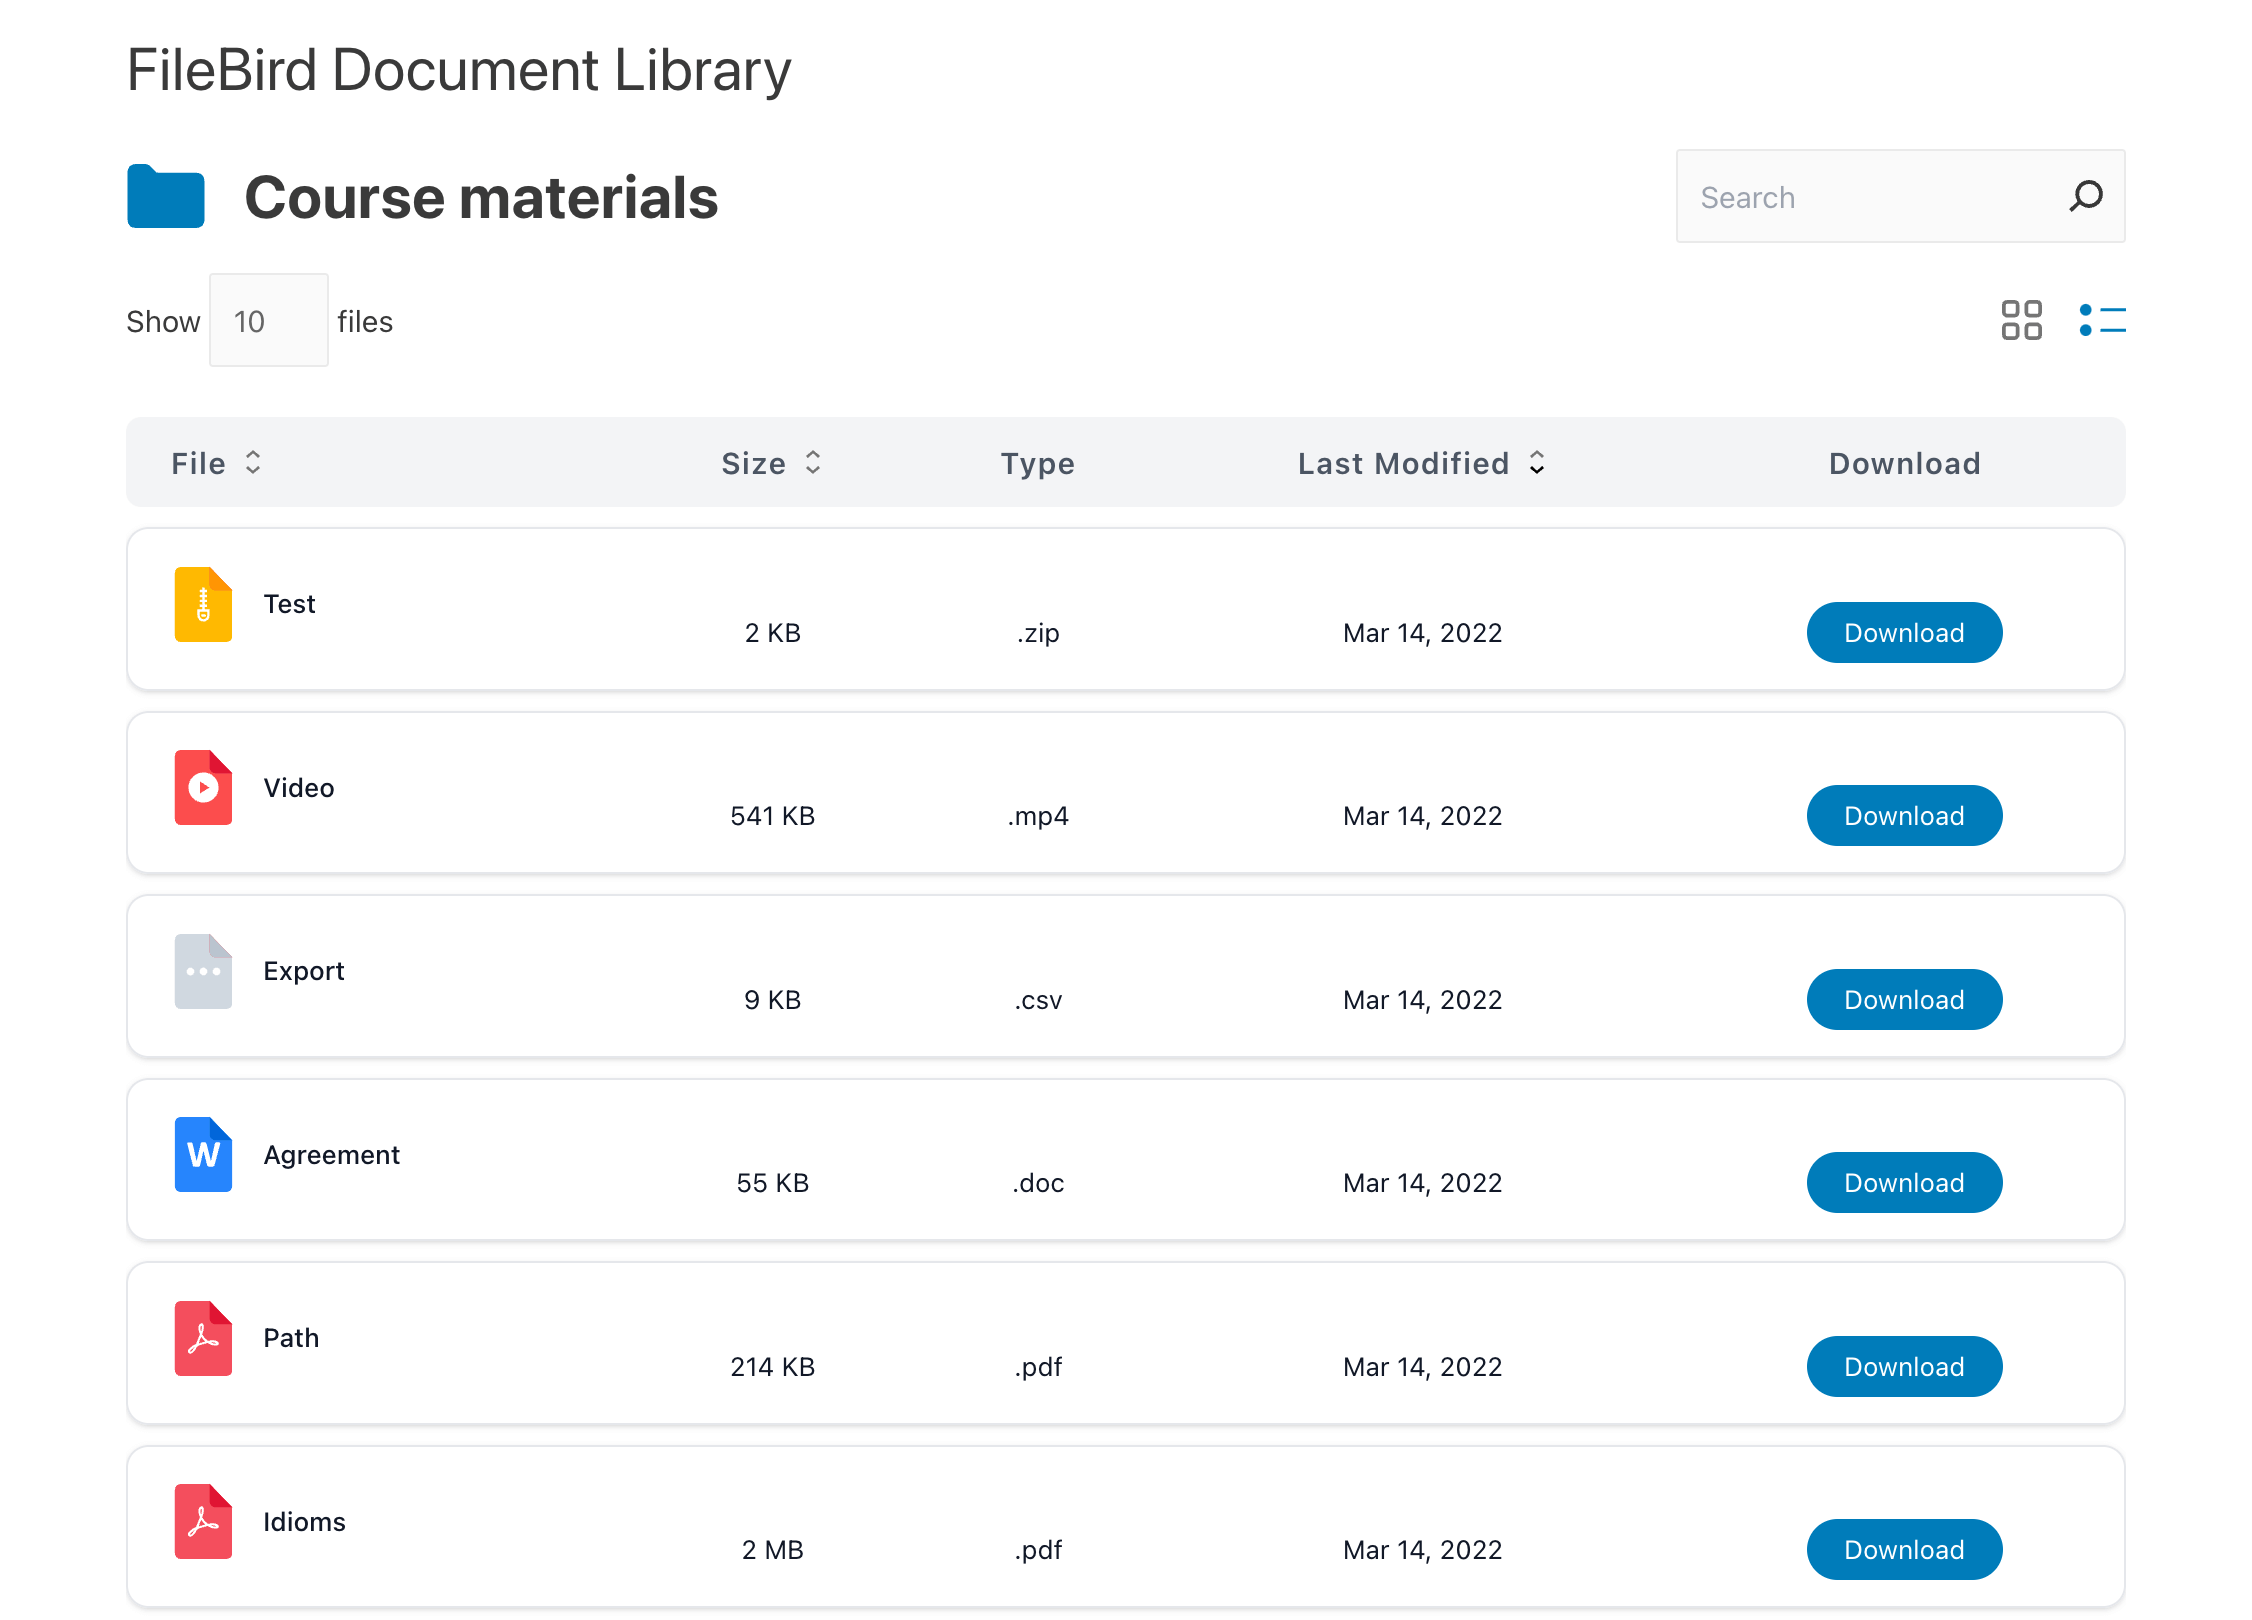
If you want to publish the library as a list table, then here’s how the end result of your published page looks.
Great, this little task is done now! I hope you’re able to achieve the look and feel you’ve always wanted for your document gallery. :)
Using the FileBird Document Library Shortcode Generator
If you’re not building with the Full Site Editor and prefer working with a page builder like Elementor, DIVI, or WPBakery, FileBird has you covered.
Instead of the Gutenberg block, you can use the built-in shortcode generator to create and configure your document library, then drop it anywhere that accepts a shortcode.
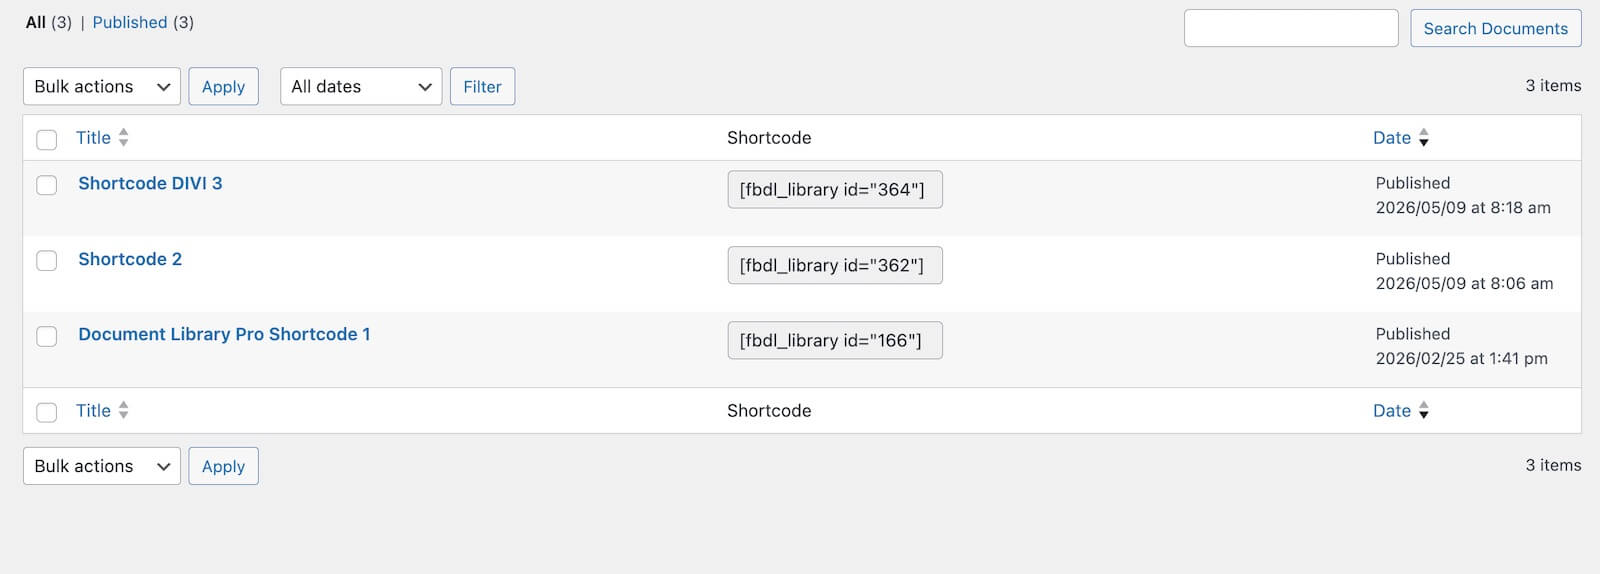
Step 1. Create a New Library
In your WordPress admin, go to FileBird Documents → Add New. This opens the shortcode editor.
It looks the same configuration panel you’d see in the Gutenberg block settings, but saved as a standalone shortcode you can reuse anywhere.
Step 2. Configure Your Library Options
This is where you tailor exactly how the library looks and behaves on the front end. Key settings to go through:
Library Type: Choose how your folder structure is presented. Selecting Display as hierarchical folders means the plugin will show the full parent-child folder tree, with subfolders automatically included under whichever root folder you select.
Folder: Pick the main folder whose files (and subfolders) you want to display.
Structure Display: Toggle on Show Tree to display the folder navigation panel on the left side of the library, so visitors can browse by folder. You can also enable Nested Folders and choose between Breadcrumb or AJAX Breadcrumb for navigation trails.
Search Scope: Set to Narrow (searches within the current folder only) or Extended (searches across all folders in the library).
Layout Display: Choose between Grid or List view depending on how you want the files presented.
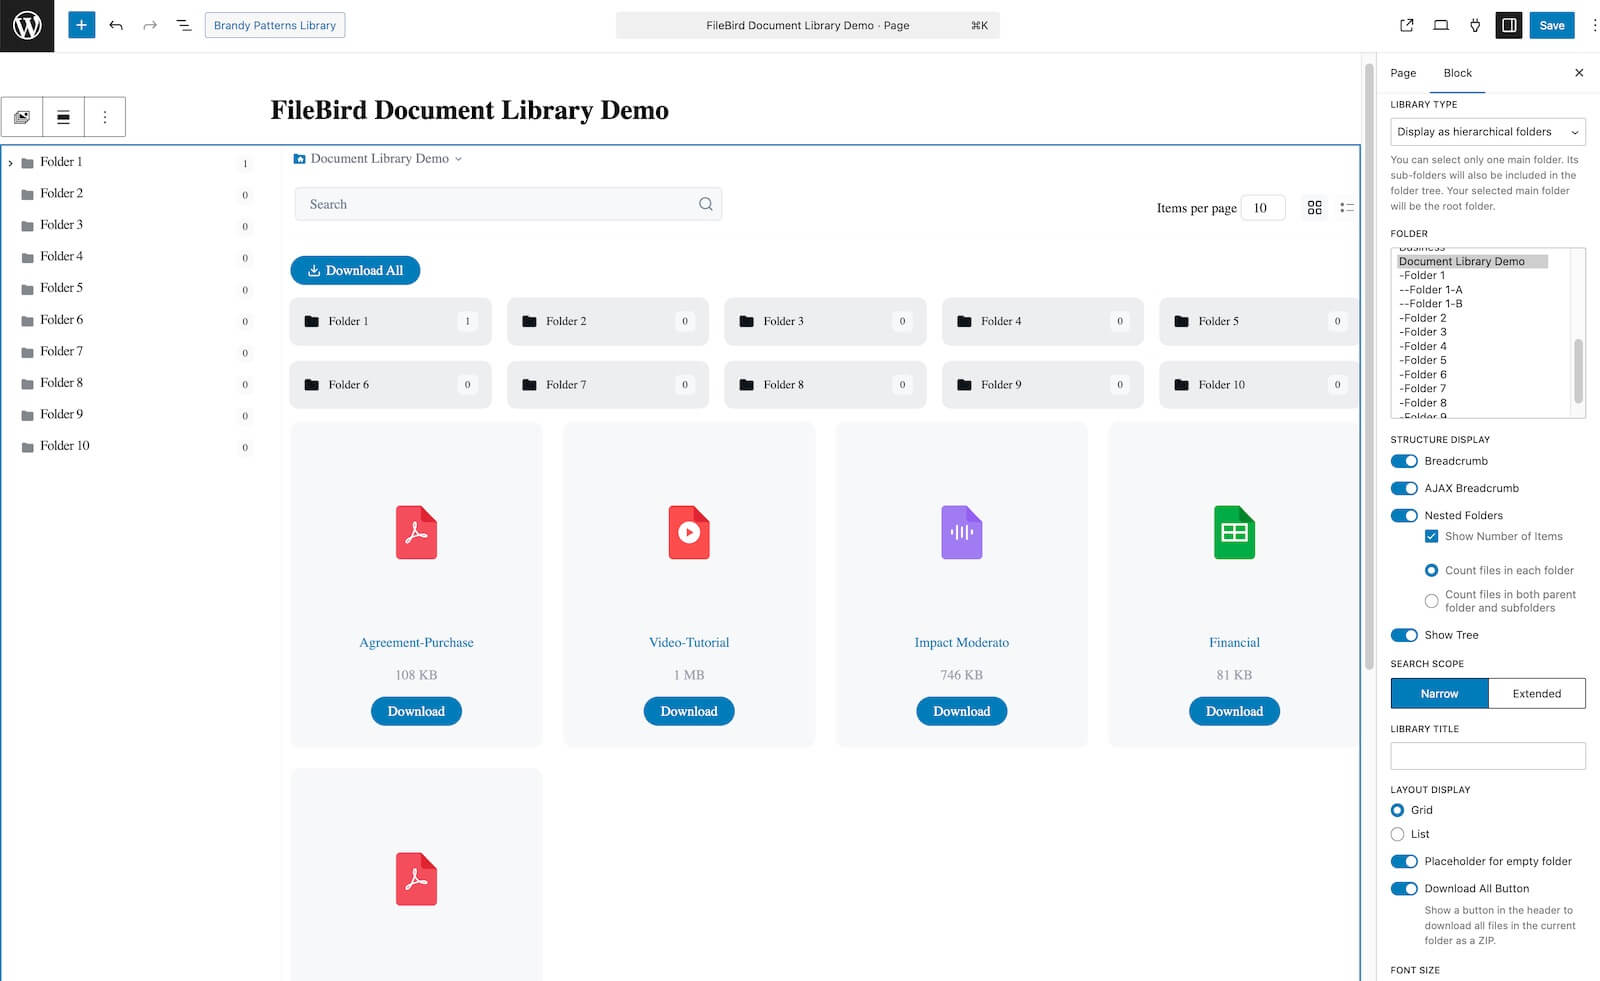
Download All Button: Toggle this on to show a prominent “Download All” button in the library header. When clicked, it packages all files in the current folder into a ZIP for visitors to download in one go! It’s a new feature released in 2026! Great for resource hubs or document collections.
Download Selected: Enable this to let visitors individually select files and download only what they need.
Step 3. Save and Copy the Shortcode
Once you’re happy with the settings, click Publish (or Save).
FileBird will generate a unique shortcode tied to this exact configuration. It looks like this:
[fbdl_library id="166"]Copy that shortcode.
Step 4. Embed It in Your Page Builder
Head to whichever page you want the library to appear on and paste the shortcode into a Shortcode element or widget. This works with Elementor, DIVI, WPBakery, Visual Composer, Flatsome, Oxygen Builder, and any other builder that supports shortcodes.
Save the page, and you have a fully configured document library: complete with folder tree, Download All button, and your chosen layout, all will render on the front end exactly as configured.
VIEW DEMO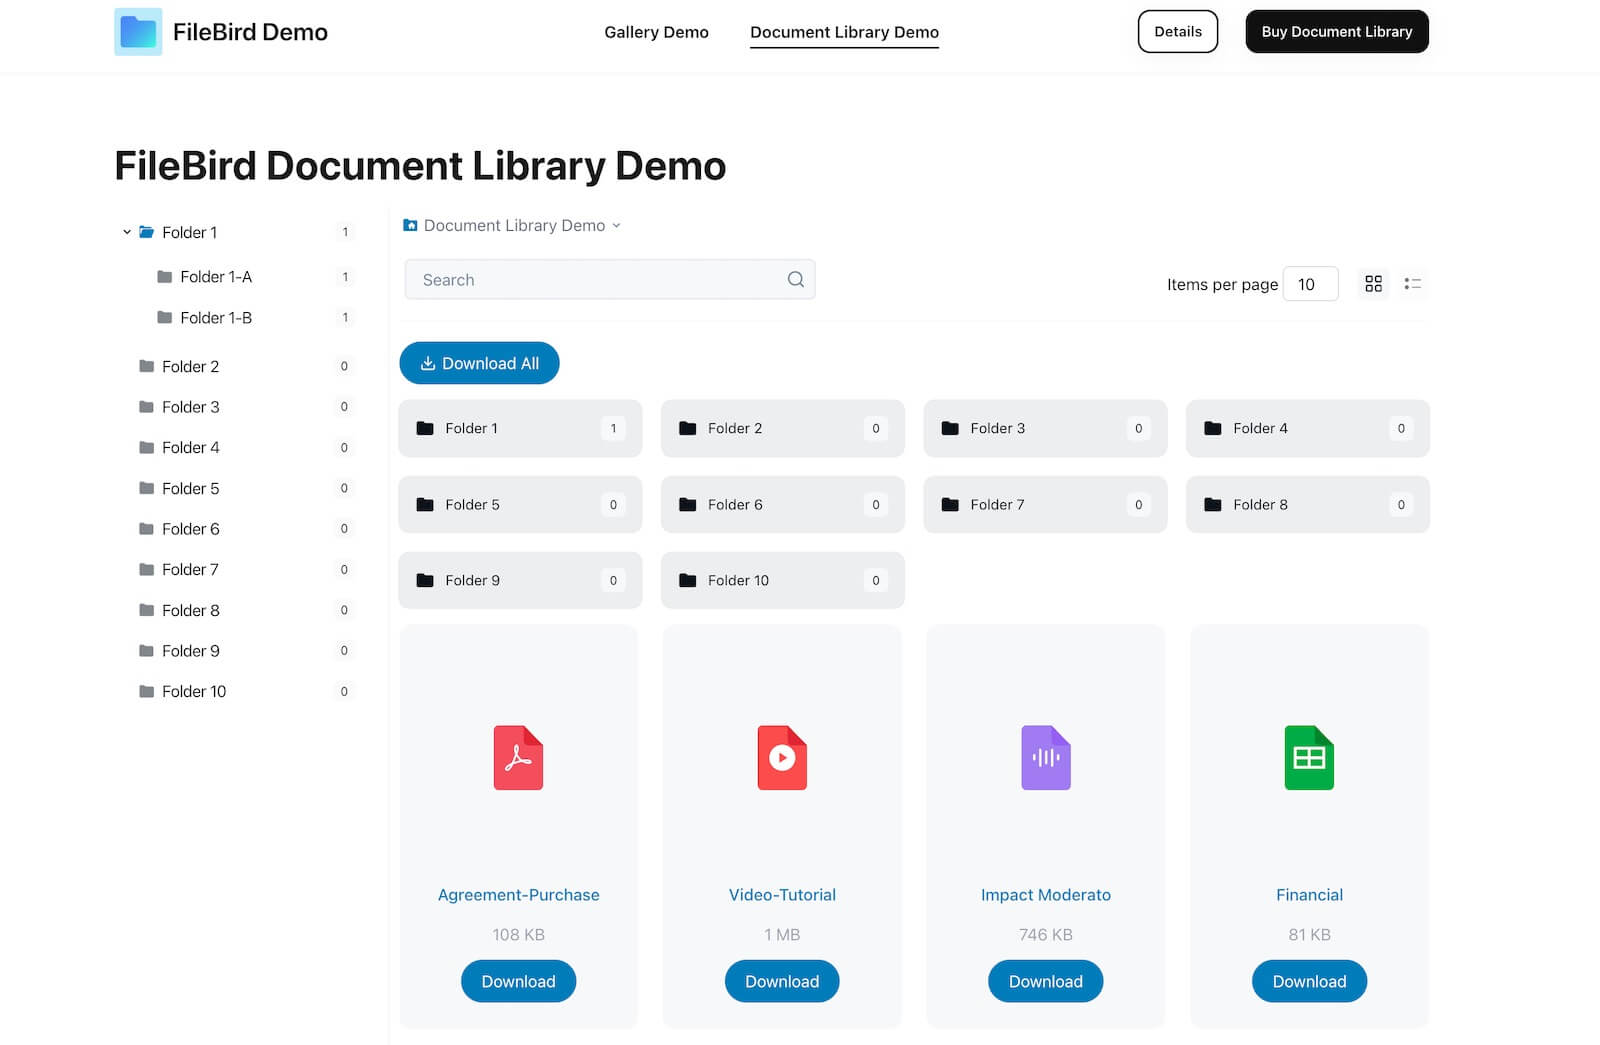
Tip: If you ever need to update the library’s settings, go back to Documents, find the entry, and edit it directly. The shortcode ID stays the same, so every page using it will automatically reflect the changes so you don’t need to re-paste anything.
Final Thoughts
This article aims to demonstrate all the steps you have to take to upload extra file types and create a nice PDF document gallery in WordPress with auto-generated thumbnails.
If you are already familiar with Gutenberg, setting up the Document Library with FileBird plugin will be a solid solution. And it is totally free!
DOWNLOAD DOCUMENT LIBRARY PLUGINShould you have a better solution, don’t hesitate to leave your opinion in the comment box or chatbox below.
We hope you can get it done in no time. Can’t wait to see your document gallery published!
