Do you want to host your static site on Kinsta? If you are looking for a step-by-step guide, keep reading this article. Here, we will show you the beginner’s guide to using Kinsta static site hosting to build your website!
When launching a website, you need two main things: a domain name and a web hosting subscription. A .com domain name would cost anywhere between $10 to $15 a year. On the other hand, web hosting will cost you upwards of $100 a year.
These will be expensive if you are a beginner with a tight budget. The best thing you can do in this situation is to use a free web hosting provider. Choosing one might be challenging since many free web hosting providers exist.
But if you have been in the web hosting industry for a while, you probably know about Kinsta – a managed WordPress hosting company. They have recently launched a new free web hosting plan for hosting your static files.
If you are looking for a step-by-step guide on how to use this, keep reading this article. Here, we will explain Kinsta’s static site hosting, why you should choose it, and how to use it.
First, let’s see what Kinsta static site hosting has to offer.
Kinsta Static Site Hosting: An Introduction
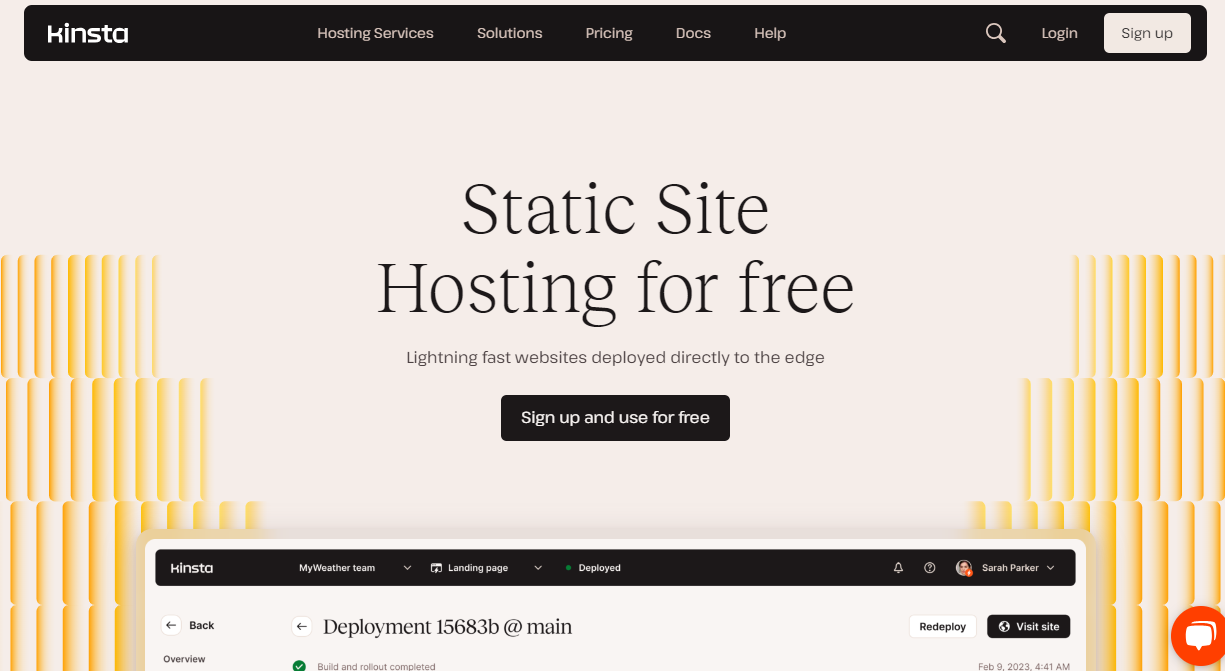
If you are looking for a reliable static site hosting platform, check out Kinsta’s static site hosting. It offers a free service by Kinsta to help small business owners and developers deploy their websites without spending a single penny.
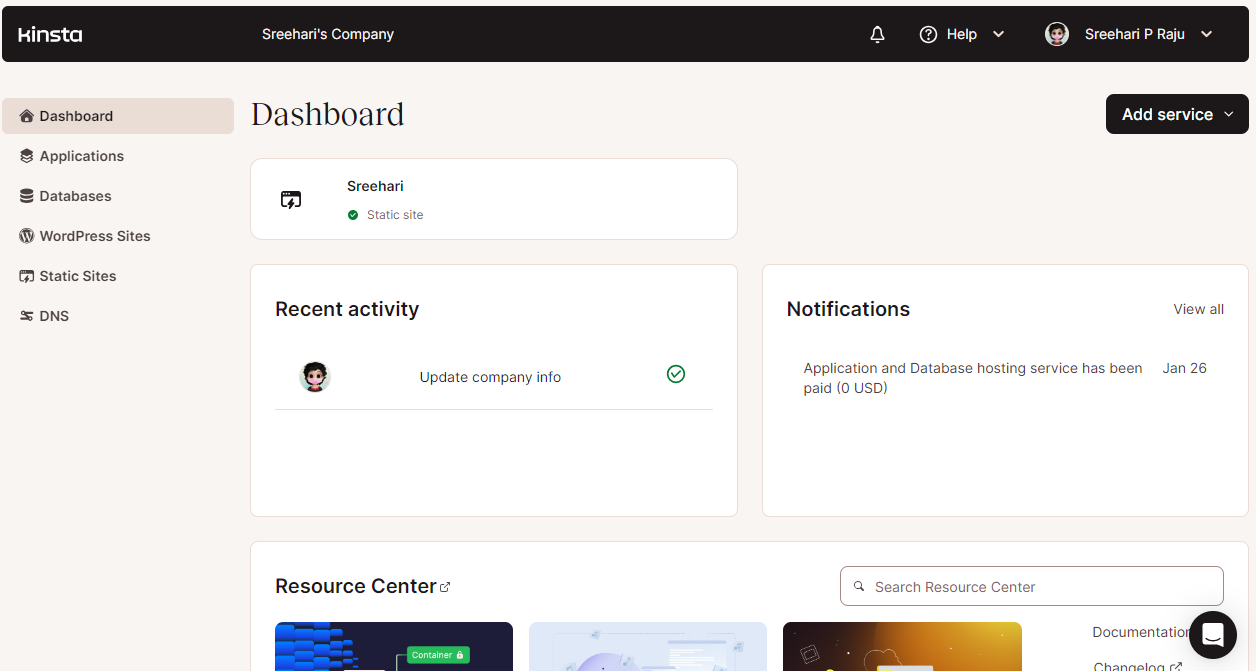
The platform comes with many features. The main thing you will love about Kinsta’s static site hosting is the easy-to-use dashboard. Unlike its competitors, Kinsta uses an elegant design for the user dashboard.
As we go deep into this tutorial, we will explain why Kinsta’s static site hosting is an ideal option for you.
Why You Should Choose Kinsta Static Site Hosting
These are the main reasons you choose Kinsta’s static site hosting:
- Free: The service is 100% free. There won’t be any hidden fees, and you will have total control over the created websites. However, the plan will have limitations, such as 600 build minutes.
- Integrates with multiple platforms: Kinsta’s static site hosting can be integrated with numerous platforms. By default, most people will prefer GitHub for the integration.
- Easy to use: The platform has an easy-to-use dashboard. You can easily create websites, deploy code, and repeat!
- Automated pull requests: Automated pull requests are an excellent feature Kinsta offers. This way, you can deploy every update without hassle.
- Multiple websites: With a static hosting plan, you can create up to 100 websites. Each website will have 1GB of storage.
- Excellent customer support: Customer support of Kinsta is excellent. You can contact the team if you need help with anything. They will usually get back to you within a business day.
Now that you know why Kinsta is best for hosting static sites, let’s move to the article’s core, where we will show you how to host your static site on Kinsta.
Without any further ado, let’s get into the tutorial.
How to Host Your Static Site on Kinsta
First, go to Kinsta. On the top bar, you can see the static site hosting option.
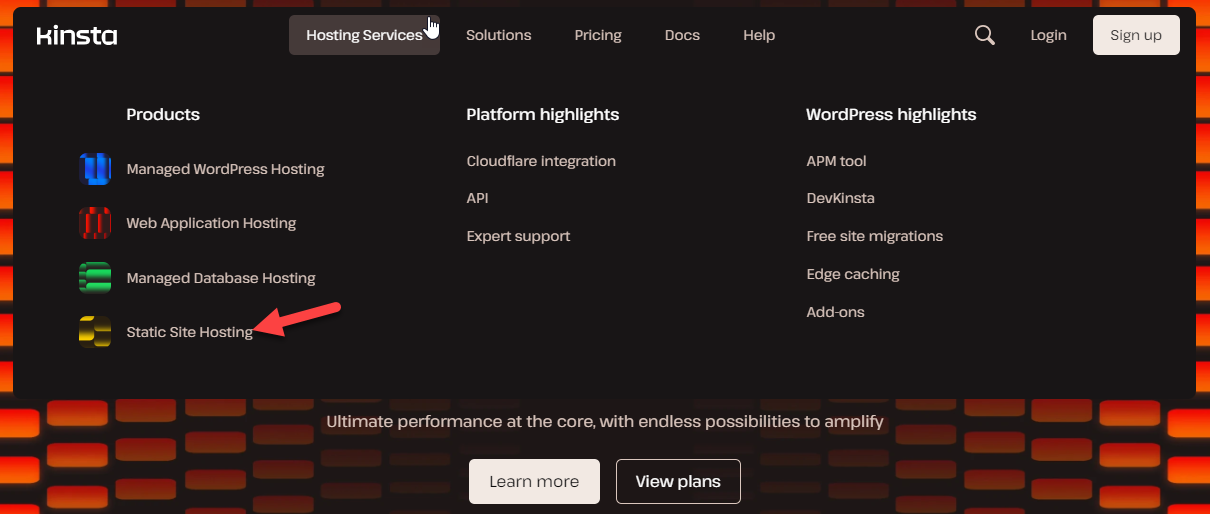
On that page, you will see the signup option.
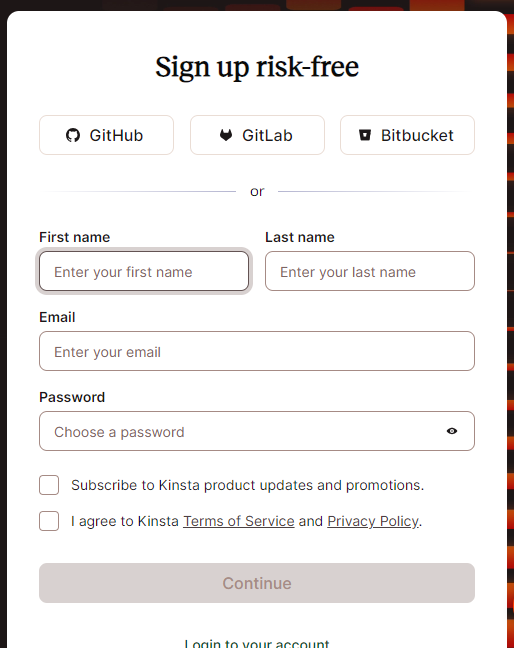
1. Complete the Account Registration

You can complete the account registration by entering your
- Name
- Password
2. Log In to The Account
Once you have completed the registration, log in to your account.
On the left-hand side, you can see the static site option.
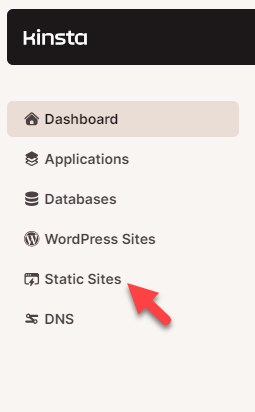
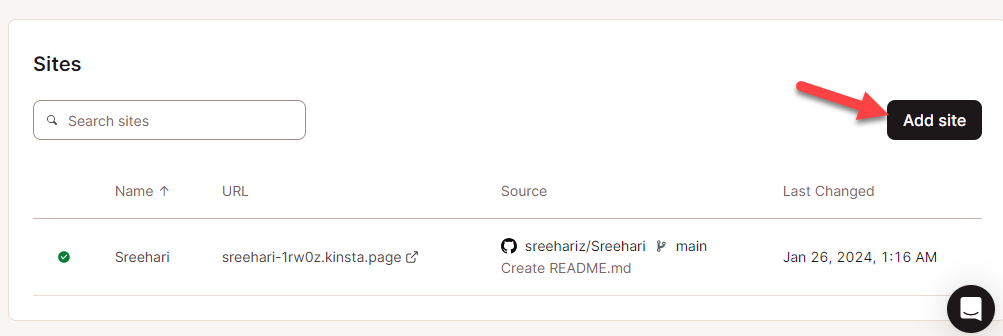
3. Create a New Website
To add a new site, click on Add New.
The platform supports integration with
- GitHub
- Bitbucket
- GitLab
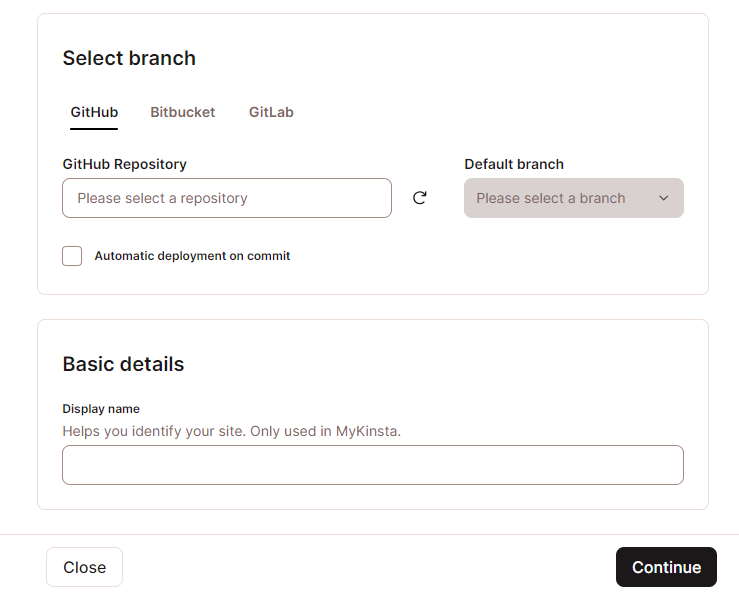
4. Complete the Repository Integration
If you’re using the tool for the first time, you must complete the repository integration.
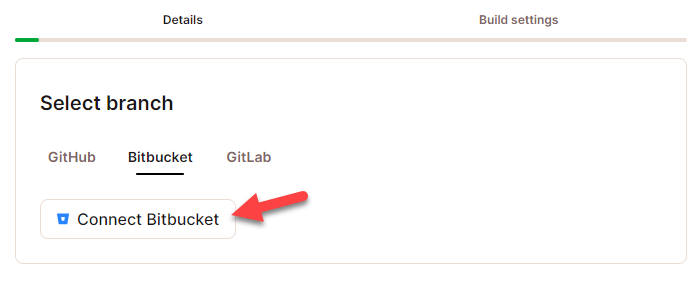
You only need to enter your account credentials and allow the permissions. Next, create a repository on GitHub.
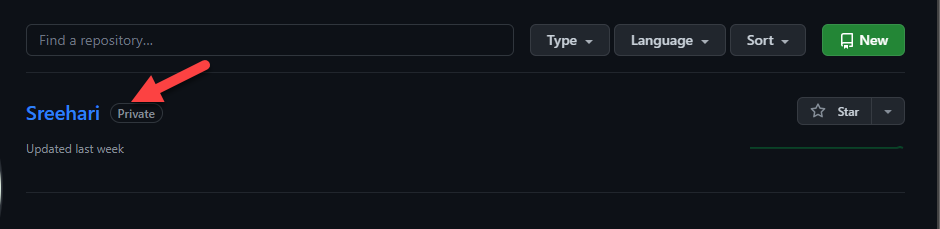
You can set the repository’s privacy to public or private. If you have enabled public, all the repository files and folders will be accessible to everyone. If you set it as private, only the files will be accessible.
Once you have done that, you will see every repository in the Kinsta dashboard. Choose a repository you need to use for the website.
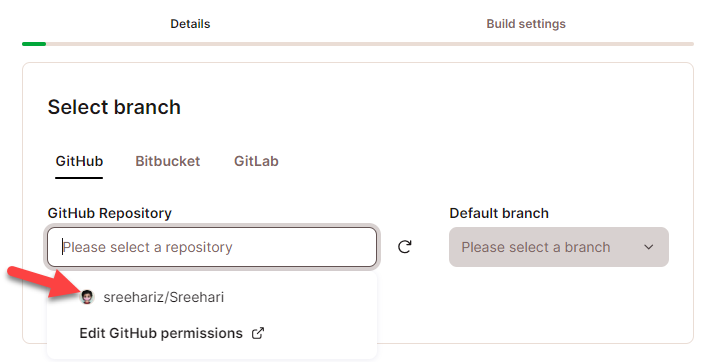
Once you have selected a repository, choose a branch.
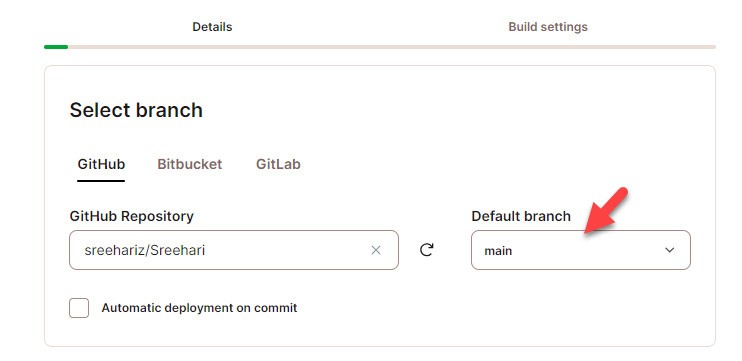
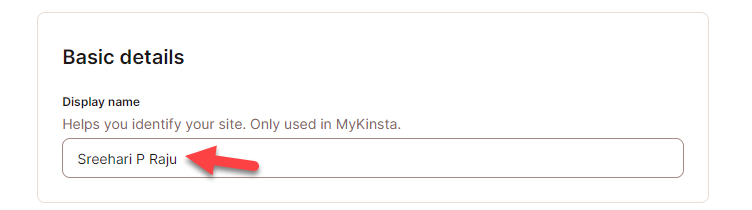
You should also enable automatic deployment on commit. The next step is to enter a display name for the website.
In the next stage, you can do the advanced configurations.
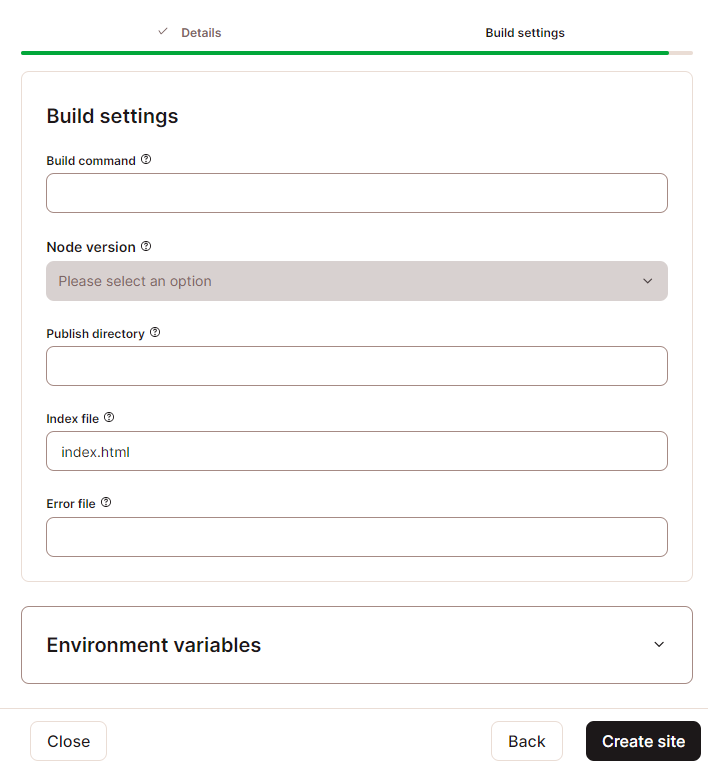
There, you will see options like:
- Build command
- Node version
- Publish directory
- Index file
- Error file
Leaving it blank would work. However, you can customize the options if you are an advanced user.
Once you have completed the settings, you can build the website.
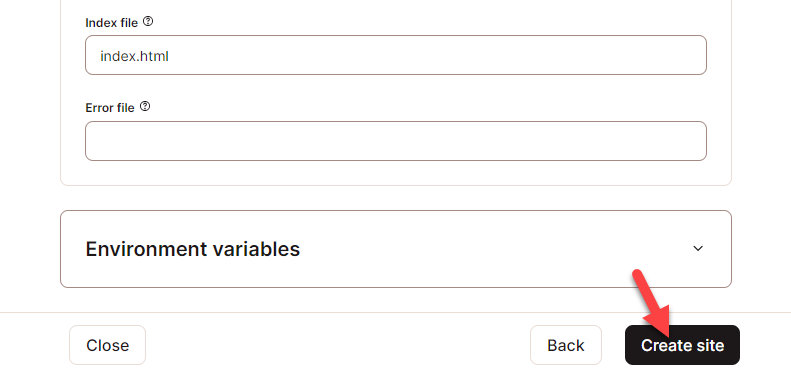
The website will be created instantly. However, the deployment process could take some time.
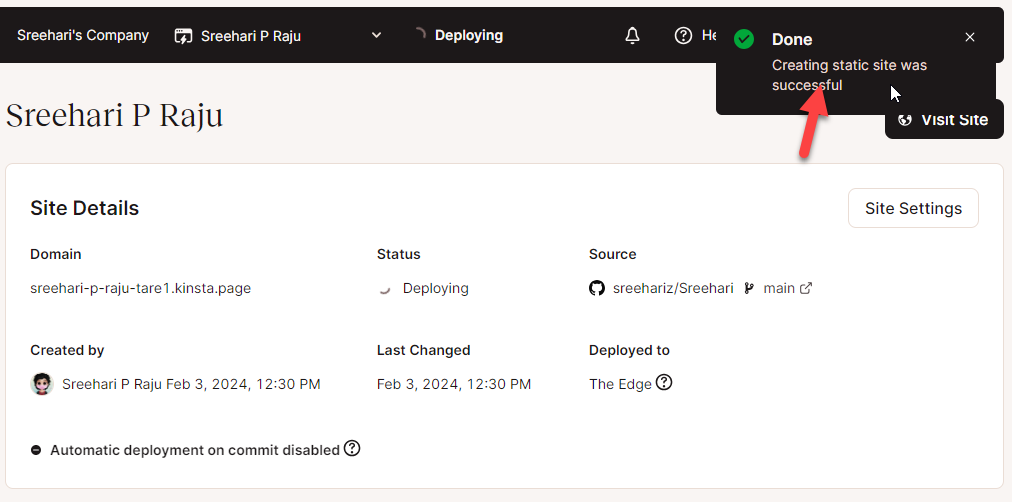
Once the deployment is completed, you can start modifying the website. If you check the left-hand side, you will see four options.
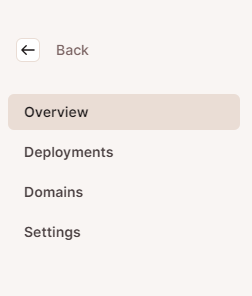
- Overview: Here, you will see general information such as the website’s URL, status, last modified date, etc.
- Deployments: You can see the deployment history here.
- Domains: Kinsta will give you a free subdomain by default. If you need to add a third-party domain, go to this section.
- Settings: To modify the site settings, you can use this option.
That’s it! So far, you have created a hosting for your website. Next, it is time to add content to the branch.
How to Add Website Files to Kinsta’s Static Site Hosting
As you can see above, uploading the files directly to the Kinsta dashboard is impossible.
Hence, all the codes and website files must be uploaded to the synced GitHub repository. This section will show how to add website files to Kinsta’s static file hosting.
The first thing you need to do is create an index.html file on your repository.
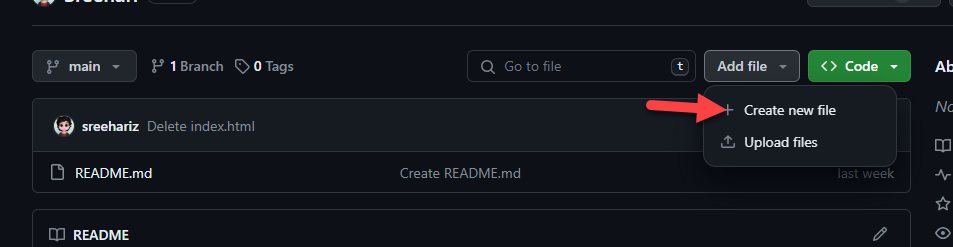
Name your file and commit the changes.

You can commit the changes to the main branch.
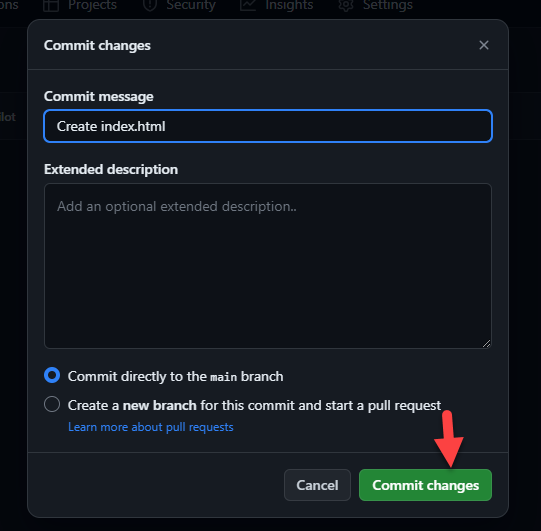
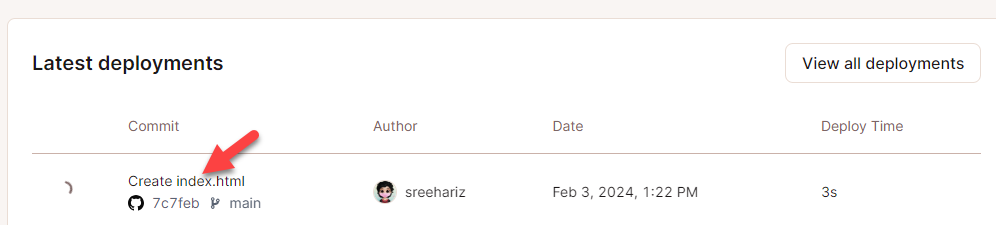
Since we have enabled the automatic commit on changes, Kinsta will automatically update the website with the modifications.
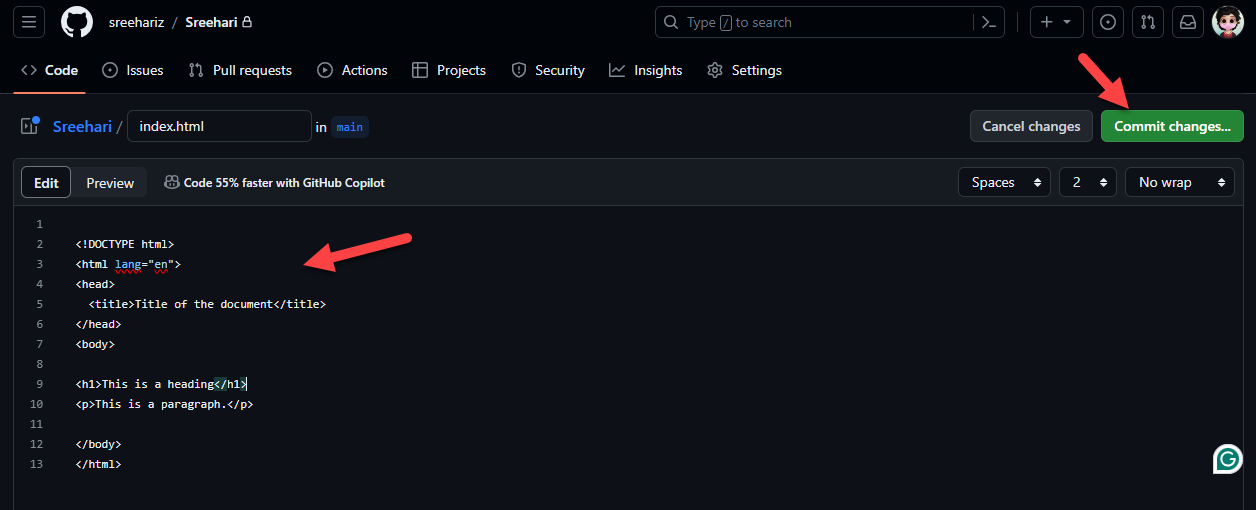
Once you have completed creating the index.html file, you must add content. You can add a sample code such as:
<!DOCTYPE html>
<html lang="en">
<head>
 <title>Title of the document</title>
</head>
<body>

<h1>This is a heading</h1>
<p>This is a paragraph.</p>

</body>
</html>
To edit the file, click the pencil icon.

Inside the editor, paste the code and commit changes.
Within a few seconds, Kinsta will update the website with the modifications. Once every update is completed, you can click the visit site button at the top right-hand side of the Kinsta dashboard.

On a new tab, the site will be opened.

This is how you can host your static site on Kinsta.
Bonus: Best Static Site Hosting Providers
Besides Kinsta, you can see several static site hosting providers on the market. This section will list some of the best static site hosting providers you should try. They are:
- Netlify
- Firebase
- Amazon A3
- Google Cloud
- Cloudflare Pages
- Digital Ocean
- Heroku
All of these hosting providers offer unique features. You can choose one according to your requirements and preferences.
Conclusion
Are you going to host a static website? Static site hosting will be ideal if you host an HTML website for your blog or a portfolio website. If you check the current hosting market, most hosting providers will cost you between $10 and $20 monthly.
In this case, Kinsta’s static site hosting will help you run a website with minimal effort. As you can see in this article, there won’t be any complex configurations. Once you have completed the integration with any code repositories like GitHub, GitLab, or Bitbucket, you can pull requests without issues.
You also have the option to create up to 100 websites per account, so you can create and manage as many websites as you need.
Would you start using Kinsta to host your website?
Let us know in the comments.