Email is one of the main ways we communicate and stay connected in the digital age.
However, juggling multiple email accounts can be tedious and overwhelming. This is where email forwarding comes in handy.
Email forwarding allows you to direct emails from one account to another. It’s an easy way to manage and organize your inboxes better. You don’t have to log in to different accounts to check your messages. Forwarding emails also ensures you don’t miss out on any important updates if you don’t check a particular account often.
In this article, we’ll look at email forwarding, why it matters, and how you can set it up efficiently.
What Is Email Forwarding?
Email forwarding is a feature that redirects emails from one email address to another. For instance, you can forward emails from your old work address to your current personal email.
When someone sends an email to your old address, it will automatically be forwarded to the email account you want. You don’t need to log in to the previous account to check messages.
The original email is sent to the intended recipient’s address as usual. But a copy of it is also delivered to the forwarded email address. The sender doesn’t know the email ID has changed.
Email forwarding prevents you from missing crucial messages and having to monitor multiple inboxes. It’s like an auto-responder silently passing emails to your preferred account. To know more about this, check sites like ForwardMX.
Why Email Forwarding Matters
Email forwarding is an invaluable tool that offers many benefits:
- Avoid Missing Important Messages
One of the biggest perks of email forwarding is ensuring you never miss critical messages. If you switch jobs or email addresses, old contacts may continue emailing your previous ID, not knowing it’s outdated.
Without forwarding, you’d have to constantly monitor multiple inboxes to avoid missing a vital email from years ago. Forwarding lets you channel emails from all accounts into one, so nothing falls through the cracks.
- Use One Primary Inbox
Having to log into separate email accounts to check messages is highly inefficient. With email forwarding, your entire communication stream gets consolidated into a single universal inbox.
This creates one centralized hub for managing both incoming and outgoing emails seamlessly. You no longer have to waste time toggling between different accounts and can handle all emails from one spot.
- Switch Email Addresses Smoothly
When you change jobs or personal email IDs, forwarding helps avoid any transition hiccups. Your contacts don’t have to be notified or updated about your new email address.
Even if they message your old address, the emails automatically land in your current inbox, thanks to seamless forwarding. This prevents communication gaps during email switches.
- Keep Your Address Private
Certain online services require you to provide an email ID during signup. Forwarding enables you to share a secondary throwaway email address while keeping your main inbox address private.
Any emails from the secondary ID will be redirected to your primary account. This gives you an added layer of privacy and security.
- Organize Your Inbox Better
Email forwarding allows you to route messages from various addresses into specific folders or labels in your main inbox. This automatically separates emails based on the sender account, making your mailbox more organized. To complement this process and further optimize your inbox, consider integrating tailored email templates. These templates not only refine the appearance and categorization of forwarded messages but also reinforce professionalism in your correspondence. By incorporating tailored email templates, you can align your communication style with your organizational needs, ultimately refining your email management strategy. Gergely Nagy from Chamaileon notes, “It depends on which email client you are using. When you forward an email, they add certain elements to the HTML code or strip them out. Also, different email clients render emails in different ways.
You can set up dedicated tabs for personal emails, work emails, newsletters, etc., without manually sorting each time. This integration not only saves time but also elevates the efficiency and customization of your email workflow, facilitating a seamless experience in organizing your inbox better.
- Access Emails Anywhere
Web-based email services allow you to access your inbox from any device or location. So when you forward emails to such an account, you can check messages on the go via phone or the web without needing the computer where they were originally delivered.
This makes sure you stay connected with a unified email, no matter where you are. Forwarding provides flexibility to manage communication remotely.
How To Set Up Email Forwarding
The exact steps to set up email forwarding vary across email providers and domains. But the general process remains the same. Here’s how to get started:
- Choose Forwarding Addresses
First, decide which email addresses you want to forward from and to. Generally, you’ll forward from old accounts to a current primary inbox.
- Log In To Old Accounts
Go to the login page of the accounts you want to forward emails from. Access each email provider or domain control panel.
- Look For Forwarding Settings
Find the ‘Forwarding’ or ‘Email Forwarding’ option under Settings or Account. This lets you enter the email address to forward messages to.
- Enter Recipient Address
Type in the complete email address you want emails forwarded to from this account. Ensure the recipient inbox can receive forwarded emails.
- Pick Forwarding Options
Choose if you want to forward all emails or just certain ones based on sender, subject, etc. Opt to delete forwarded emails from the original inbox or keep them.
- Save Changes
Double-check if you entered the correct forwarding email ID. Then, save changes to activate email forwarding for this account.
- Test It Out
Send a test email from another account to your old address. Check if it shows up in the forwarded inbox. Repeat steps for other accounts.
How To Choose The Best Forwarding Option
When setting up email forwarding, you’ll find a few options to customize how emails are redirected. Selecting the right settings ensures seamless forwarding aligned with your specific needs.
- Forward All Emails
This option forwards every email in your old inbox to the new email address. It is an effective way to consolidate all your messages into one account if you want to remain updated about all incoming communication.
The ‘Forward All’ setting is ideal when closing an email account, but you don’t want to lose touch with people who may still message you there. It acts as a catch-all forwarding rule without filtering emails.

- Forward Based On Sender/Subject
This configurable setting lets you forward emails selectively based on your specified criteria. For instance, you can choose to forward only emails from certain domains or with a defined subject line.
Setting up sender/subject-based forwarding is useful when you want to transfer only specific, important messages to your primary inbox. It prevents your new account from getting cluttered up with irrelevant forwarded emails.
You can add multiple criteria like email addresses, domains, subject keywords, etc., to automate forwarding only the emails you need.
- Delete Forwarded Emails
This option forwards the email and then deletes it from the initial inbox. This prevents duplicate copies and keeps your old email accounts organized.
However, deleting forwarded emails means you no longer have a backup in the original account. You won’t be able to access the messages if something happens to the recipient inbox.
The ‘Delete’ setting is best used for email accounts you plan on deactivating after forwarding important emails to another address.
- Keep Forwarded Emails
This forwards a copy of the email but retains the original in the first inbox as well. It serves as a backup and gives you access to both accounts’ messages.
However, having duplicate forwarded emails in multiple inboxes can clutter your mailbox and make organization difficult.
The ‘Keep’ option works best if you want to monitor incoming emails in the old account for a while before shutting it down completely.
- Mark As Read/Unread
This lets you choose if the forwarded emails should have a ‘Read or ‘Unread’ status in the new inbox.
Marking emails as ‘Unread’ when forwarding ensures you see and read messages that may have gotten lost in the old account.
But if you don’t want a flood of a hundred ‘Unread’ emails suddenly popping up in your primary inbox, you can mark them as ‘Read’ when forwarding.
- Include Attachments
By default, most forwarding services send attachments and the email body text. Disabling this option forwards only the main email content without any files.
You may want to exclude attachments if forwarding many emails with large file sizes. This also prevents forwarded emails from eating up storage space in your new inbox.
Make sure the recipient account has enough space if you want to include attachments with forwarded emails for reference.
- Forward And Reply All
This nifty setting lets you directly respond to forwarded emails from the new inbox itself. When you hit ‘Reply,’ it goes to the original sender rather than the forwarded address.
The ‘Forward and Reply All’ feature allows you to carry conversations from the new account without repeatedly logging into the old email.
However, some email providers may not fully support this two-way forwarding, so test it out before activating.
Evaluate your specific needs and inbox usage to pick the ideal forwarding options. The right settings can ensure smooth, automated redirection of messages to your new email account.
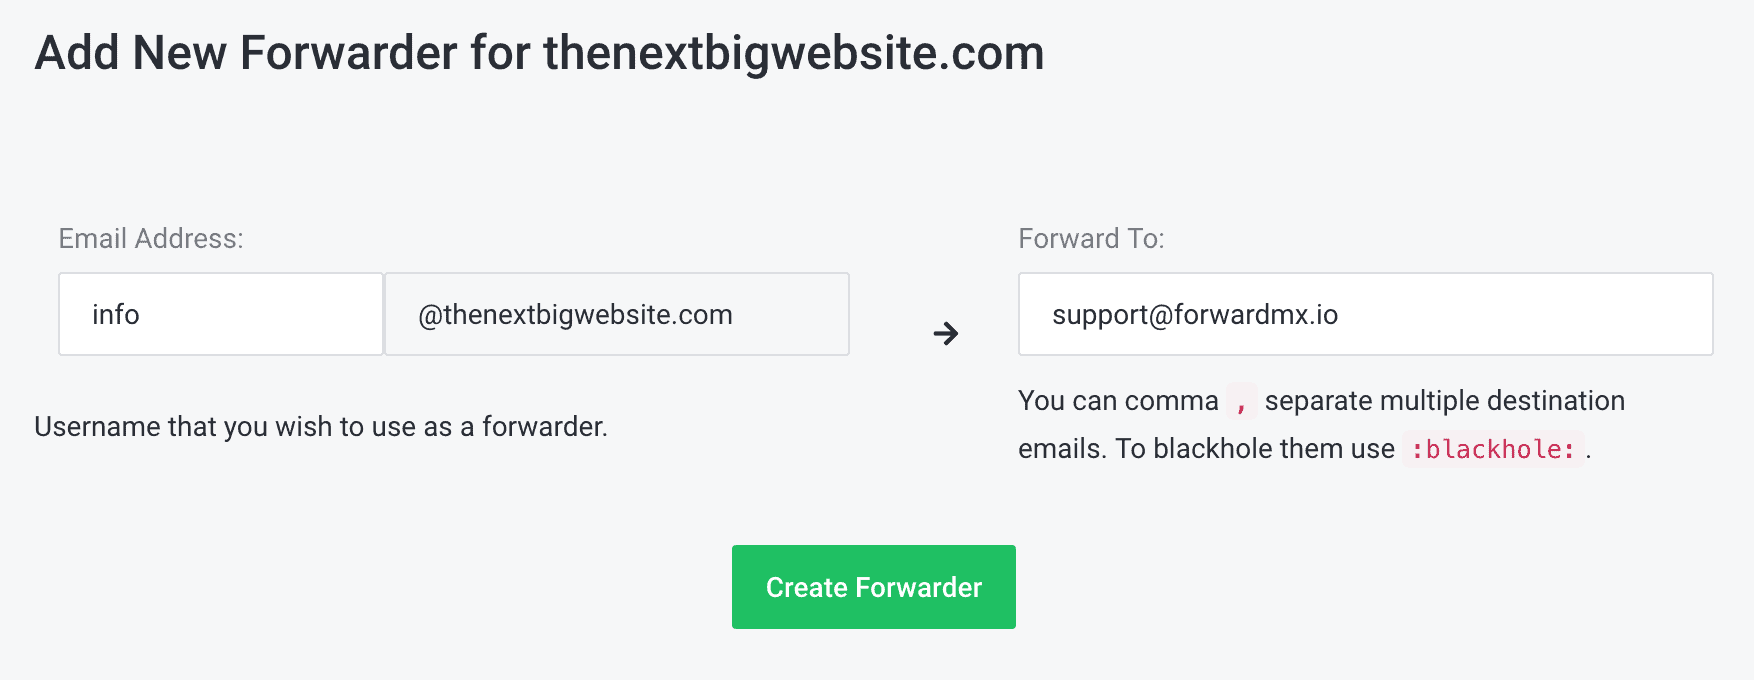
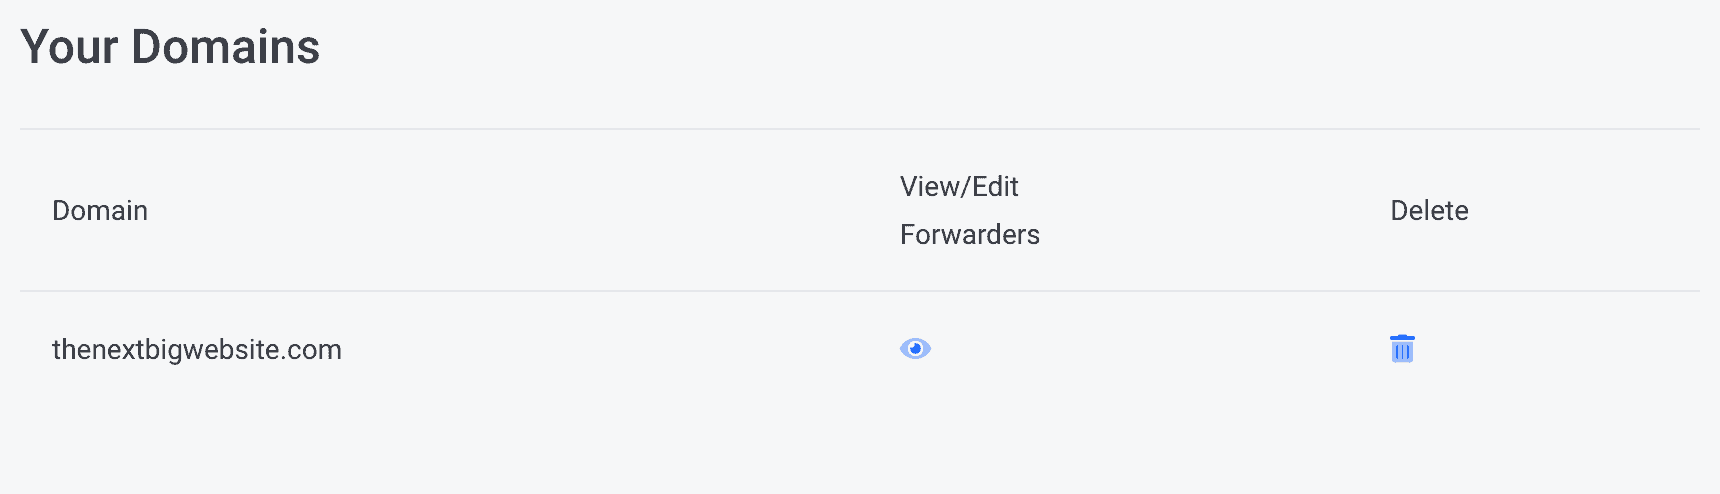
If you’re using WordPress, ForwardMX comes with a plugin and fully-featured API that allows you to complete all of the forwarding actions:
- Add/delete forwarding domains from your account
- Add/edit catch-all settings for your domains
- Add/edit/delete email forwarding addresses/aliases
Conclusion
Email forwarding is an indispensable tool for managing multiple email accounts seamlessly. It lets you channel important messages from old addresses to a single primary inbox. This saves you time and effort spent monitoring different accounts.
Setting up email forwarding is also simple and quick once you find the right settings. Choose your preferred forwarding options based on your specific needs. Use email forwarding to stay on top of all incoming communication and maintain a unified hub for emails. Implementing this can make your inbox more streamlined, organized, and efficient.