Do you want to set up print on demand store with WooCommerce? Keep reading this article if you are looking for the most straightforward method. Here, we will show you the step-by-step guide to set up a print-on-demand store without hassle.
Focusing on a customer-centric business is an excellent idea to make money. But if you are a beginner in this field, research and find what works well. In our experience, setting up an online store with trending products that will add value to a user’s life always works.
But investing huge in your first online store is not recommended.
So, how do you start an online store without a considerable investment but still make money?
The short answer is through a print-on-demand store. In this article, we will show you how to start a print-on-demand online store with the help of WooCommerce.
Before going further, let’s see why setting up a print-on-demand store is good.
Why Set Up a Print-on-Demand Store
Setting up a print-on-demand store would be a good choice since it has many advantages. Some of the major pros of the POD stores are:
- Low investment: Since you do not need to buy or manufacture products earlier, you do not need to spend much money on them. You only need to deal with the shipment when a customer orders.
- Low risk: The risk of handling a POD store is relatively low. If this is your first business and if you need to learn more about online store handling, start a POD store to learn stuff.
- Easily scalable: If you start getting more and more orders on your store, you can quickly scale it by adding more product options and designs.
- Inventory management: By default, you need a warehouse to store all the goods. Since you only develop products when someone orders, you can eliminate inventory management in POD stores.
- Highly customizable: Customers can customize the product according to their preferences. This is one of the main benefits of having a POD store.
And so on.
Now you know why setting up a POD store is good and the main advantages. Now, let’s move to the article’s core, where we will teach you how to set up a print-on-demand store with WooCommerce.
How to Set Up a Print-on-Demand Store with WooCommerce
There are three steps to setting up a POD store.
- Install WooCommerce
- Install Spocket
- Install and Configure YayExtra
Let’s take a look at them in depth.
1. Installing WooCommerce
The first thing you need to do after configuring the WordPress installation is install the WooCommerce plugin. You can directly install it from the repository.
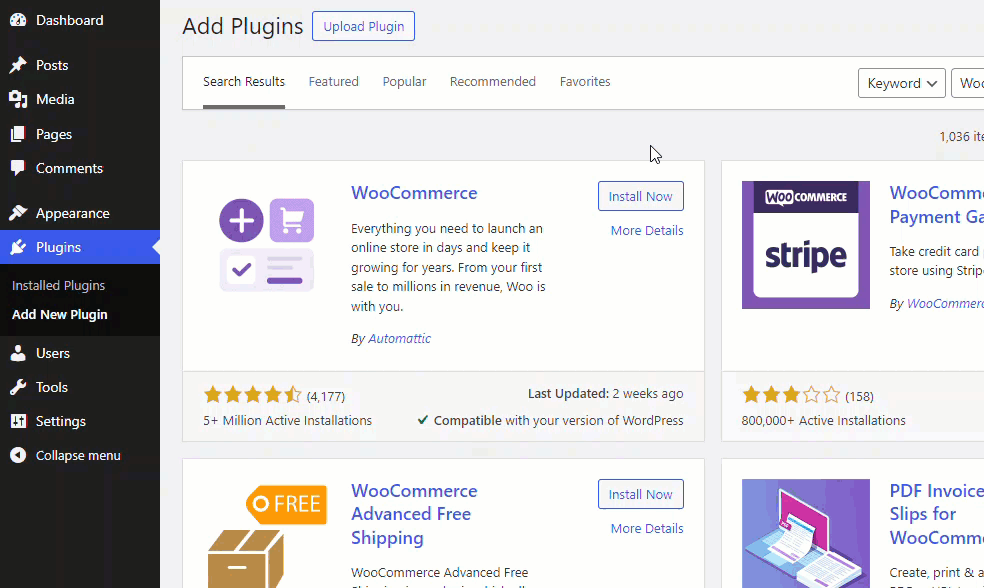
Once you have activated the plugin, you must do some basic configurations, such as entering the address, setting up currency, etc.
If you have already installed WooCommerce, you can skip this step.
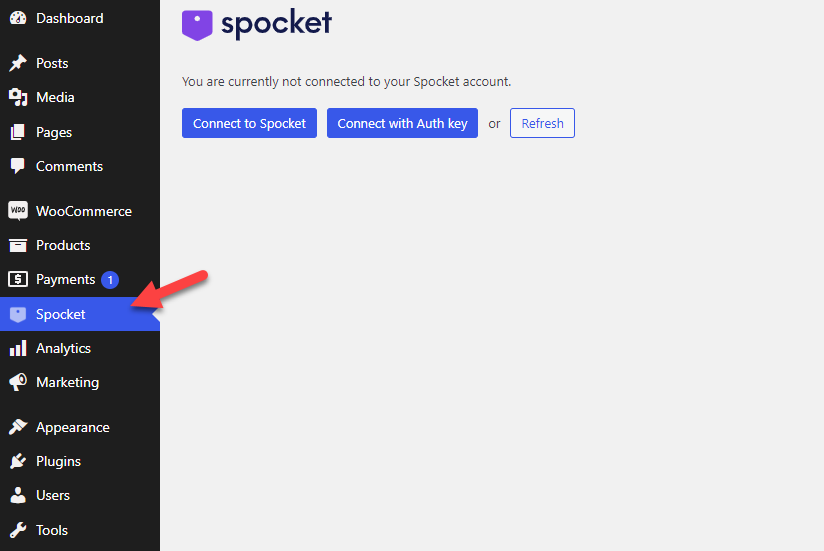
2. Installing Spocket
The next thing you need to do is install Spocket. Sprocket is a popular plugin to add dropshipping features to your WooCommerce store. As we did earlier for WooCommerce, you can install Spocket from the repository.
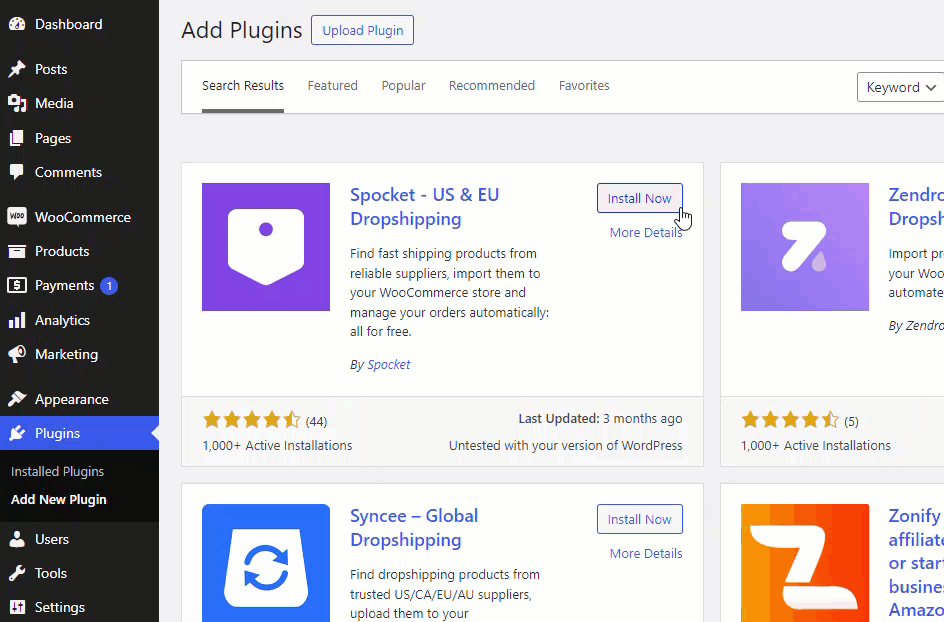
Once you have installed and activated the plugin, connect it with the API key.
If you don’t have a Spocket account, create one. During the account creation process, you can choose which products you need to add to the website,
Select the shipping region,
And so on. After configuring the account, connect it with the Spocket plugin and start importing products.
Next, let’s configure YayExtra on the website so you can add extra product options.
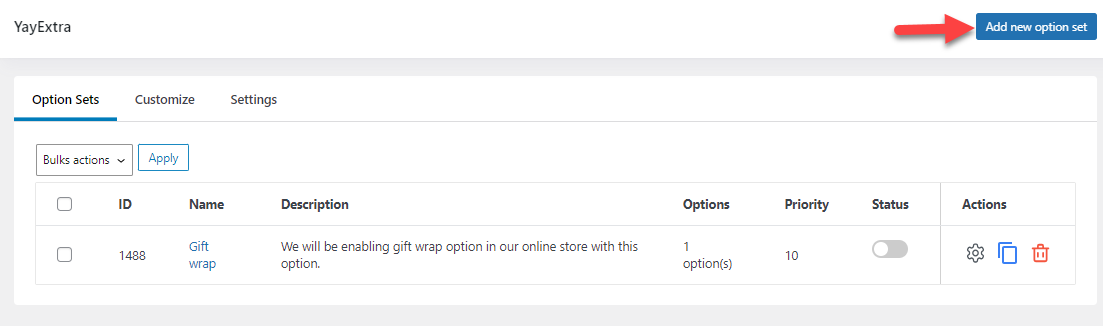
3. Using YayExtra for the Additional Customization
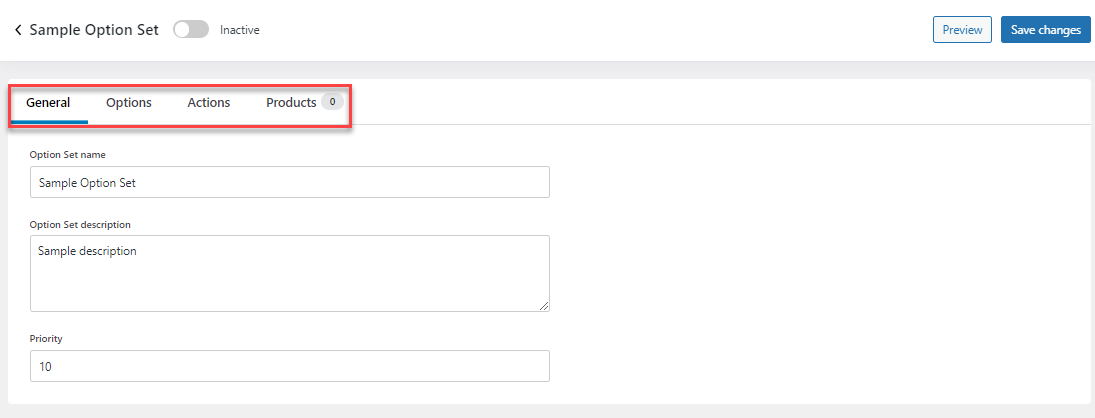
After installing and activating the plugin, you must create a new option set.
There are four options:
- General
- Options
- Actions
- Products
We will be adding three custom product options to our website.
- Image/design upload
- Print position
- Extra add-on
We will check how to add these options to the website.
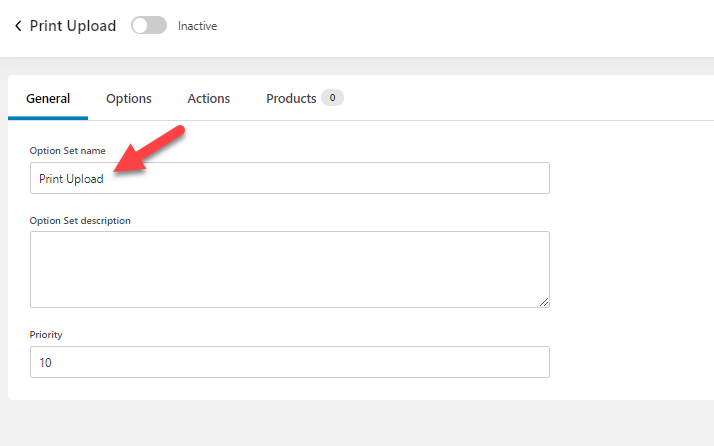
1. Adding Image/Print Design Field
The first option we are going to add is image/print upload. From the general settings, you can name this.
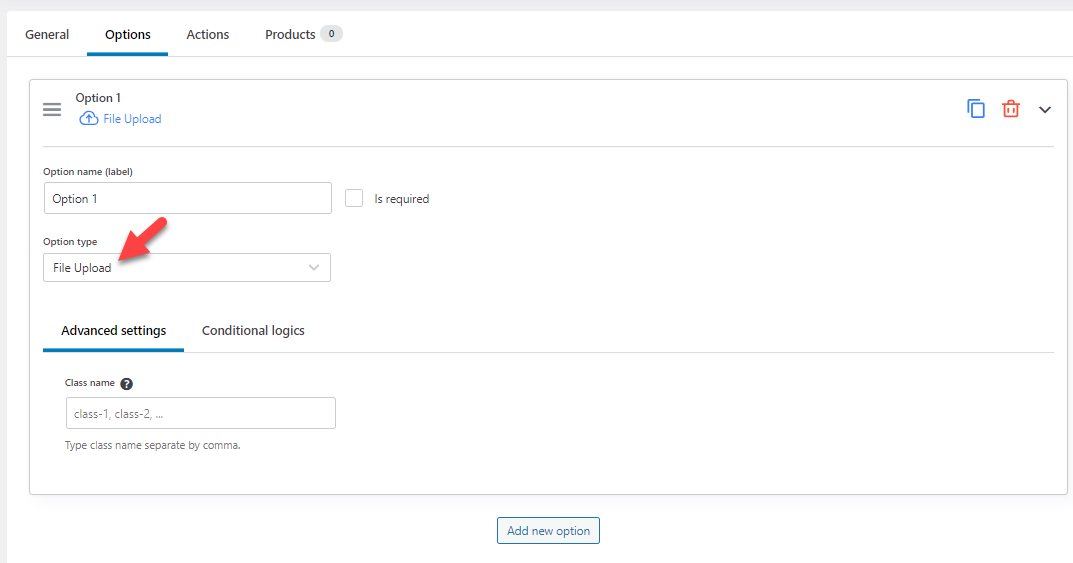
Go to the options settings and select file upload as the option. You can mark it as a required field if this is mandatory to place an order. Plus, add a CSS class if you need to add custom styling to the option. Finally, the conditional logic option will help you make the option visible according to the user’s selection.
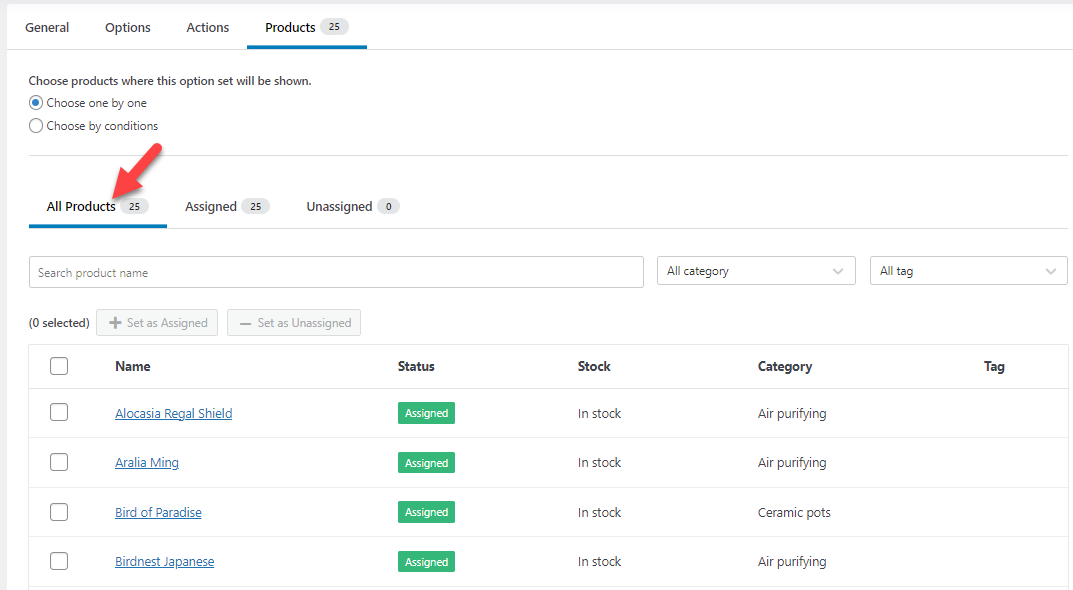
An action condition is not mandatory for this. You can choose the products you need to display this extra product option.
Once you have done that, activate the option and check the website from the front end. You will see the newly added file upload feature there.
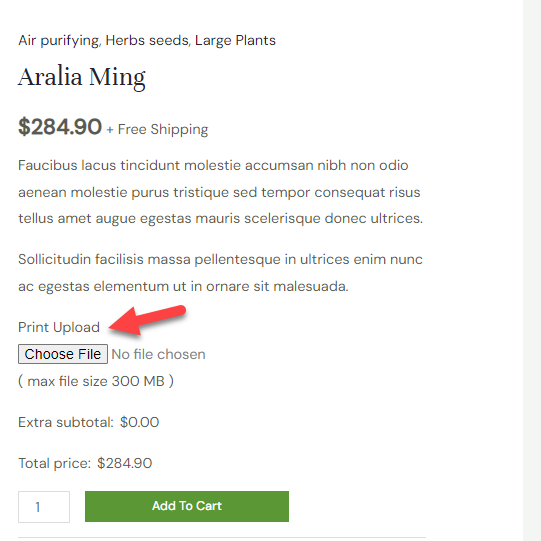
That’s it. This is how you can add a print upload field.
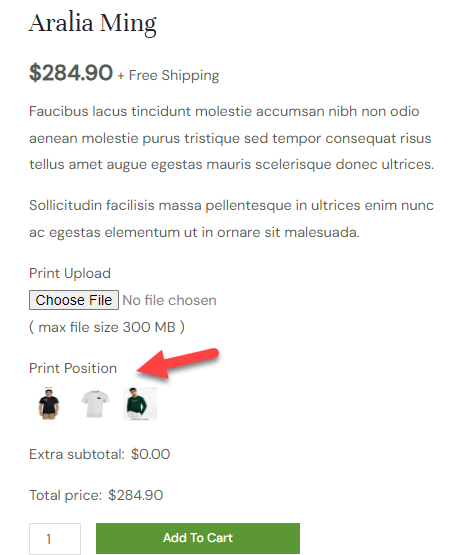
2. Print Position
Earlier, we have shown them a print they can use on the product. Next, include the ability to mention the print position. Add a new option to the set and call it print position. You can choose swatches as the option type.
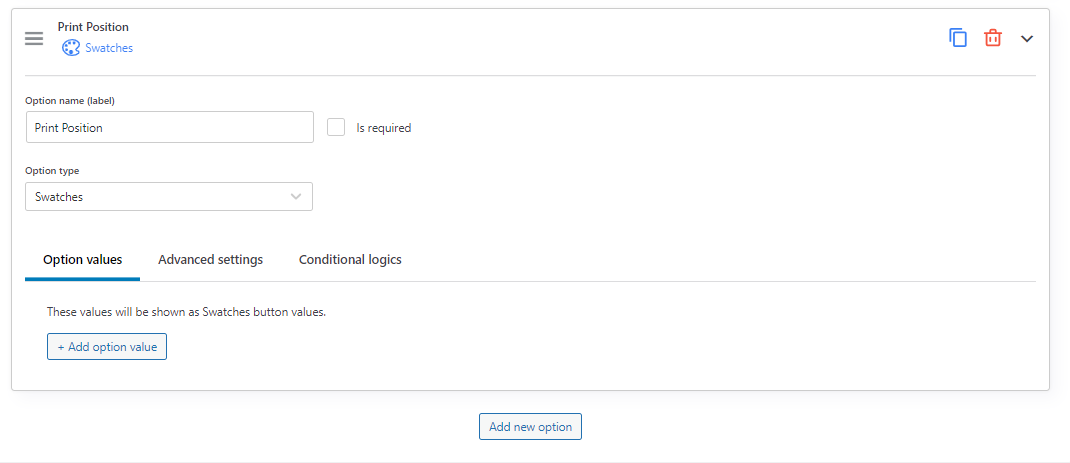
Now, add option values. In this case, we will add three values.
- Right
- Left
- Centre
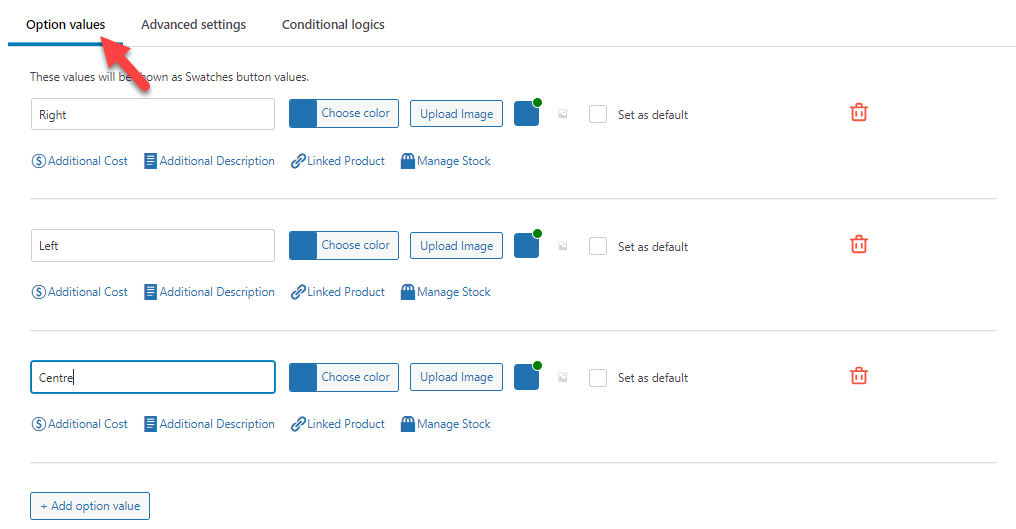
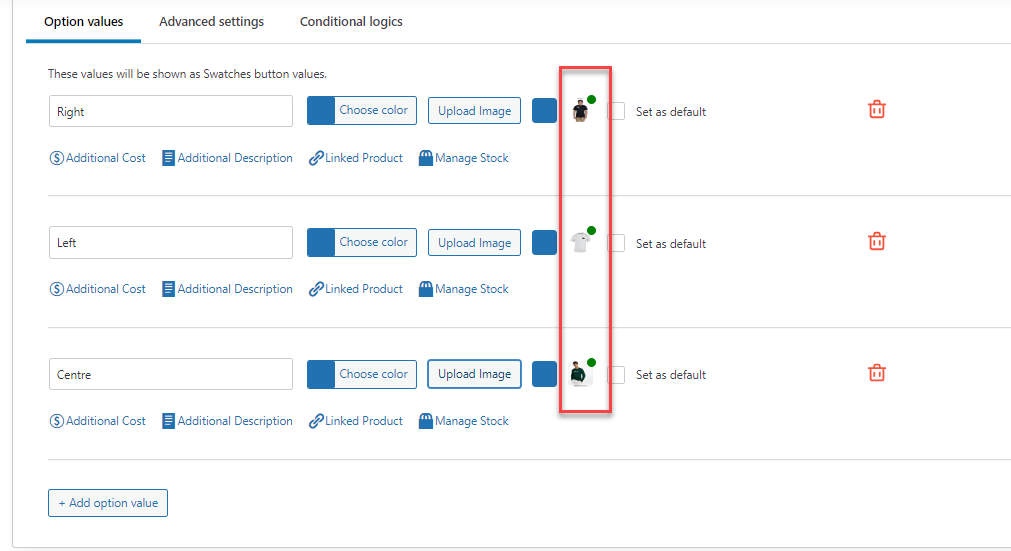
You can upload an image that directly reflects the option to improve it.
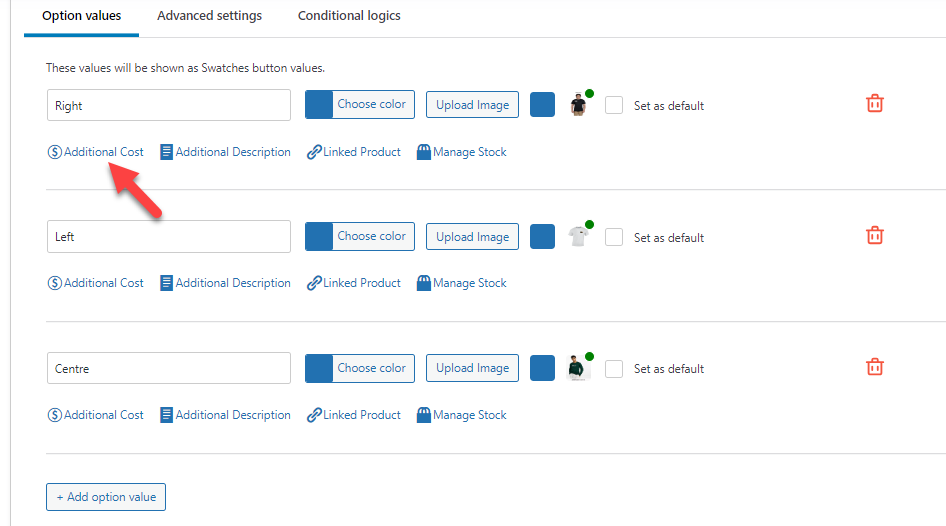
You also have the option to add additional cost to the printing. If you need to bill extra for the other work, use this option:
After saving the update, check the website from the front end.
Next, let’s see how to bundle some products together and improve the conversion rate.
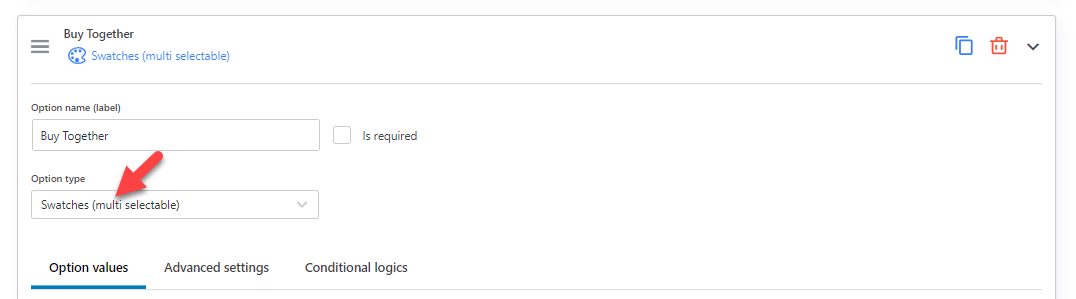
3. Extra Products
We are going to name this as buy together. For the option type, we will use swatches (multi-selectable).
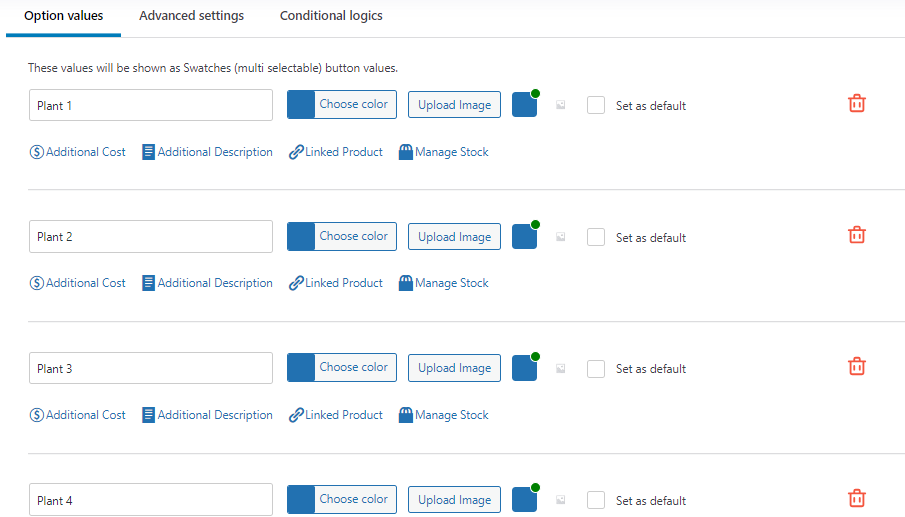
Go to the options and add as many options as you need. Here, we will list four options.
Now, it is time to link the WooCommerce product. To do this, you must enable the Linked Product feature and search for the product’s name.
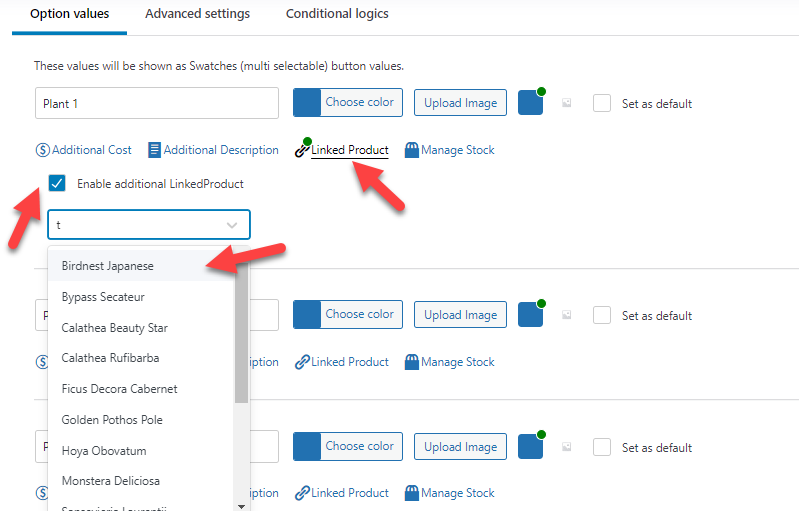
Similarly, you can add multiple products to the created options.
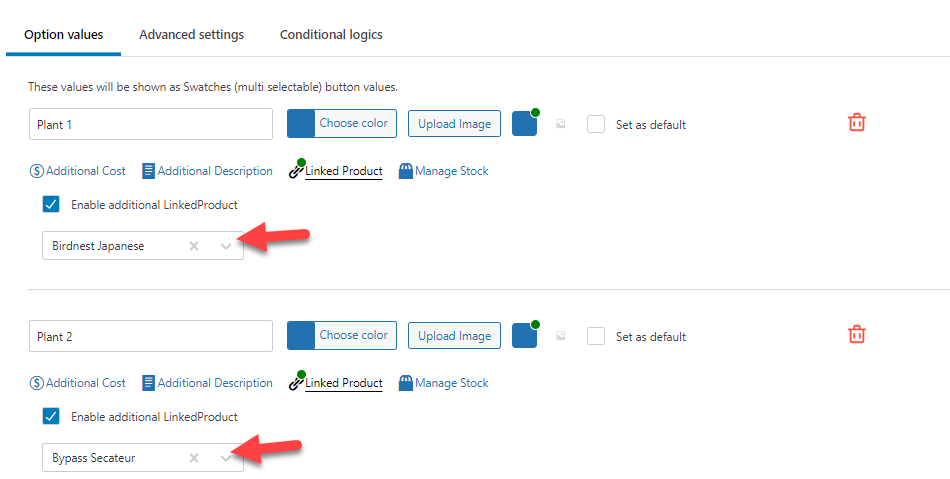
As we did earlier, you can also list an image for an individual product. Once you have done that, save the options set.
Next, check the website from the front end.
That’s it! This is how you can use YayExtra to add additional product fields. Adding extra fields on your website allows customers to customize the product according to their liking.
How to Promote Your Print-on-Demand Store
The main methods you can use to promote your newly created POD store are:
- SEO: The first thing you should do is optimize your website for search engines. You can build backlinks, add your website to the search console, and use a dedicated on-page SEO plugin to fine-tune the content, and so on.
- Content marketing: Publishing blog posts and marketing via content is an excellent way to bring traffic to your website. You should convert those website visitors into subscribers or customers.
- Social media: Driving traffic from social media is an ideal option. These days, creating individual business handles for your website is mandatory. You can promote your deals and offers there to get a spike in the overall traffic.
- Paid traffic: As a new business, no one will notice you. You can use paid ads like Google Ads to bump the search traffic. This will help you with brand awareness.
- Influencer marketing: Find an influencer with hundreds, thousands, or even millions of followers. You might want to pay the influencer for the promotion, but the reach would be great.
- Limited-time deals: Offering unique discount sales is an excellent way to get attention from the crowd. You should have a proper marketing strategy to get the word out.
- Giveaways: Host giveaways. You do not need to give away costly products. Anything that will add value to the customer’s life would do it.
- Brand collaboration: Collaborating with other brands is an excellent way to grow the business. This way, both of you will grow and make some conversions.
- Email marketing: Use pop-ups to collect your website visitor’s email address. Later, you can use an email marketing service like AWeber or Constant Contact to send timely emails.
Conclusion
Setting up a print-on-demand store is an excellent way to make money with minimal risk. If you need more clarification about the steps to start a POD store, this article solves every mystery. As you can see in this article, setting up a POD website with WooCommerce is easy.
You can configure your POD website with a plugin like Spocket with WooCommerce. Besides that, you should also use a plugin like YayExtra to add custom product options to the website.
We hope you have found this article helpful and enjoyed reading it. If you did, please share this post with your friends and fellow bloggers on social media. For more articles, you need to check our blog archive.
Would you set up a print-on-demand store with WooCommerce?
Let us know in the comments.