The product page is one of the most important elements of an e-commerce site. Your responsibility as a merchant is to ensure that customers can easily select products and add them to the cart, especially those that are in high demand.
Since some product page traffic does not convert to a sale, the customer shopping effort should be reduced to just a few clicks to increase conversions. In most cases, clients prioritize particular product variants for better product page visibility.
Now let’s talk about Shopify product variants from the proximity of WooCommerce variable products.
Basics of product variations
The growth of online shopping has created the need to implement e-commerce marketing strategies to create excellent customer experiences. This must be integrated with the ability of customers to add products to the cart to reduce the chances of bounces. That is where the significance of the Shopify product variant comes in.
Any product that comes in several options requires variation. The option value combinations for products can represent its variant. For example, if you are selling wallets of different colors, the product option values which include orange, green, and brown are the variants.
According to leading assignment help, the variant list for a product appears on the product page. It is also possible to manage stock for every variant through the inventory page. Adding product variants requires an adjustment in inventory, shipping, and pricing settings on the details page of the product.
What to consider when adding variants
Every product that qualifies for a variant can have three options that differ from one product to another. This could be in terms of color, price, style, weight, size, and so on. The limits for variants and options can be increased by third-party apps from the Shopify App Store.
The sale of a product with more than 3 options or 100 variants may require you to customize the product’s theme code to obtain customers’ tailor-made requirements. If your store has so many variants, it may be subject to a regular limit for variant uploading using CSV file support or an app.
The module that we call meta box in WordPress/WooCommerce is considered a Polaris card in the Shopify admin dashboard. A freshly created product in Shopify is a simple product by default. It comes with some main cards including:
- Media
- Pricing
- Inventory
- Shipping
- Variants
The moment when you enable the Variants card and save the product options successfully, the above info cards will be moved to each variant item.
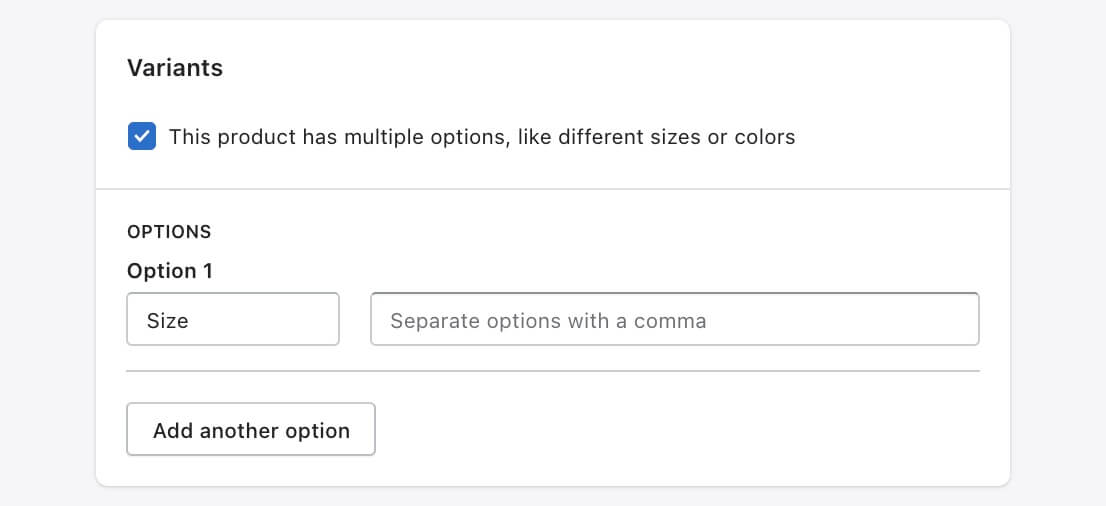
Adding variants during product creation
If you want to create a product, it is possible to add variants simultaneously. You can bulk add variants very easily in the product option expanded card.
You will then enter an option’s name, such as color or size, under the option name. Enter the option value and then a comma, and the option values will look like tags.
If your variants are different in many ways, click on “Add another option.” Every product can have a maximum of 3 options. As you continue adding product options, the variant list appears titled, “Modify the variants to be created.”
After adding product variants, you can edit the variant image, pricing, inventory, and other details per variant. If you have added a bunch of media files in the simple product creation, those images also show up in its variants’ info cards.
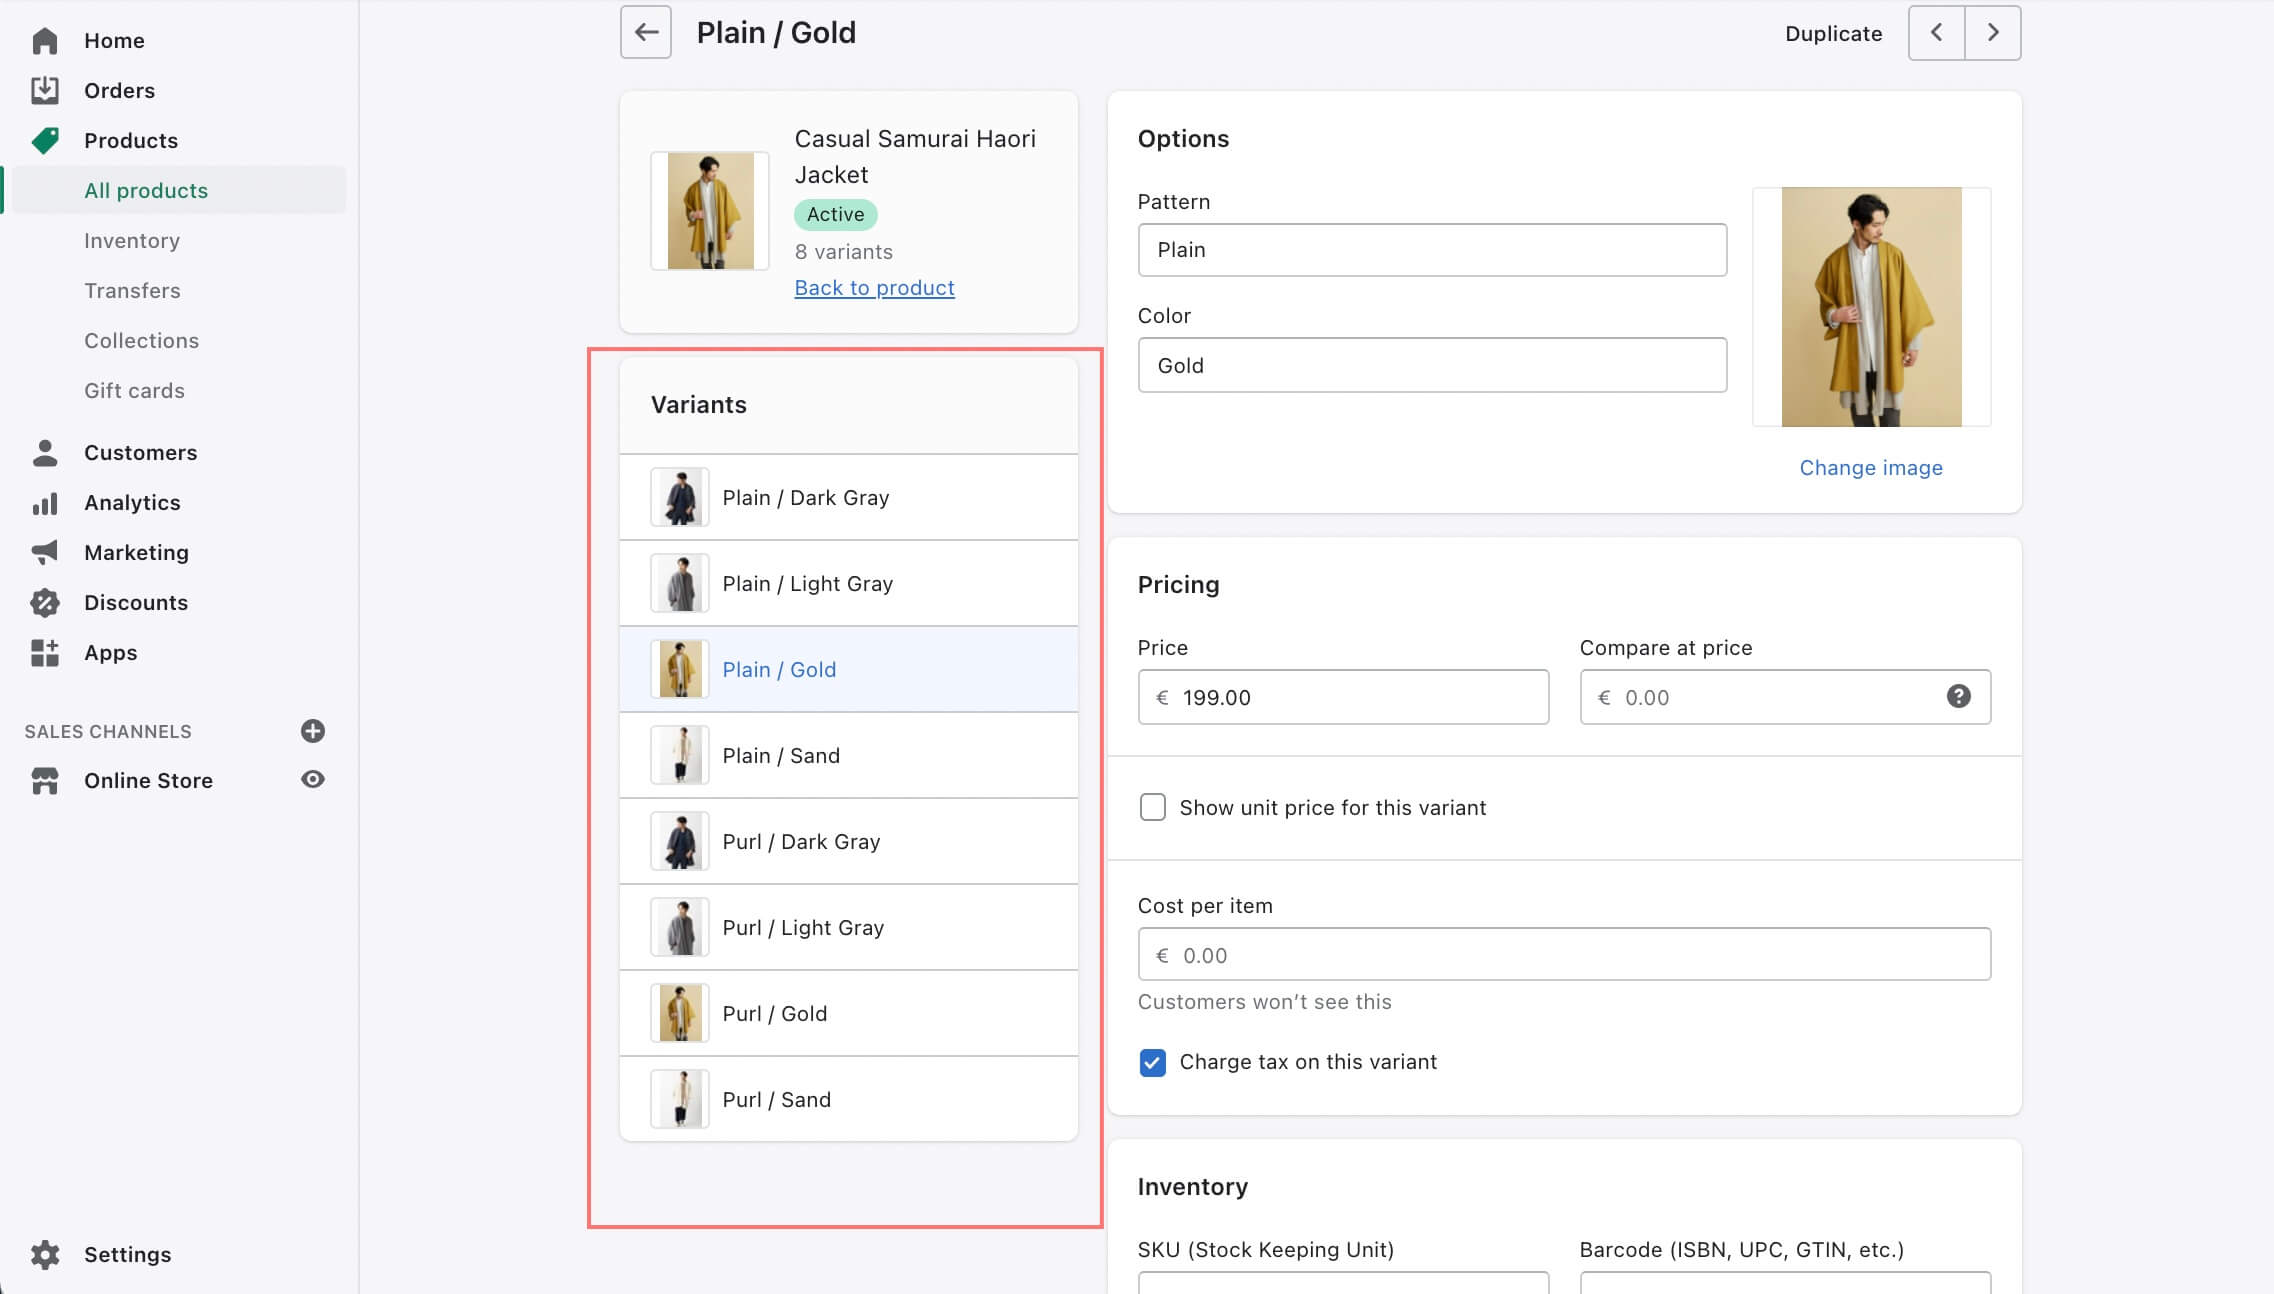
When it comes to product variation, we call it “Product option” in Shopify for what we call “Attributes” in WooCommerce.
Drag and drop in Shopify variants
Despite its known limitations of product hierarchy, Shopify presents a very user-friendly setup interface. Which comes with drag and drop possibility in the product setup cards.
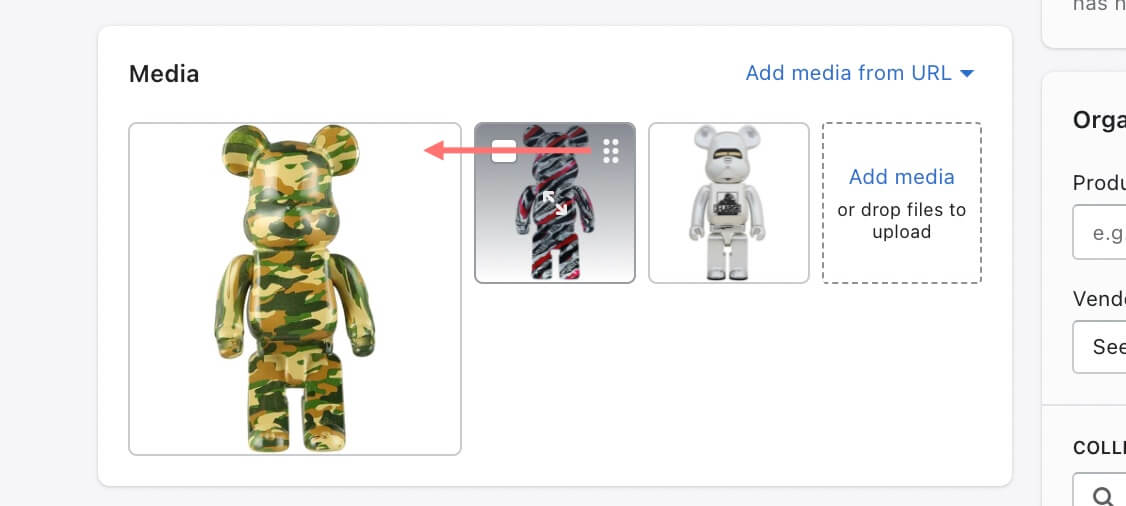
- In the Media card, you can drag and drop to reorder the images. The first big one would become the featured image that shows up at the prominent spot of your product page.
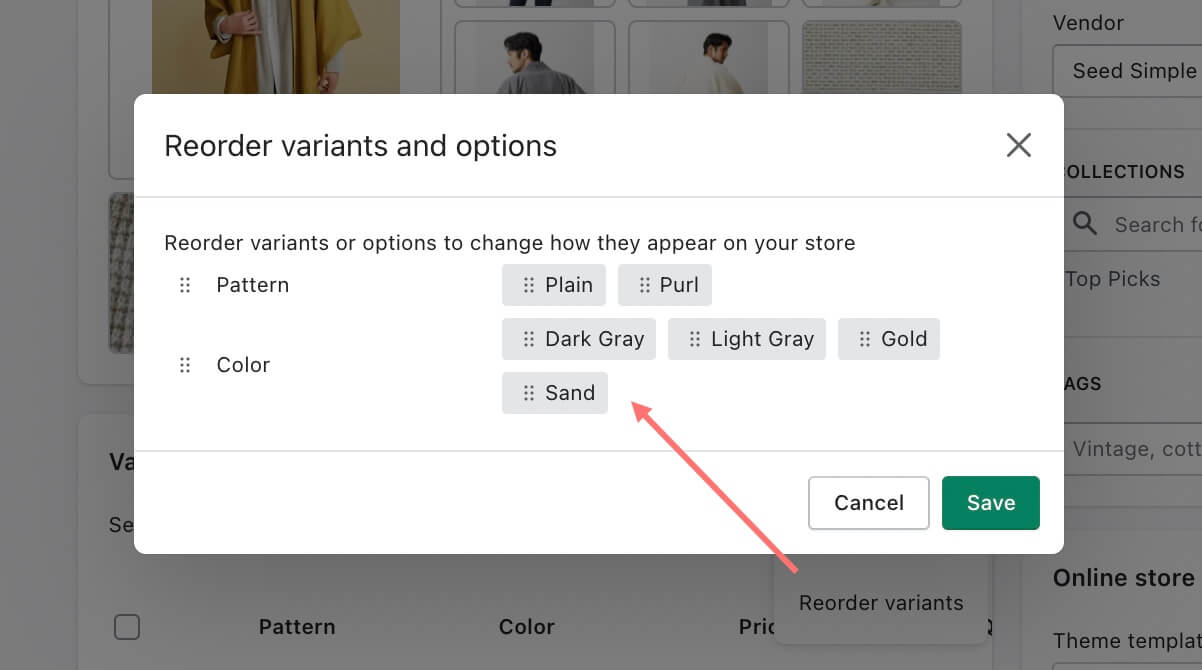
- From the Variants card, go to More options > Reorder variants to drag and drop the product options and option values. Please note that the new variant order doesn’t make changes to your previously chosen featured image. This arrangement of option and variant only affects the organization of variant swatches on your storefront.
Creating an additional variant
You may want to save time by duplicating a variant instead of entering similar details again. The details of a duplicate variant are similar to those of the existing variant, but in saving a duplicate variant, it is important to edit option values. However, it is difficult to save a “real” duplicate.
Go to the products category option of your Shopify admin and select the product that requires an additional variant. Edit a preferred option value to ensure the uniqueness of the variant. You can include a new value option or an existing one for the variants.
Duplicate Shopify variation has an option for duplicating or copying the product in one click. Therefore, you can quickly create many variations with similar properties such as variation image, variation price, or stock.
Variant image swatches
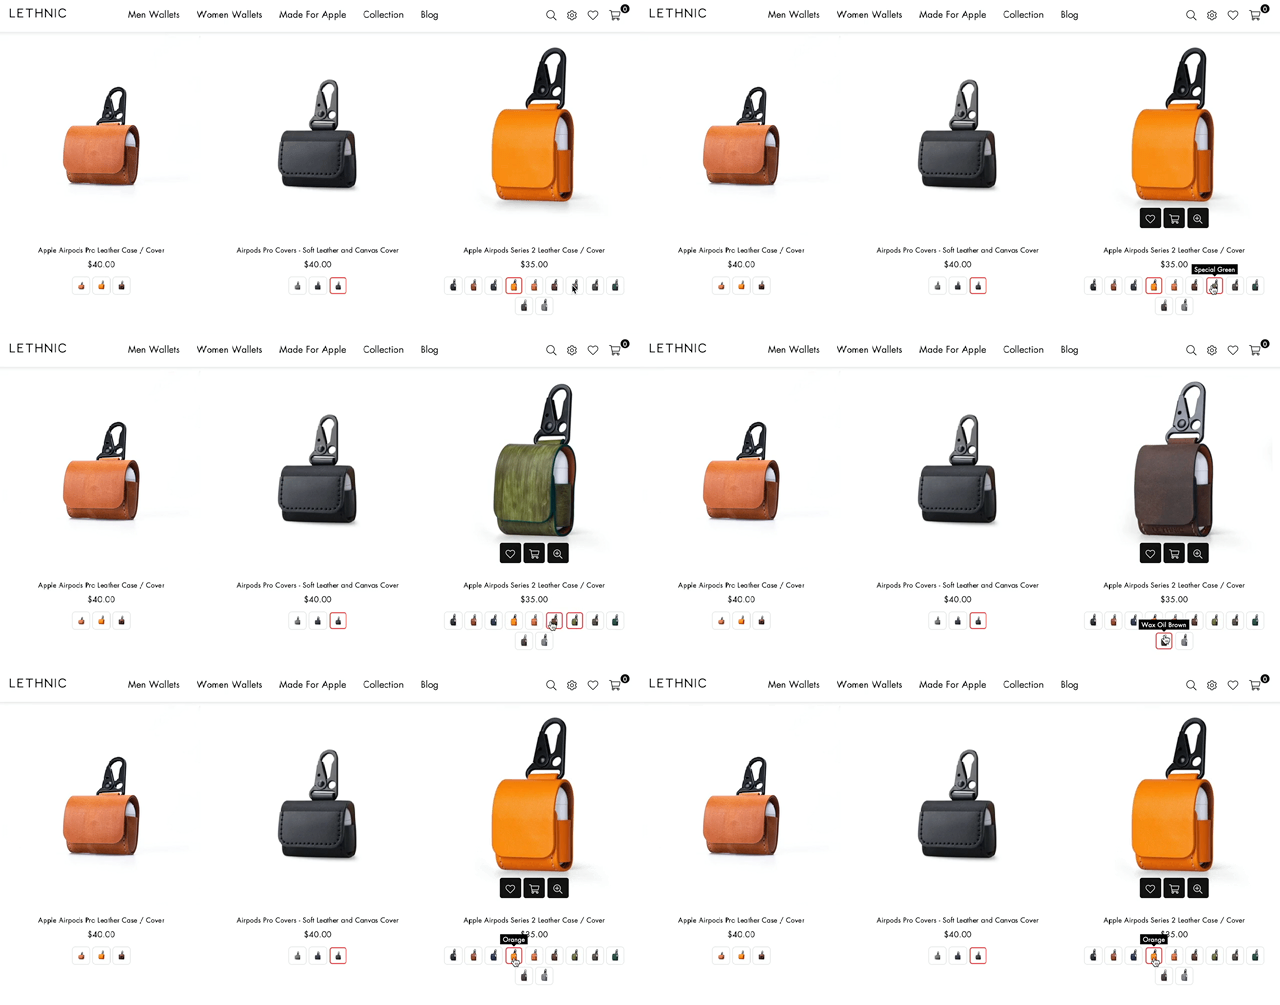
Depending upon the store’s theme, the product variant image swatches can be seen in dropdown lists or buttons. Some premium themes have the ability to display your product color variants as circular swatches instead of text.
If you make changes to the original code in a theme, update your theme to a newer version, or switch to another theme in the future, it will override past variant swatches.
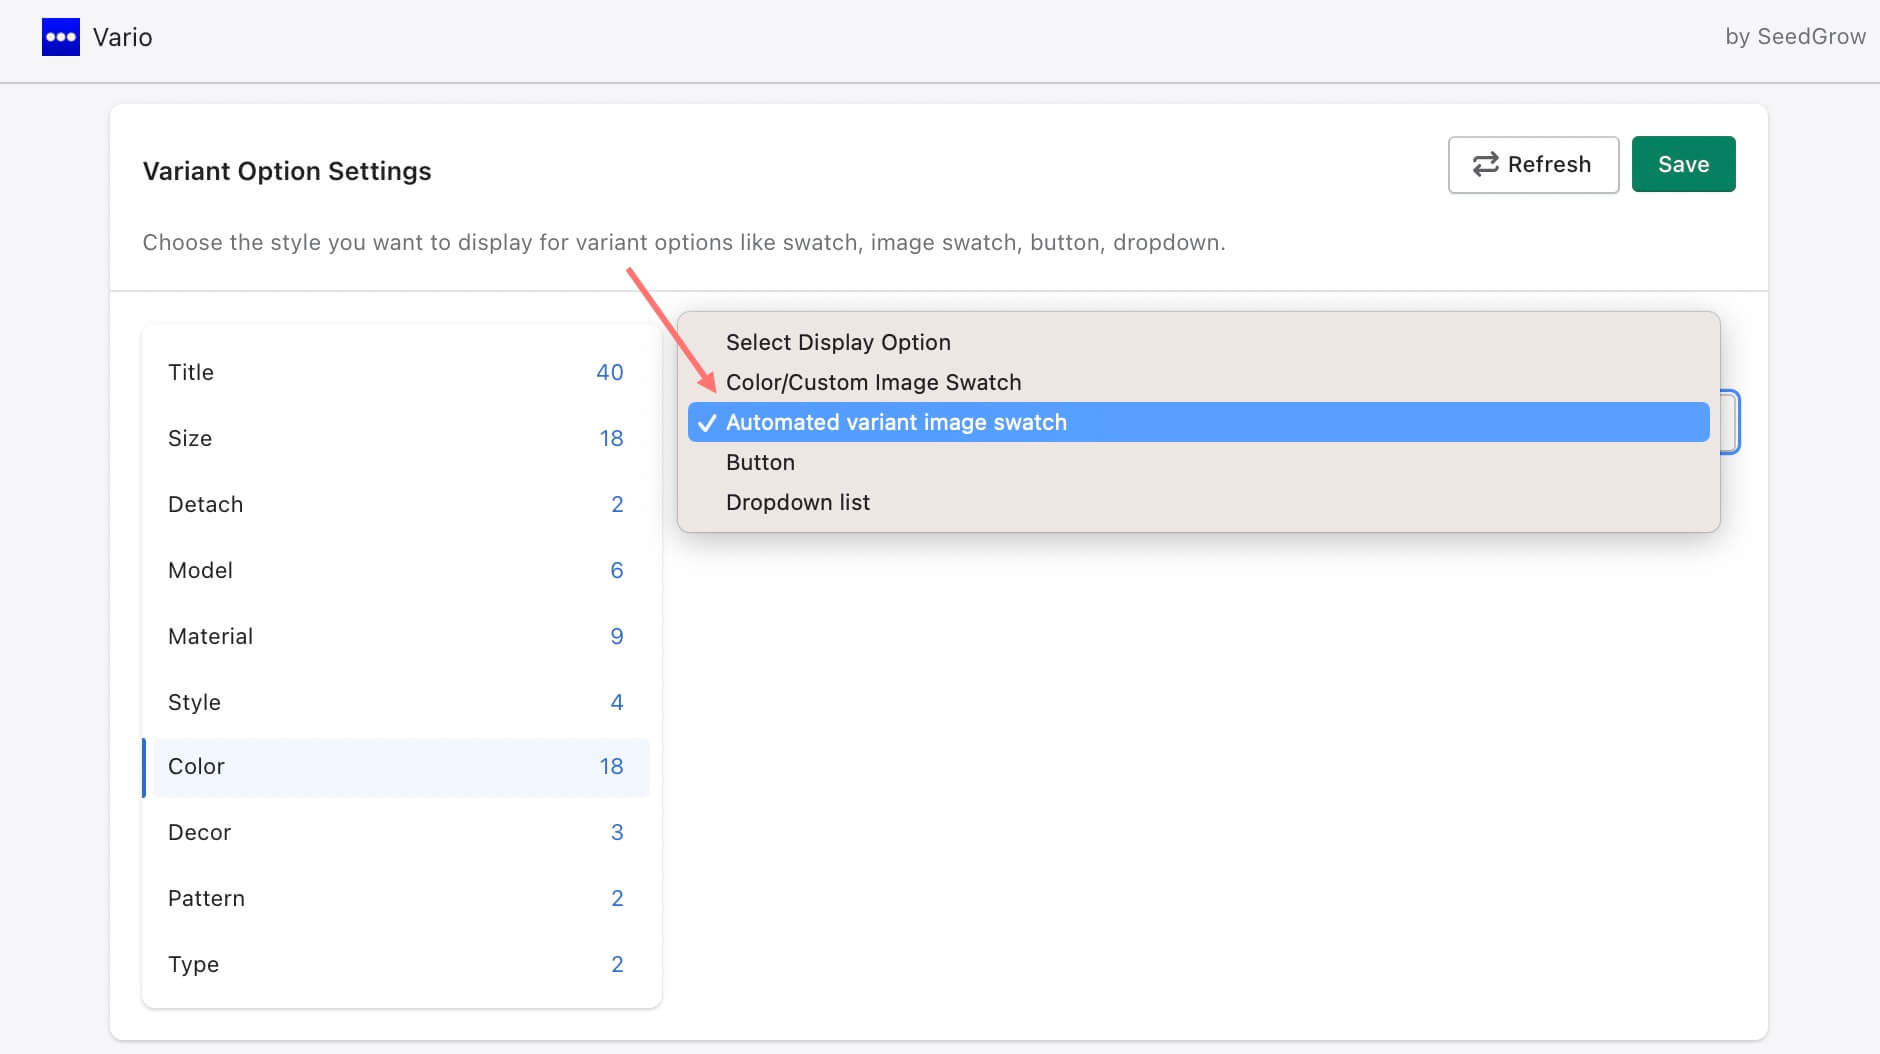
In order to bring the assigned variants images to the storefront’s image swatches, you will need a swatch automator app like Vario.
It is a free-to-use app that helps you put up good-looking variation swatches such as buttons, custom colors, patterns, and custom images.
For instance, if you want to set the product variant images as variant image swatches, it’s just a click away. By enabling Automated variant image swatch, each product variant will show its own image and you don’t have to upload new images all over again.
If you’re using a not-so-popular theme, custom theme, or unlisted on the Shopify theme store, you can reach out to Vario developers. The support team offers free support on custom code changes. You can reach them easily by visiting the Shopify variation swatches > go to Support section > click Get support.
Deep linking on product page
For every product variant built on Shopify, there is a unique variant ID. You can create a deep link to a given variant by including a query string on the URL of a product page. The best way to do this is by appending an ideal parameter to the product’s URL along with the variant’s ID.
When the customers click on the defined URL, the product page will automatically load. This will have all the information connected with the variant with a deep link. The product image, price, and drop-down option should be selected in advance when the page loads. The control-flow tags and liquid attributes can help you to output the features of the deep-linked variant to various product page elements.
Shopify variable product linking requires you to visit the variation product and add the variation to the cart. You can then open the cart and review the item by confirming the link in the status bar.
Conclusion
You can create a functional product page for your Shopify eCommerce by prioritizing product variant options. Understanding the basics of Shopify variants and how to create and link them can allow clients to reduce the clicks when shopping. They will be able to find their desired products faster and conveniently.
If you don’t know where to start, installing Variation Swatches app for free is a great idea.
John Peterson is a journalist and a college paper writer with four years of experience working in London magazine “Shop&buy” and some academic writing sites as a freelancer. He has written a novel, “His heart,” and has also made a name for himself in the mini-tennis arena. You can find him on FB.
