In recent years, WordPress and WooCommerce users have been on the rise and because of this growth in popularity, a lot of developers are also developing supporting addon plugins for WooCommerce in other to further enhance the user experiences.
One of the main functions of WooCommerce is its ability to send out different transaction Emails to Customers and Operators of a WooCommerce-powered store. However, since millions of store owners use WooComemerce, it thus works very similarly for all its users by sending very generic Emails and less customizable Emails.
In other to have these customization capabilities and get more control over how your Emails look, we would employ a free plugin called ‘YayMail – WooCommerce Email customizer‘.
In this article, we will go through how to customize WooCommerce Email templates added by a plugin called ‘Germanized for WooCommerce’ by using the addon plugin developed for YayMail called ‘YayMail Addon for Germanized for WooCommerce‘
Contents to be discussed
- Why Customize Email Templates?
- What’s YayMail?
- What is Germanized for WooCommerce?
- YayMail’s Addon for Germanized Plugin?
- The Germanized Templates are Customizable With YayMail
- Common Design Customizations
- How to Customize Germanized Email Template With YayMail
Why Customize Germanized Email Templates?
There are many benefits that come with customizing Germanized Email templates, some of which include the following:
- The default Email template that comes with Germanized plugin will certainly appear very similar across all web stores that use the plugin. You, therefore, need to customize these templates with YayMail in other to make your Germanized Emails stand out and add a unique touch to the Emails your store sends out.
- Besides the fact that YayMail allows you to add Germanized plugin elements to the Email designs, it also gives you more flexibility by allowing you to add so many extra elements to the Germanized Email templates. Helping you spice up your designs, instead of accepting the default ‘take-as-is’ kind of design.
- You have the ability to include more information in the Emails like personalization and brand centralization etc.
What is YayMail?
YayMail – WooCommerce Email Customizer is a WordPress plugin that gives you the ability to customize emails sent out by WooCommerce. Its drag-and-drop editor makes it super easy to edit emails to the desired state that suits your business. You can add images, and use different fonts, icons, colors, and so on.
YayMail comes in two forms including:
Free: A free plugin to help you fully customize 11 standard WooCommerce email templates
YayMail Pro: A paid plugin including all the free features and compatible with various third-party WordPress/WooCommerce plugins
What is Germanized for WooCommerce?
Germanized extends WooCommerce to technically match specific german legal conditions. The objective of this plugin is to adapt WooCommerce to the special requirements of the German market.
What is YayMail Addon for Germanized?
The YayMail’s addon for Germanized is an additional PRO version addon plugin for the stand-alone YayMail plugin. It works either with the Free version or the Pro version of the YayMail plugin. It can help you customize the majority of the Germanized plugin Email templates.
Note:
This YayMail Addon for Germanized will work with either the free version or the Pro version of YayMail stand-alone plugin, but it is a PRO plugin itself.
The Germanized Templates Customizable with YayMail
The Germanized plugin has 18 different default mail templates that come with it, all of these template designs are customizable and they can be branded with Colors, Logos, Fonts etc.
These templates include:
Paid for order – This notifies the buyer when their payment for the item has been successfully received by the seller
Cancelled order – This tells the buyer after their order cancellation has been successfully processed.
New account activation – This notifies a new user, informing them with a link to activate their newly created account.
Withdrawal – This notifies the user when their revocation or withdrawal request is successful
SEPA Direct Debit Mandate – This notifies the seller about the SEPA agreement once a buyer submits payment.
Invoice (PDF) – This is sent to the customer after an order is fulfilled.
Document Admin (PDF) – This notifies the admin about the info of an order.
Cancellation (PDF) – This notifies customers about their cancelation.
Document (PDF) – This notifies customers about the info of an order.
Packing Slip (PDF) – This is the packing slip of an order.
OSS Delivery Threshold Notification – This notifies buyers about the OSS delivery policy threshold
Trusted Shops Review Reminder – This notifies the buyers to review the recently purchased products
Order shipped – This notifies the buyers once their items have been shipped
Order return – This notifies the buyers who trigger a return with more information about how to return the items
Order return delivered – This notifies the buyers when their returns have been received successfully.
Order guest return request – This notifies the buyers when they request to add a return request to their order.
New order return request – This notifies the seller whenever a buyer adds a return request
Order confirmation – This notifies the customer about order confirmation.
Common Design Customizations
Some of the common Design Customizations you can use include:
Header Image – An image that you’d like to display at the top of all emails. You might want to use your logo or other brand imagery here.
Footer Text – Information found at the bottom of each email. Include a link to your website and contact information to make it easy for your customers to get in touch.
Base Color – The color used for headings, links, and the background of your email title.
Background Color – The color used for the background of the email.
Body Background Color – The color of your email content background.
Body Text Color – The color for all written email content.
How to Customize Germanized Email Template With YayMail
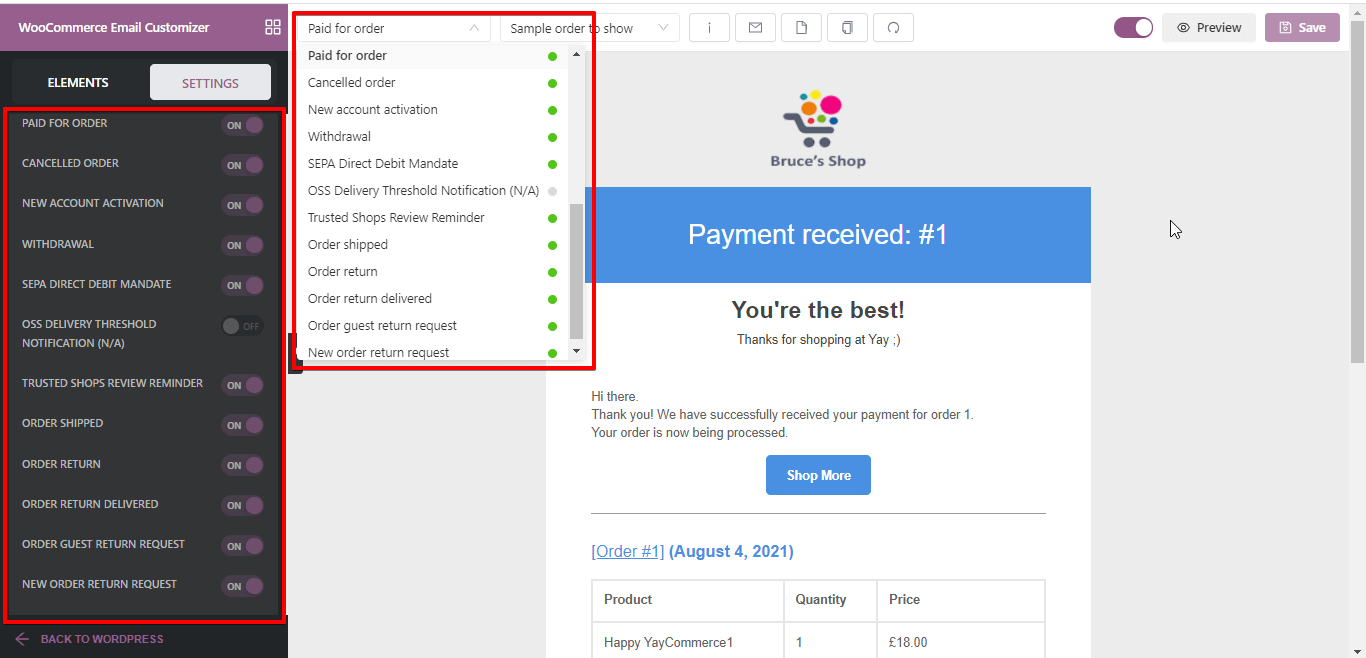
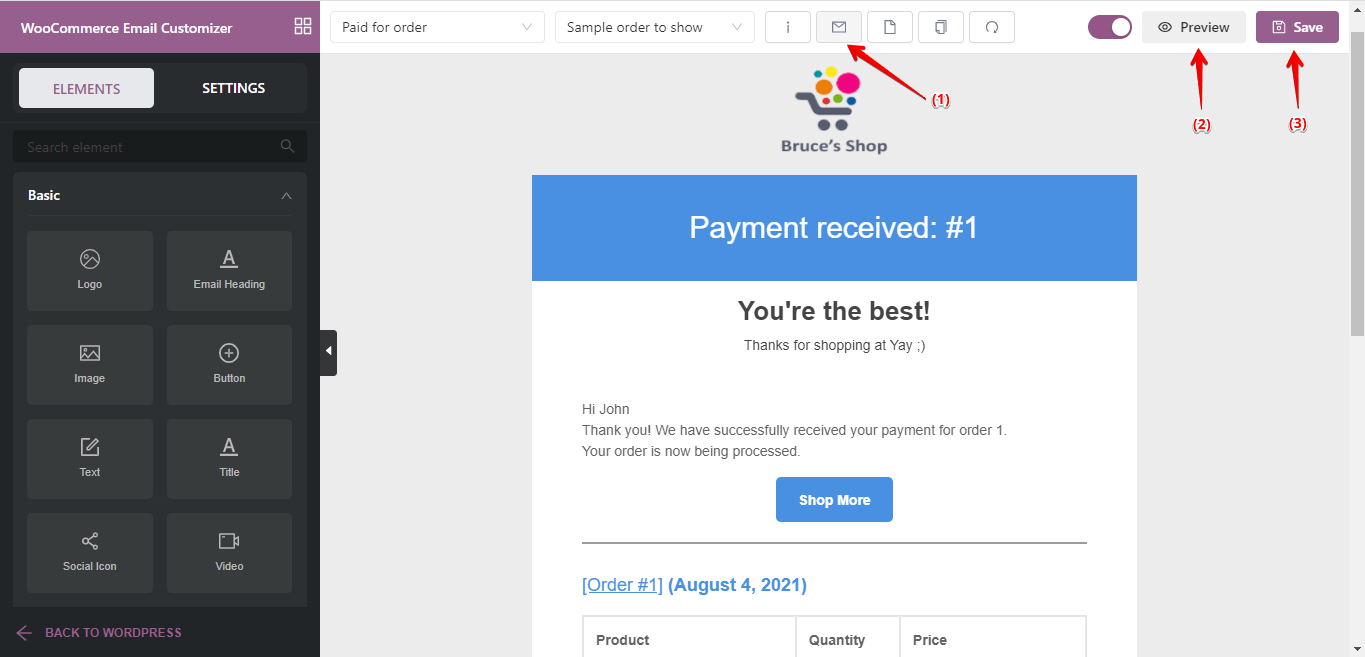
As an example, I will explain how to customize the ‘Paid for Order’ Email template. Ideally, it is just the same method if you are customizing other Germanized Email templates too.
You can customize the ‘Paid for Order’ Email template via your wp-admin > WooCommerce > Email Customizer > Paid for Order.
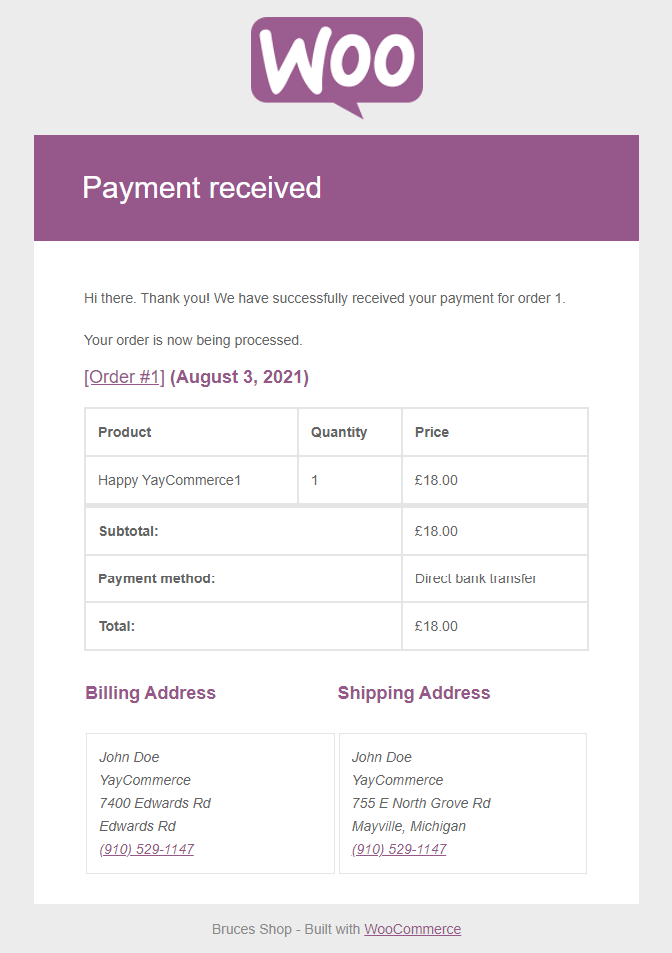
Here is a screenshot that shows the default WooCommerce design for this Germanized template:
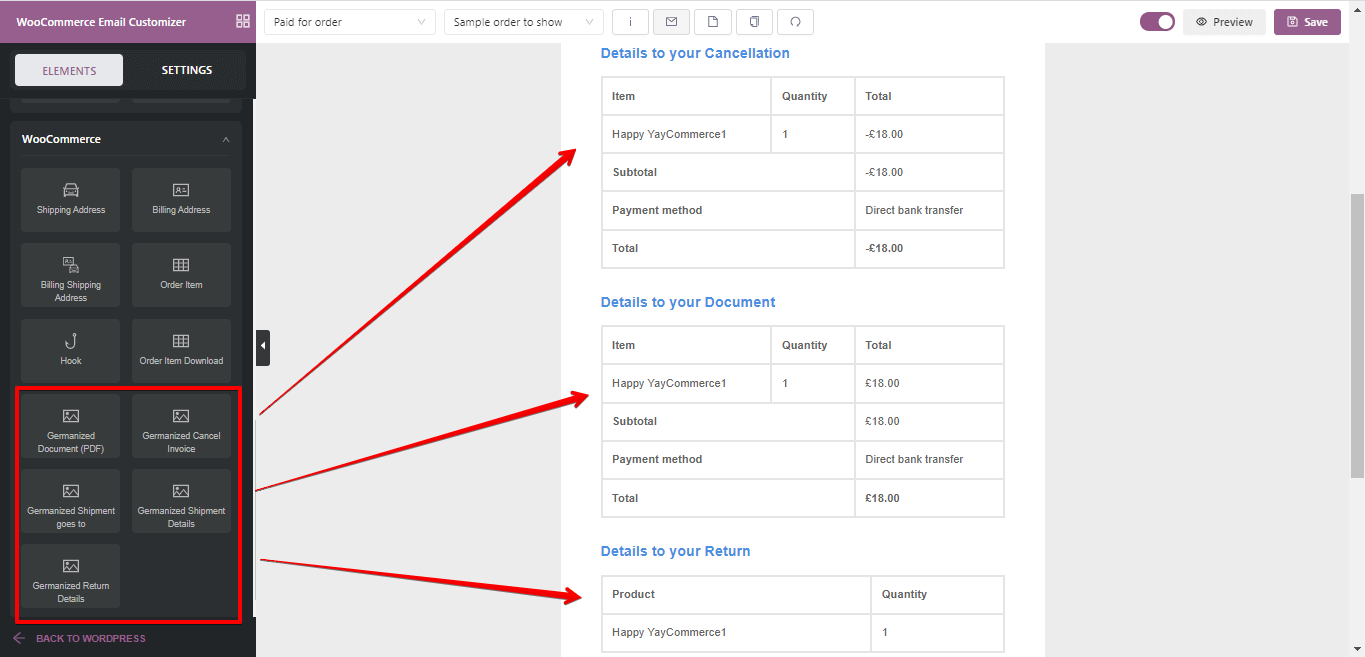
Germanized Design Elements
The Germanized plugin adds its own various design elements which are recognized and supported by YayMail. Some of these elements include:
Germanized Document (PDF) – This element adds order item details to the Email Template
Germanized Cancel Invoice – This element adds order item cancellation details to the Email Template
Germanized Shipment Goes to – This element adds the shipment address to the Email Template
Germanized Shipment Details – This element adds details of the order items to be shipped to the Email Template
Germanized Return Details – This element adds order item to be returned details to the Email Template
Now, we can follow these easy steps to make a better design:
Change the Logo: You can change the Logo by clicking on the default WooCommerce Logo and changing it or simply by clicking on the “Element” tab and then dragging and dropping the Logo element to the top layer of the design.
![]()
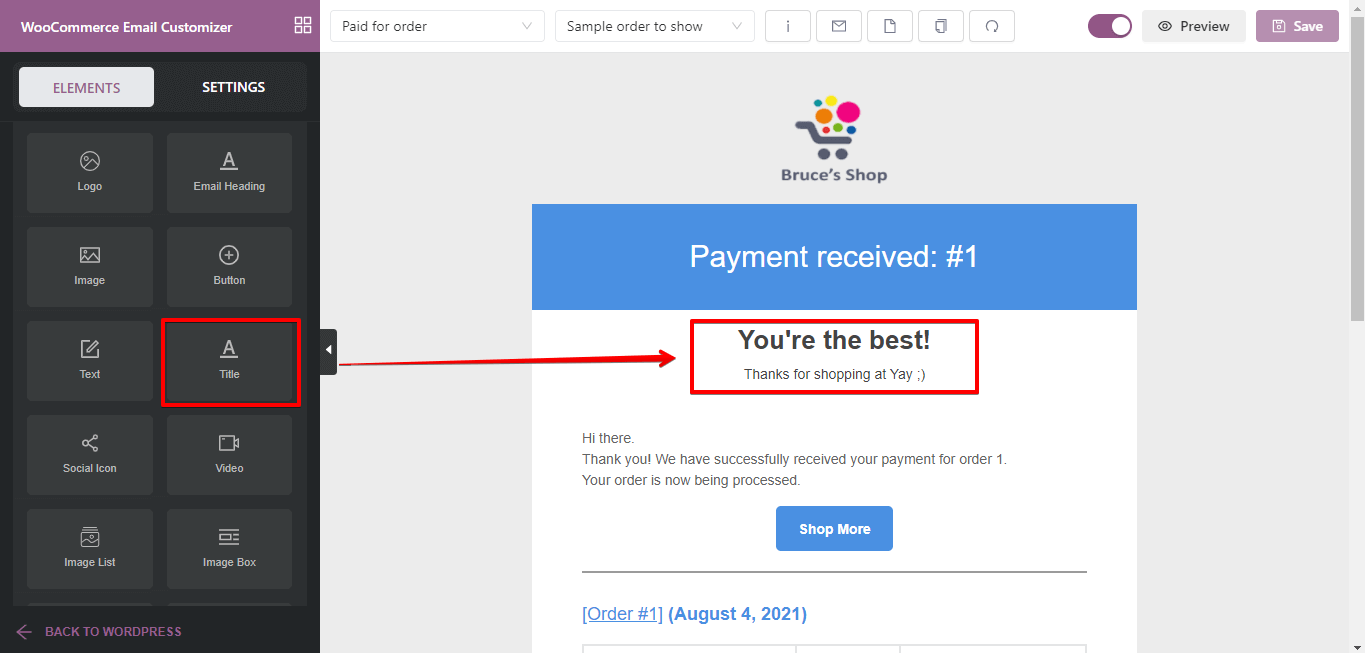
Set the Heading color: This the color of your Order Title background and it is better to set this based on your website’s color scheme and color consistency.
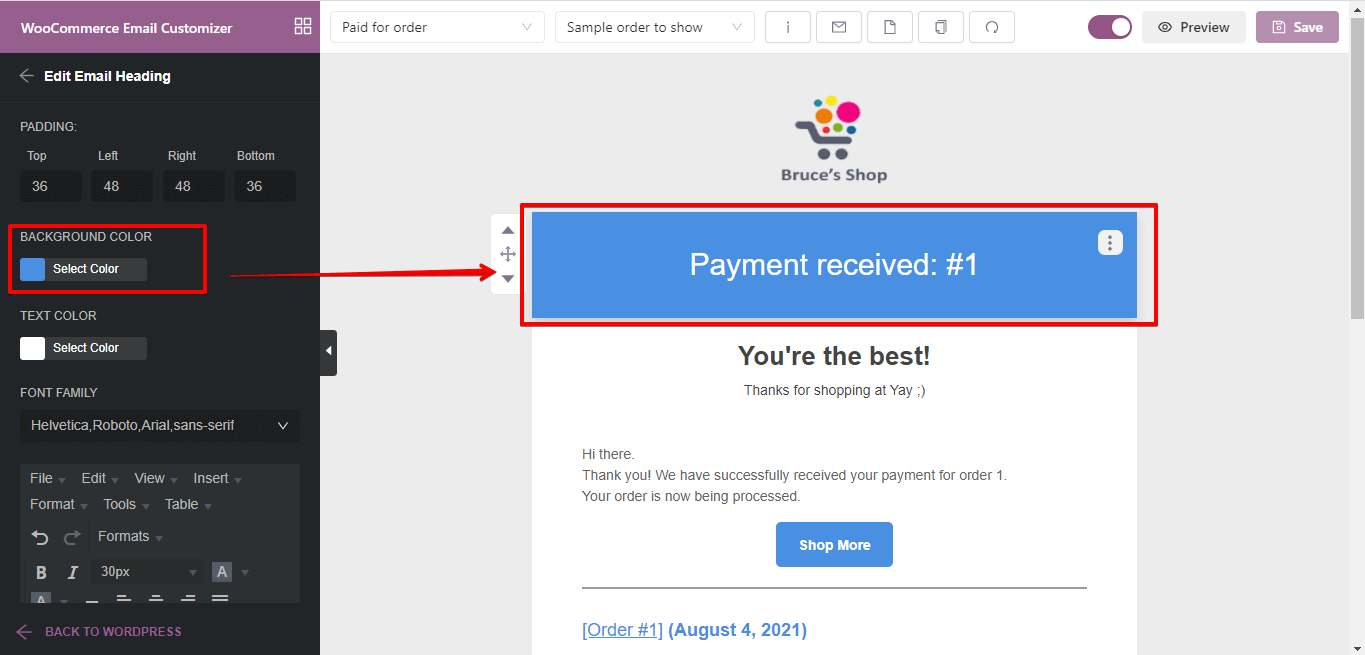
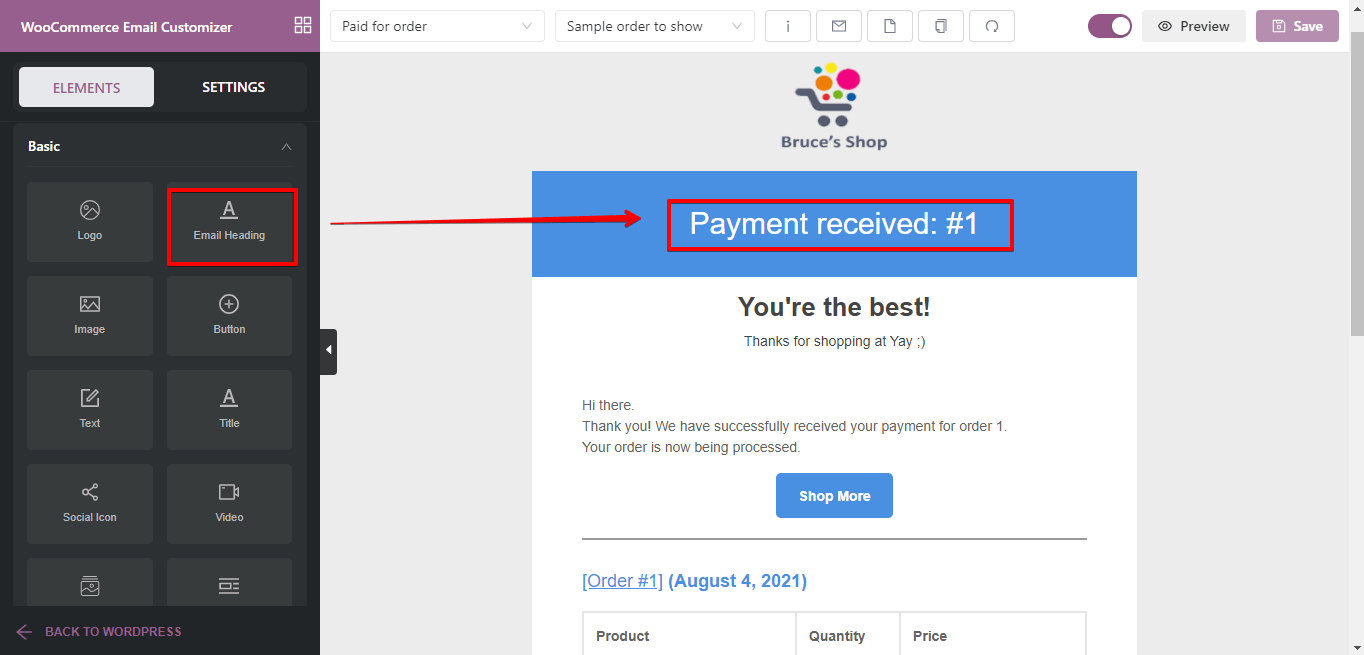
Change the Title text: This is the title of the email and this can be designed by clicking on the title and then changing the font type, font color, etc.
Add a Heading text: You can add header texts, something nice to motivate your customers by clicking on the “Elements” tab and dragging and dropping the “Text” element to the canvas.
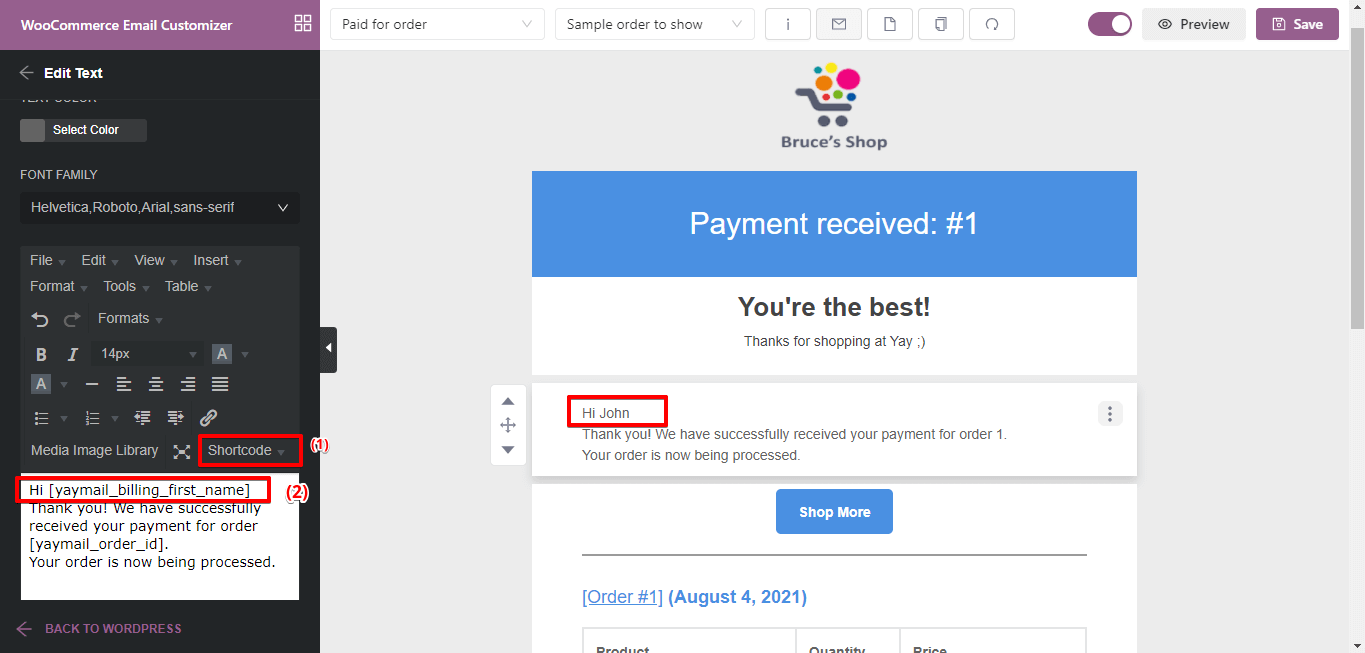
Personalize some parts of the Email content: This is a very cool way to win the hearts of your customers with a touchy and personal email, you can add or edit a “Text” element, then click on the “shortcode” options to see available name shortcodes to add in the text, so as to call each customers name in the email.
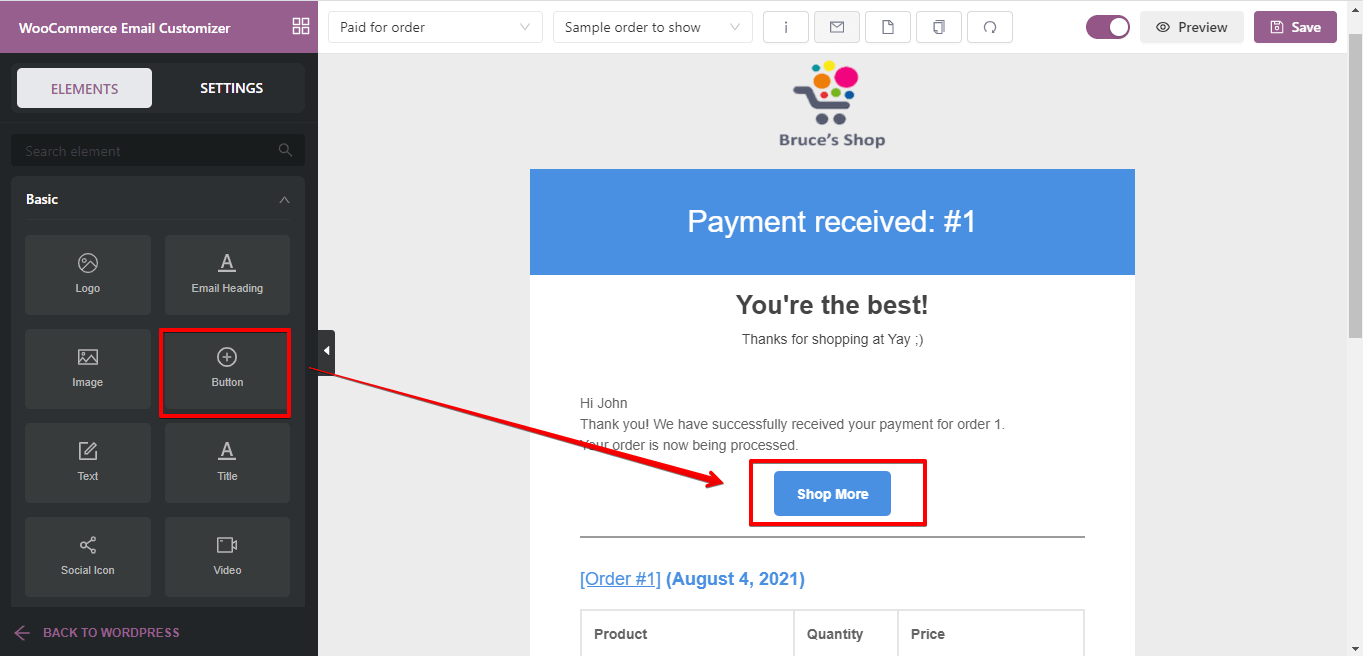
Add a Button at the bottom and change its color for consistency: You can add a button by dragging and dropping to the working canvas via the basic “Elements” tab.
Add a nice footer text: A footer text is not so necessary but in fact, if well used it might add some spice to your designs and it might just be a great way to add watermarks, special links, unsubscribe links, etc. You can click to edit the existing one or add a new footer text via the basic elements from the “Elements” tab.

What next after customizing the Email template?
- Send test email: One click to send a test message to any email address to see how your designed email would look in the inbox.
- Preview: Instantly view your customized email in a pop-up in full-screen mode. You can see how it looks on desktop and mobile devices.
- Save: Save your edits at any point in time.
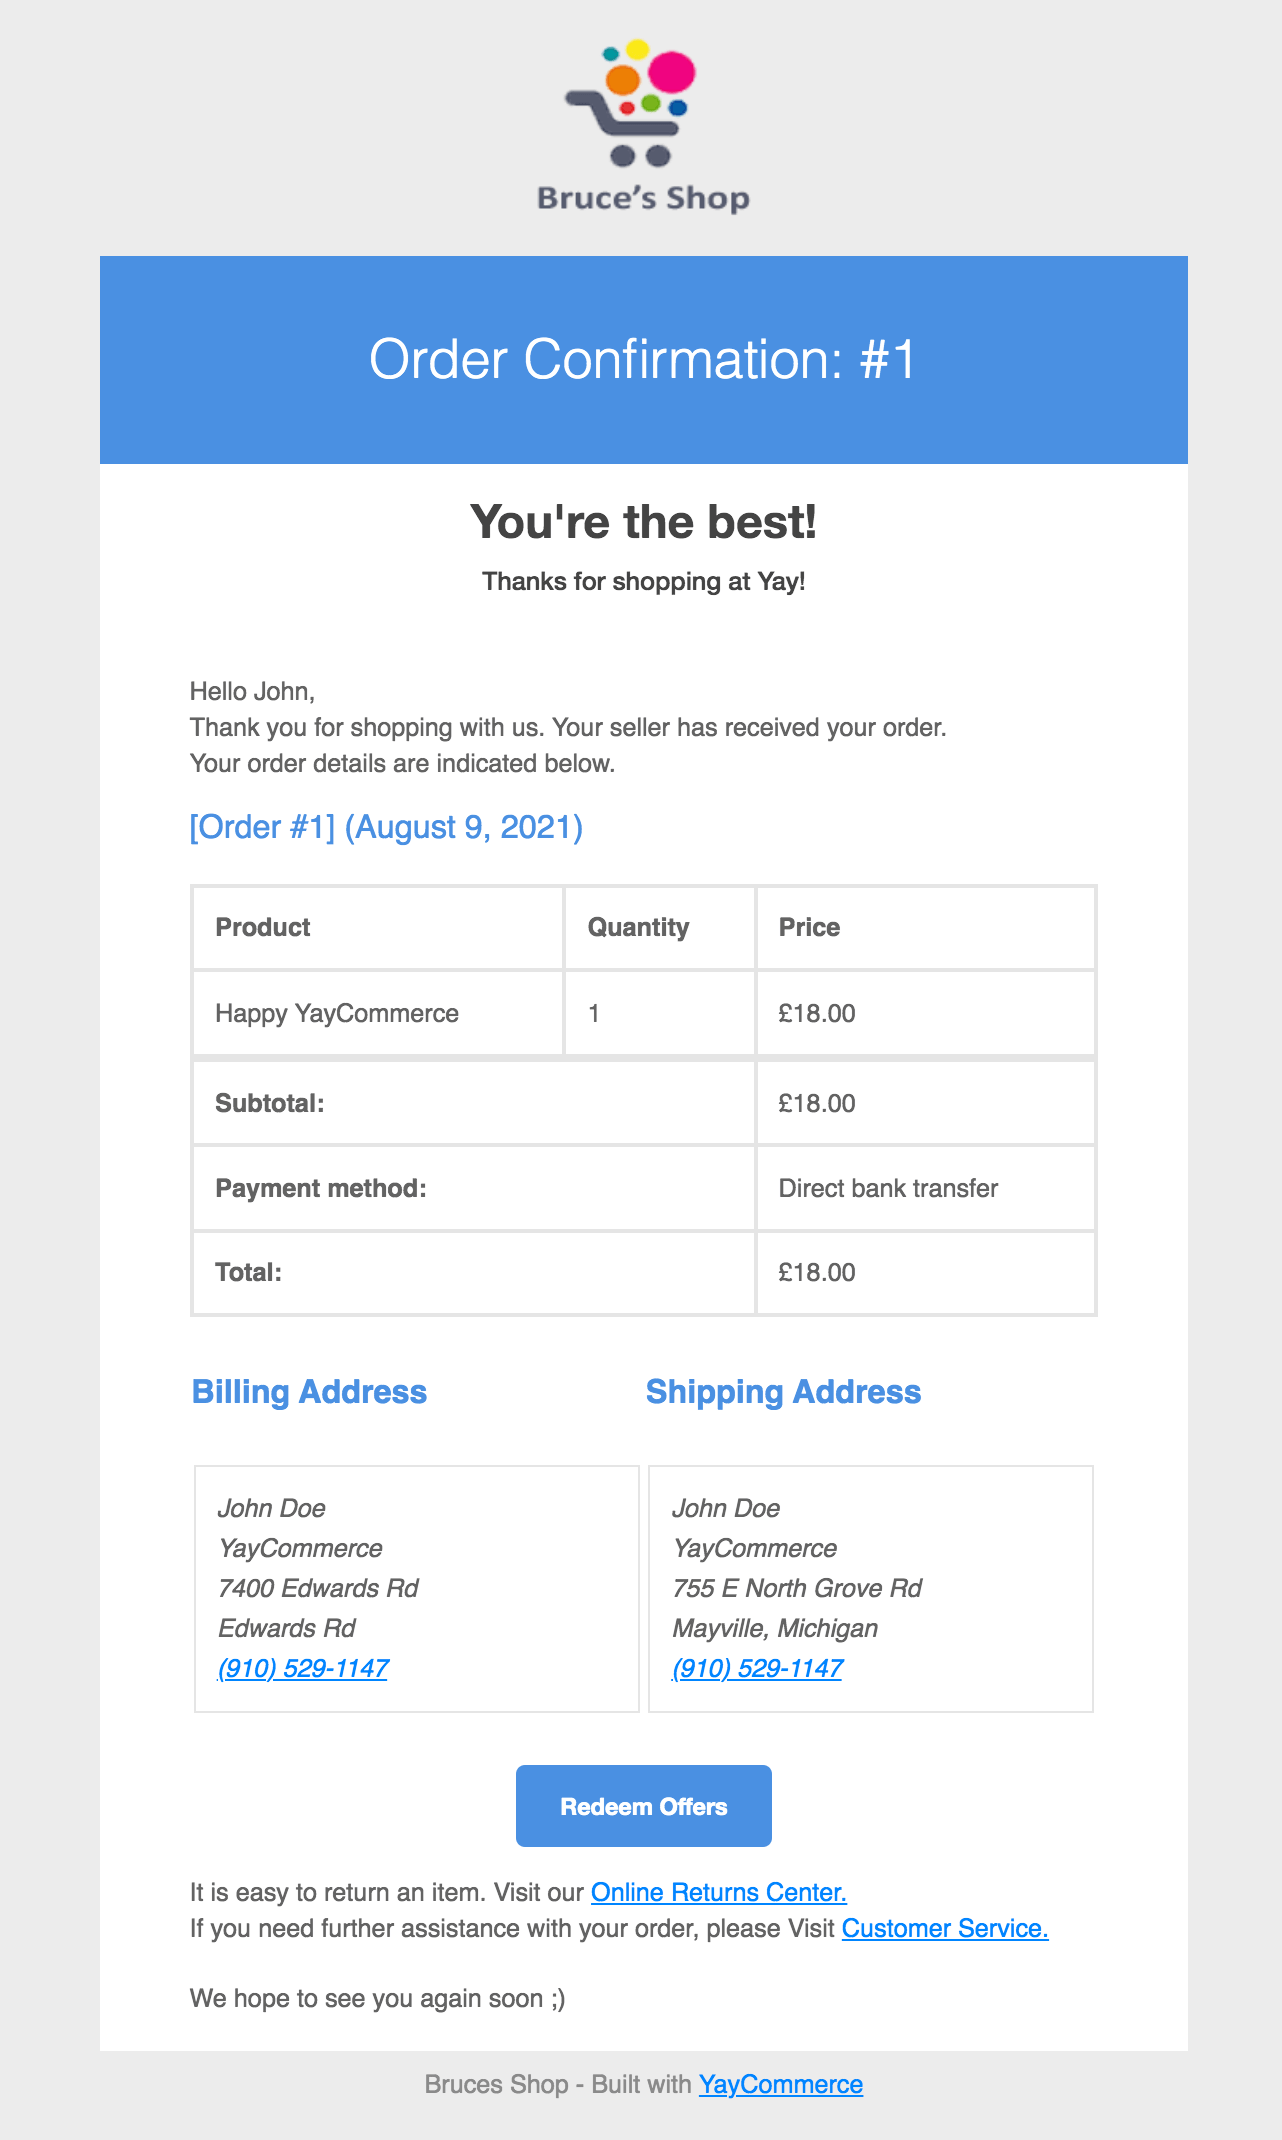
Here is a screenshot that shows our new design for this Germanized template customized with YayMail:
Wrapping Up
In conclusion, this article has discussed how to customize Germanized Email templates with an easy-to-use Germanized addon plugin for the YayMail plugin. We now understand why it is important to have better, personalized, brand-centralized Emails sent to your customers, vendors, and site admins.
Basically, there are three tools discussed in this article; YayMail, YayMail addon for Germanized, and Germanized for WooCommerce plugin. YayMail is an Email Customizer for WooCommerce that is accessible in both free and premium variants.
The free form is presumably enough for most sites, but you need the premium addon for Germanized to help you design Germanized Email templates.
YAYMAIL FREE
YAYMAIL PRO
YAYMAIL ADDON for GERMANIZED